
How to Dehydrate Mango: Easy Steps for Perfect Dried Fruit

Mangoes are delicious, but wow—they don't wait around! One day they're firm, and the next they're a slippery, stringy mess. That's where dehydrating comes in.
Drying mango slices at home is a great way to use ripe fruit before it spoils. And the result? Sweet, chewy mango pieces that are easy to pack for hiking, lunchboxes, road trips, or simply enjoying at home.
✅ Quick Answer: How do you dehydrate mango?
Choose ripe but still firm mangoes. Wash, peel, remove the large pit, and slice the flesh into evenly sized pieces about 1/4 inch thick. Arrange the slices in a single layer on dehydrator trays and dry at 135°F for approximately 10–12 hours, or until leathery and pliable with no visible moisture. Allow the mango to cool, then condition it before packaging for storage.
In this guide, I'll walk you through how to prepare, slice, dehydrate, and store mango, along with a few practical tricks for dealing with that slippery pit!
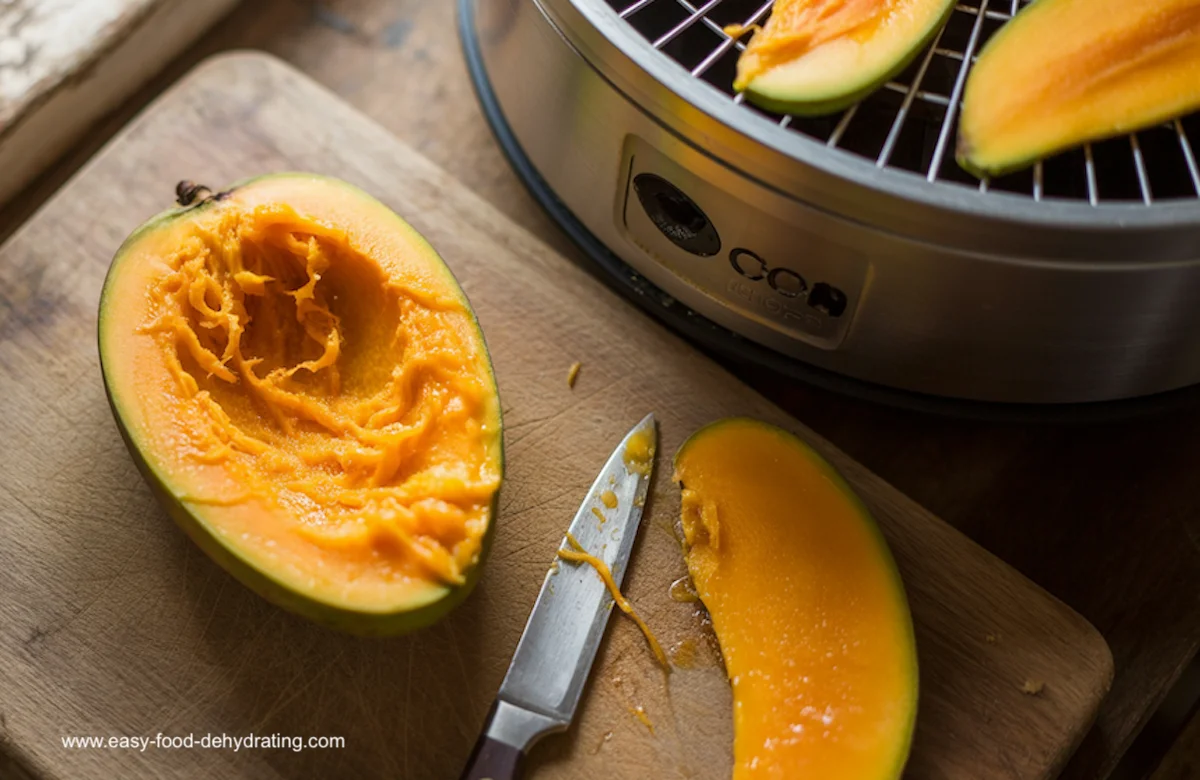
Don’t Let Mango Go Bad—Dehydrate It First!
Mangoes can go from perfectly ripe to overly soft surprisingly quickly. Rather than letting them spoil in the fruit bowl, why not dehydrate them while they're still at their best?
And don't stop at mangoes! Apples, bananas, and pineapples are all excellent fruits for dehydrating, too. It's a practical way to save food, reduce waste, and keep your pantry stocked with tasty snacks.
I prefer using an electric food dehydrator because it provides consistent heat and airflow. Whether you use a Nesco, Excalibur, or Elite Gourmet dehydrator, the important thing is to prepare your mango slices evenly and allow plenty of room for air to circulate.
🥭 Ready to turn that juicy mango into a delicious dried snack? Let's get going!

Step-by-Step: How to Dehydrate Mango Like a Pro
Drying mangoes in a food dehydrator is easy once you've tackled that slippery pit!
- Choose your mangoes: Select ripe but still firm mangoes. Wash them thoroughly under cool running water before cutting.
- Remove the pit: Stand the mango upright and carefully slice down either side of the large, flat pit to remove the two fleshy "cheeks."
- Peel and slice: Remove the skin and cut the mango flesh into approximately 1/4-inch-thick slices. Try to keep the pieces similar in thickness so they'll dry evenly.
- Fill the trays: Arrange the mango slices in a single layer on your dehydrator trays, leaving a little space between them for good airflow. Avoid overlapping the pieces.
- Set the temperature: Dehydrate at 135°F (57°C), following your dehydrator manufacturer's instructions.
- Allow time for drying: Plan on approximately 10–12 hours, but start checking toward the end of that period. Actual drying time depends on the thickness of your slices, the ripeness of the fruit, humidity, and your dehydrator. Rotate trays if your model requires it.
- Check for doneness: Properly dried mango should feel leathery and pliable, without wet or sticky pockets of moisture. Let a piece cool before testing it. Cut through one of the thicker slices to check that no visible moisture remains.
- Cool before storing: Allow the mango to cool completely, then condition it before packaging for storage. We'll cover conditioning and storage in more detail below.
Pro Tip: Tame That Slippery Pit!
Once you’ve sliced off the mango cheeks, don’t forget there’s still plenty of juicy fruit clinging to the pit. To make it easier (and way less messy), try this:
👉 Grab a 2-prong corn-on-the-cob holder and stab it right into the pit — it gives you a solid grip while you use a spoon to scrape off every last bit of mango goodness.

Your hands (and countertop) will thank you.
Move the slider to convert temperatures instantly.
Move the slider to convert temperatures instantly.
Fresh, Frozen, or Canned Mango? Here’s What Works Best
Fresh mango is my first choice for dehydrating, but frozen and canned mango can work, too. The important thing is to remove excess moisture before arranging the pieces on your dehydrator trays.
Fresh mango: Choose ripe but still firm fruit. Wash, peel, remove the pit, and slice the flesh about 1/4 inch thick. Follow the step-by-step instructions above.
Frozen mango: Thaw the pieces in the refrigerator, drain away any liquid, and pat them dry with paper towels. Cut larger chunks into evenly sized slices if necessary. Because frozen mango softens as it thaws, handle it gently.
Canned mango: Drain thoroughly. If it's packed in heavy syrup, you can rinse the pieces to remove some of the excess syrup, then pat them dry. Keep in mind that canned mango is often softer than fresh fruit and may produce a stickier finished snack.
Whichever type you choose, spread the pieces in a single layer and check them carefully for doneness. Drying times may vary, particularly with frozen or canned fruit.
How to Condition and Store Dehydrated Mango
Once your mango has finished dehydrating, there's one more important step before putting it away for storage: conditioning.
1. Cool the mango completely. Allow the dried slices to reach room temperature before placing them in containers. Packaging warm fruit can cause condensation.
2. Condition for 7–10 days. Loosely pack the cooled mango into clean, dry glass jars or other suitable airtight containers. Leave a little room so you can move the pieces around.
3. Shake and check daily. Gently shake the containers each day to redistribute the mango pieces and check for any signs of condensation. If you notice moisture collecting inside the container, return the mango to the dehydrator for further drying, then cool and repeat the conditioning process.
4. Package for storage. Once conditioning is complete and there's no sign of excess moisture, transfer the mango to clean, airtight containers. Store somewhere cool, dry, and dark. For longer storage, freezing is a good option.
What about oxygen absorbers and desiccant packets?
You may have seen oxygen absorbers and desiccant packets recommended for storing dehydrated foods. They do different jobs: oxygen absorbers remove oxygen, while desiccants absorb moisture.

Neither replaces thorough drying and proper conditioning. For chewy dried mango, I recommend focusing on airtight packaging and suitable storage conditions rather than automatically adding either type of packet.
If you'd like to learn more about how oxygen absorbers work and when to use them, visit my guide to oxygen absorbers.
Too Ripe to Dry? Make a Quick Mango Smoothie Instead!
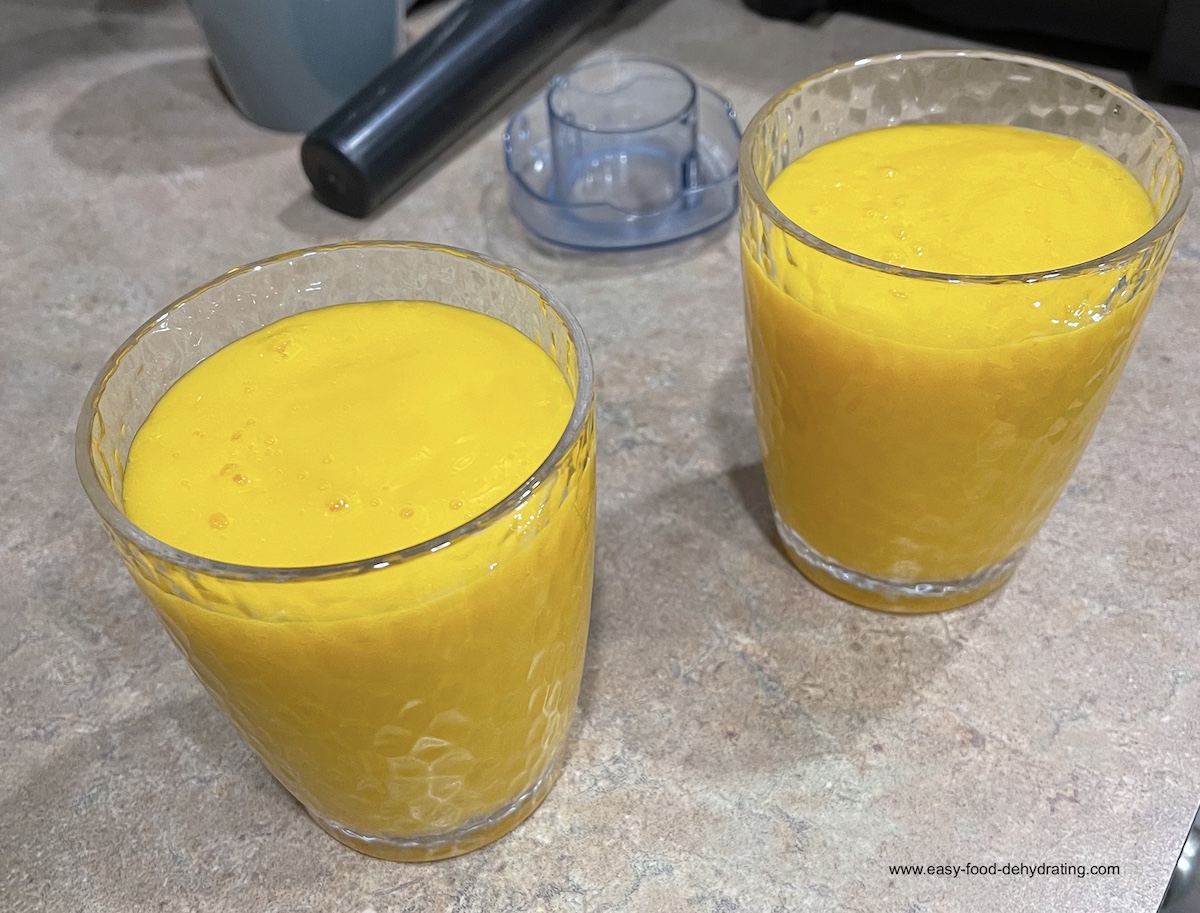
Sometimes mangoes become so ripe that they're difficult to slice without making a slippery mess. Rather than wasting them, why not turn them into a refreshing mango smoothie?
Here's my simple recipe:
Ingredients:
- 2 very ripe mangoes, peeled and pitted
- 10–12 oz apple juice
- Approximately 8 ice cubes
Instructions:
- Scoop the mango flesh into a blender.
- Add the apple juice and ice cubes.
- Blend until smooth and creamy.
- Taste and adjust the amount of apple juice to get the consistency you prefer.
There's no need to add sugar if your mangoes are already lovely and sweet.
It's a refreshing drink, especially on a warm Florida morning!
Spice Up Your Dried Mango: Flavor Boost Ideas
Mango is naturally sweet and delicious on its own, but sometimes it's fun to experiment with different flavors!
Here are a few ideas to try:
- Chili-lime mango: Sprinkle your fresh mango slices lightly with Tajín seasoning before dehydrating. It adds a lovely combination of tanginess, salt, and a little heat.
- Cinnamon mango: Dust the slices with a small amount of ground cinnamon for a warm, sweet flavor.
- Ginger mango: Try a light sprinkling of ground ginger for a slightly spicy twist.
- Plain and simple: Sometimes nothing beats the natural sweetness of a perfectly ripe mango!
My mum loved mango chutney, so I've always associated mango with those wonderful sweet-and-spicy flavors. It's amazing how well mango works with both!
If you enjoy experimenting with dried fruit, have a look at my guides to dehydrating peaches, pineapple, and apricots, too.
A little tip: Start with a light hand when adding seasonings. As the mango loses moisture, the flavors can become more concentrated. You can always add a little more seasoning to your next batch!
Common Questions About Dehydrating Mango
(Because mangoes can be slippery little devils!)
How do you dehydrate mango at home?
How do you dehydrate mango at home?
Wash, peel, and pit ripe but firm mangoes. Cut the flesh into approximately 1/4-inch slices, arrange them in a single layer on dehydrator trays, and dry at 135°F for approximately 10–12 hours. The finished mango should be leathery and pliable, with no visible moisture.
Should mangoes be ripe before dehydrating?
Should mangoes be ripe before dehydrating?
Yes! Choose mangoes that are ripe and sweet but still firm enough to slice. Very soft mangoes can be difficult to handle and may produce sticky, uneven pieces.
Do you have to peel mangoes before dehydrating?
Do you have to peel mangoes before dehydrating?
I recommend peeling them. Mango skin can be tough and unpleasant to chew after drying. Removing it gives you a nicer finished snack.
How do you keep dried mango from becoming stringy?
How do you keep dried mango from becoming stringy?
Start with mangoes that have smooth, relatively fiber-free flesh, and slice them evenly. Some mango varieties are naturally more fibrous than others, so the texture of your dried mango will depend partly on the fruit you choose.
Can you dehydrate frozen or canned mango?
Can you dehydrate frozen or canned mango?
Yes. Thaw frozen mango in the refrigerator and drain it thoroughly. For canned mango, drain away the liquid and pat the pieces dry. Both may take a different amount of time to dehydrate than fresh mango.
How should you store dehydrated mango?
How should you store dehydrated mango?
Cool the mango completely, then condition it for 7–10 days, checking daily for condensation. Once conditioned, store it in airtight containers in a cool, dry, dark place. You can also freeze it for longer storage.
Can you add spices to mango before dehydrating?
Can you add spices to mango before dehydrating?
Absolutely! Try a light sprinkling of cinnamon, ginger, or Tajín seasoning before drying. Start with a small amount because the flavors may become more concentrated as the mango dries.
Dehydrating mango at home is easy and downright delicious—once you learn to wrangle that giant slippery pit and pick the right level of ripeness.
If you’d like more tasty ways to use dried food, don’t miss my free 5 Dried Food Recipes That Actually Taste Great PDF below. Inside you’ll find carrot soup, minestrone, split pea soup, spicy beef jerky, and even banana cinnamon rolls—all proven favorites that make dehydrating fun and delicious!

5 Free Dried Food Recipes
That Actually Taste Great
Put your dried food to delicious use!
Five very different recipes.
Not one dull bite...
5 Free Dried Food Recipes
That Actually Taste Great
Put your dried food to delicious use!
Five very different recipes.
Not one dull bite...
More From Easy Food Dehydrating
How to Dehydrate Fruit Rolls: Easy Fruit Leather Guide
Make fruit rolls with fresh, frozen, or canned fruit. Dry at 135–140°F for chewy, kid-approved leathers.
How to Dehydrate Berries (Blueberries & Cranberries)
Learn how to dehydrate blueberries and cranberries at 135°F, with fresh and frozen berry prep, drying times, doneness tests, conditioning, and storage tips.
How to Dehydrate Strawberries for Snacks and Smoothies
How to dehydrate strawberries for snacks, cereals, and smoothies, with step-by-step preparation, drying, and storage tips.
How to Dehydrate Peaches for Snacks & Recipes
Learn how to dehydrate peaches for snacks and recipes, including fresh or frozen preparation, drying temperatures, conditioning, and storage.
Dehydrate Apples for Snacks and Pantry Storage
Learn how to dehydrate apples in a food dehydrator: prevent browning, dry at 125–135°F, test for doneness, and store them for snacks, pies, and more.
How to Dehydrate Plums for Prunes and Snacks
Learn how to dehydrate plums at 135°F for chewy prunes or crisp chips, with preparation, drying times, doneness tests, conditioning, and storage.






More From Easy Food Dehydrating
How to Dehydrate Fruit Rolls: Easy Fruit Leather Guide
Make fruit rolls with fresh, frozen, or canned fruit. Dry at 135–140°F for chewy, kid-approved leathers.
How to Dehydrate Berries (Blueberries & Cranberries)
Learn how to dehydrate blueberries and cranberries at 135°F, with fresh and frozen berry prep, drying times, doneness tests, conditioning, and storage tips.
How to Dehydrate Strawberries for Snacks and Smoothies
How to dehydrate strawberries for snacks, cereals, and smoothies, with step-by-step preparation, drying, and storage tips.
How to Dehydrate Peaches for Snacks & Recipes
Learn how to dehydrate peaches for snacks and recipes, including fresh or frozen preparation, drying temperatures, conditioning, and storage.
Dehydrate Apples for Snacks and Pantry Storage
Learn how to dehydrate apples in a food dehydrator: prevent browning, dry at 125–135°F, test for doneness, and store them for snacks, pies, and more.
How to Dehydrate Plums for Prunes and Snacks
Learn how to dehydrate plums at 135°F for chewy prunes or crisp chips, with preparation, drying times, doneness tests, conditioning, and storage.
Before You Go...
If you enjoyed this page, tap the ❤️ in the lower right-hand corner. It saves this page to your Grow bookmarks so you can find it again later.
You’ll also see quick share buttons to copy the link, post to Facebook, or save it straight to Pinterest.

Test Your Food-Dehydrating
Know-How
Choose a food, make the right preparation, drying, and storage decisions—and see how many stars you can earn!
Play “Save the Harvest”Test Your Food-Dehydrating
Know-How
Choose a food, make the right preparation, drying, and storage decisions—and see how many stars you can earn!
What We Mean by “Dehydrate”
Here at Easy Food Dehydrating, “dehydrate” always means using an electric food dehydrator — the easy, reliable way to dry food at home.
What We Mean by “Dehydrate”
Here at Easy Food Dehydrating, “dehydrate” always means using an electric food dehydrator — the easy, reliable way to dry food at home.


LATEST READS on EFD


-
Nesco FD-75A Dehydrator Review: Is It Worth It?
Nov 02, 26 01:20 PM
 Hands-on Nesco FD-75A food dehydrator review—real drying results, pros & cons, tips, and who should buy it.
-
How to Dehydrate Carrots for Easy, Long-Term Storage
Nov 02, 26 12:28 PM
 Learn how to dehydrate carrots for long-term storage—plus slicing, color, drying temps, and storage tips.
-
How to Dehydrate Cauliflower for Soups, Sides & Rice
Nov 02, 26 11:31 AM
 Learn how to dehydrate cauliflower at 125–135°F, including blanching, drying, and storage tips. Perfect for soups, mash, cauliflower rice, and powder.



Unlock the Secrets of Food Dehydrating... from Fruit 'n' Veg to Doggie Dinners!




AFFILIATE DISCLOSURE: I am an Affiliate for Amazon, and other sellers of quality merchandise. Should you purchase an item through their links, I may receive compensation. The price you pay does not increase. THANKS for your support! Read full disclosure here.
easy FOOD DEHYDRATING: Making food preservation simple since 2010. I show you how to keep your food pantry full, whatever the reason or season!

HOME ARTICLES CONTACT ADVERTISING DISCLOSURE DISCLAIMER FAQ PRIVACY SITEMAP TERMS TESTIMONIALS
ALL CONTENT COPYRIGHT © 2010-2025 • ALL RIGHTS RESERVED REGARDLESS OF LINKS OR ATTRIBUTIONS.
POWERED BY SBI! (SOLO BUILD IT!)
As an Amazon Associate, I earn from qualifying purchases.