What We Mean by “Dehydrate”
Here at Easy Food Dehydrating, “dehydrate” always means using an electric food dehydrator — the easy, reliable way to dry food at home.
- Home
- Dehydrating Fruits: Step-by-Step Guides by Type
- How to Dehydrate Plums

How to Dehydrate Plums for Prunes and Snacks

Plums are one of the easiest and tastiest fruits to preserve, and dehydrating them gives you chewy prunes or crisp plum chips that last for months. Whether you’ve got a bumper harvest or scored a deal at the market, drying plums locks in their natural sweetness while boosting shelf life.
✅ Quick Answer: How do you dehydrate plums?
Wash and halve ripe plums, remove the pits, and place cut-side up on dehydrator trays. Dry at 125–135°F for 12–30 hours until leathery but pliable. Store in airtight containers for up to a year.
From healthy snacking to baking add-ins or digestive health support, learning how to dehydrate plums at home is simple, affordable, and delicious. Let’s dive into the step-by-step method!

What Nutrition Do Plums and Prunes Offer?
VITAMINS: Vitamin A, followed by Vitamin C, Vitamin K, Folate, and Choline.
MINERALS: High in Potassium, followed by Phosphorus, Magnesium, Calcium, Fluoride, and a trace amount of Iron.
They also contain Omega-6 fatty acids. When they're made into prunes, they’re naturally fat-free and provide fewer calories than many processed snacks, while packing in fiber and nutrients.
If you use syrup blanching before drying, keep in mind this will add extra sugar and calories to the finished prunes. For the lowest-calorie version, skip the syrup and dry them plain.
From Plums to Prunes: The Easy Transformation

Plums are a great source of carbohydrates, and a decent amount of dietary fiber too and when dried as prunes, they are famous for their aid in our digestive systems!
Just eat a couple a day and your digestive system will be fine!
According to Peggy Trowbridge Filippone, from About.com Home Cooking, prunes have a bad reputation with younger folk, and the prune industry got together and re-named prunes. Hence the name change from prunes to 'dried plums'!
Did you know that dehydrated plums are great for snacks, muffins, cookies, breads, and granola?
Step-by-Step Guide: Dehydrating Plums Like a Pro

Let's get busy learning how to dehydrate plums!
- Wash the fresh plums, slice them in half, remove the pit, and pop the back* to expose more of its surface to the air. Slice into quarters if desired.
- Place them on your food dehydrator trays with the cut side up to prevent drips on the lower trays!
- Turn on your dehydrator and set the temperature between 125°F and 135°F (or per your food dehydrator's instructions).
💡 Tip: Outside the U.S.? Most dehydrating temps here are listed in Fahrenheit - use our quick converter to see the Celsius equivalent for your machine.
*NOTE:
"Pop the back"
simply means to turn the fruit inside out after slicing it in half, best
done by using your thumb to push the skin side inwards.
If you want sweeter plums, consider doing a syrup-bath blanch.
To syrup-blanch, first prepare a mixture of 1 cup of sugar, 1 cup of light corn syrup, and 2 cups of water.
Bring to a boil, then add no more than 2 pounds of prepared fruit to the pan and simmer using the chart below.
Remove from heat and allow to cool in the syrup for up to 30 minutes. This step is optional - it adds more sweetness but can soften fruit further, so skip if you prefer firmer fruit.
| Fruit | Syrup Blanch Time | Notes |
|---|---|---|
| Peaches | 3–5 minutes | Skins loosen; flesh stays intact |
| Plums | 1–2 minutes | Skins crack quickly |
| Apricots | 3–4 minutes | Enough to soften skins, avoid mush |
Recommended blanch times for peaches, plums, and apricots.
How to Know When Your Plums Are Perfectly Dried
-
Drying time: between 12-30 hours and the plums will be leathery in consistency when dried. See my important notes from Beverly and Don, below.
- Remember to rotate your food dehydrator trays, for even drying.
Which Plum Tree Varieties Make the Best Prunes?

If you have a plum tree and are concerned about how to dehydrate plums - assuming your plum tree is suitable for making prunes - please note there are many different types of plum trees that can be used for prunes.
However, some varieties are better than others. For example, the Satsuma plum tree is a popular choice for prunes. This variety produces large, sweet fruits that are perfect for drying.
Other good options include the European plum, the Japanese plum, and the Damson plum. Experiment and see what type of plum you like best!
Real-Life Tips: Dehydrating Plums in Humid Weather
Beverly, from Washington State, wanted to add this when she was dehydrating plums: They dried way faster than stated above, which was 22-30 hours: in 16 hours at 72% humidity and 135°F degrees, my prunes/plums were almost to the point of "brittle!" My plums were small ~ this is perhaps a factor as well. I will shorten the drying time to 12 hours for the next batch.
💡 Tip: Outside the U.S.? Most dehydrating temps here are listed in Fahrenheit - use our quick converter to see the Celsius equivalent for your machine.
Why the Stanley Prune Tree Is a Prune-Making Favorite
NOTE: Don Hendricks posted this great information: My plum tree is a Stanley Prune tree – although it is a variety of plum, it is an Italian PRUNE - it's where prune juice comes from – not all varieties will dry into a prune!
Regarding Don's comment above: a Stanley prune tree is a type of plum tree that produces large, sweet fruits. The fruits of this tree are often used for drying and can be made into prunes.
The Stanley prune tree is native to the western United States. It's a popular choice for gardens and orchards because it's easy to care for and produces a large crop of fruit.
If you're looking for a tree that will produce a lot of prunes, the Stanley prune tree is a good choice!
Try This Twist: Making Crispy Plum Chips
Margaret posted this great idea (on our Facebook page): I sliced my plums into thin rings and dehydrated until crisp. Resulted in a great snack to eat on the go!
Answers to Plum Drying Questions You Didn’t Know You Had
What are pitted dry plums?
What are pitted dry plums?
Pitted dry plums are simply plums that have had the pits removed before drying. They’re often called prunes and make a chewy, fiber-rich snack that also works great in baking or for digestive health.
What are dry salted plums?
What are dry salted plums?
Dry salted plums are preserved by coating plums with salt during the drying process—either sun-dried or dehydrated. The salt forms a crust, giving them an intensely tart, sweet-salty flavor. Popular in traditional Asian cooking, they can be eaten as-is or rehydrated to reduce saltiness. Properly dried and salted, they can last up to a year.
Should I peel plums before dehydrating them?
Should I peel plums before dehydrating them?
No—peeling isn’t necessary. Most people leave the skins on because they help the fruit hold its shape and add extra fiber. If you want a smoother prune texture, peeling is optional, but not required.
Can you dehydrate plums without cutting them?
Can you dehydrate plums without cutting them?
You can, but it’s not recommended. Whole plums take much longer to dry and may trap moisture inside, leading to spoilage. Halving or quartering plums and removing the pit is the safest method and speeds up drying time.
How do I store dehydrated plums for long-term use?
How do I store dehydrated plums for long-term use?
Once fully dried and cooled, store your plums in airtight containers such as Mason jars, Mylar bags, or vacuum-sealed pouches. For maximum shelf life (up to 12 months), add an oxygen absorber and a desiccant packet, keep the container in a cool, dark place, and avoid heat and humidity.
Can I make plums taste sweeter before drying?
Can I make plums taste sweeter before drying?
Yes. A quick syrup-bath blanch (sugar, corn syrup, and water) before dehydrating enhances sweetness. Just know this step can soften texture, so skip it if you prefer firmer fruit.
Do different plum varieties dry differently?
Do different plum varieties dry differently?
Definitely. Stanley, Satsuma, and European plums are classics for making prunes, while Japanese and Damson plums can make excellent chewy snacks or crisp chips. Each variety has its own flavor and drying behavior, so experiment to see which you like best.
Thanks for stopping by and learning how to dehydrate plums! With just a little prep and patience, you’ll have chewy prunes or crunchy plum snacks ready for year-round enjoyment. Be sure to check out all our fruits on this page.
And if you’re looking for even more inspiration, don’t miss your free 5 Dried Food Recipes You’ll Actually Love PDF (below) — featuring favorites like carrot soup, minestrone, split pea soup, spicy beef jerky, and banana cinnamon rolls.
Get 5 Dried Food Recipes You'll Actually Love

Here's where you can get your copy of our all new
5 Dried Food Recipes (That Actually Taste Great)
They're my all-time favorite easy dried food meals!
Get it here right now.
For Free!
You Might Like These
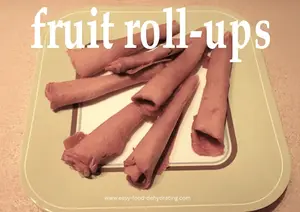
How to Dehydrate Fruit Rolls: Easy Fruit Leather Guide
Make fruit rolls with fresh, frozen, or canned fruit. Dry at 135–140°F for chewy, kid-approved leathers.
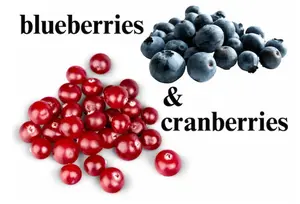
How to Dehydrate Berries (Blueberries & Cranberries)
Dehydrate berries—blueberries & cranberries—with easy steps for year-round snacks, baking, and long-term storage.
Dehydrate Strawberries for Tasty Snacks & Smoothies
Dehydrate strawberries the easy way! Perfect for healthy snacks, smoothies, and sweet treats... all year long.
How to Dehydrate Peaches for Snacks & Recipes
Learn how to dehydrate peaches for snacks, smoothies, and cobblers. Step-by-step tips for drying and storing peaches.
Dehydrate Apples for Snacks, Pies & Pantry Storage
Dehydrate apples easily: slice, prevent browning, dry at 125–135°F, and store for snacks, pies, or pantry use.
How to Dehydrate Mango: Easy Steps for Tasty Dried Fruit
Learn how to dehydrate mango at home with simple steps for delicious, healthy dried mango snacks. Easy guide!


You Might Like These
How to Dehydrate Fruit Rolls: Easy Fruit Leather Guide
Make fruit rolls with fresh, frozen, or canned fruit. Dry at 135–140°F for chewy, kid-approved leathers.
How to Dehydrate Berries (Blueberries & Cranberries)
Dehydrate berries—blueberries & cranberries—with easy steps for year-round snacks, baking, and long-term storage.
Dehydrate Strawberries for Tasty Snacks & Smoothies
Dehydrate strawberries the easy way! Perfect for healthy snacks, smoothies, and sweet treats... all year long.
How to Dehydrate Peaches for Snacks & Recipes
Learn how to dehydrate peaches for snacks, smoothies, and cobblers. Step-by-step tips for drying and storing peaches.
Dehydrate Apples for Snacks, Pies & Pantry Storage
Dehydrate apples easily: slice, prevent browning, dry at 125–135°F, and store for snacks, pies, or pantry use.
How to Dehydrate Mango: Easy Steps for Tasty Dried Fruit
Learn how to dehydrate mango at home with simple steps for delicious, healthy dried mango snacks. Easy guide!
Before You Go...
If you enjoyed this page, tap the ❤️ in the lower right-hand corner.
It saves this page to your Grow bookmarks so you can find it again later.
You’ll also see quick share buttons to copy the link, post to Facebook,
or save it straight to Pinterest.
What We Mean by “Dehydrate”
Here at Easy Food Dehydrating, “dehydrate” always means using an electric food dehydrator — the easy, reliable way to dry food at home.
Click the "Save" button (above) to pin
this page’s ideas to your Pinterest board!


LATEST READS on EFD
-
Green Split Pea Soup Made Easy in the Slow Cooker
Apr 30, 26 09:10 AM
 Easy slow cooker green split pea soup with ham, carrots, and celery—comforting, flavorful, and simple to make.
 -
12 Common Mistakes When Dehydrating Food (and Fixes)
Apr 20, 26 09:37 AM
 Discover 12 common mistakes when dehydrating food—and simple fixes for even drying, better flavor, and longer storage.
 -
Dehydrated Tomato Minestrone Soup – Easy Pantry Meal
Apr 16, 26 10:32 AM
 Make dehydrated tomato minestrone soup with dried veggies, beans, and pasta—a cozy, shelf-stable meal ready anytime.


Unlock the Secrets of Food Dehydrating... from Fruit 'n' Veg to Doggie Dinners!


AFFILIATE DISCLOSURE: I am an Affiliate for Amazon, and other sellers of quality merchandise. Should you purchase an item through their links, I may receive compensation. The price you pay does not increase. THANKS for your support! Read full disclosure here.
easy FOOD DEHYDRATING: Making food preservation simple since 2010. I show you how to keep your food pantry full, whatever the reason or season!

HOME ARTICLES CONTACT DMCA DISCLAIMER FAQ PRIVACY SITEMAP TERMS TESTIMONIALS
ALL CONTENT COPYRIGHT © 2010-2025 • ALL RIGHTS RESERVED REGARDLESS OF LINKS OR ATTRIBUTIONS.
POWERED BY SBI! (SOLO BUILD IT!)
As an Amazon Associate, I earn from qualifying purchases.