What We Mean by “Dehydrate”
Here at Easy Food Dehydrating, “dehydrate” always means using an electric food dehydrator — the easy, reliable way to dry food at home.
- Home
- Articles On How To Dehydrate Food Safely
- Making Dehydrated Food Gifts

How to Make Dehydrated Food Gifts That People Love

Try your hand at making dehydrated food gifts If you’re looking for a heartfelt, affordable, and healthy way to wow your loved ones.
✅ Quick Answer: How do you make dehydrated food gifts?
To make dehydrated food gifts, choose ripe fruits or veggies, dehydrate them fully using a dehydrator or oven, and package them in Mason jars or clear gift bags with optional oxygen absorbers and desiccant packets. Add handwritten notes, ribbons, or themed baskets to create healthy, long-lasting, and heartfelt presents.
As summer fades and the weather cools, markets and roadside stands are bursting with fresh, seasonal fruits and vegetables. This is the perfect time to preserve nature’s bounty and turn it into beautiful, homemade dehydrated gifts.

📋 Coming up...
- 🎁 Gift Ideas & Starter Projects
- 🧺 Basket Themes & Creative Combos
- 🎀 Wrapping Tips & Presentation
- ❓ FAQs + Free Download
Zucchini Chips in Jars: A Perfect Starter Gift

From crunchy zucchini chips to vibrant fruit roll-ups, these edible presents pack flavor, personality, and long shelf life into every jar or bag.
This guide walks you through how to make thoughtful, long-lasting gifts that stand out—and are devoured in no time. And while you're at it, why not make some for yourself too?
Why Dehydrated Gifts Stay Fresh for Months

One of the biggest perks of dehydrated food gifts is their shelf life. Unlike fresh fruit that spoils quickly, properly dehydrated and airtight-packed food can last for months—even years.
It's easy to make dried food Christmas gifts but if you're worried about freshness, include a small oxygen absorber and a desiccant packet hidden in each jar. This simple step keeps moisture and mold at bay, ensuring your gift stays crisp, flavorful, and safe to eat.
Dehydrated Gift Projects That Are Fun and Functional
Homemade dehydrated food gifts are a unique and thoughtful way to share your love of wholesome, long-lasting snacks. From fruit leather roll-ups and spiced apple chips to herb-infused soup mixes and jerky samplers, there are endless creative dehydrating projects to explore.
You can also craft DIY tea blends with dried citrus and herbs or assemble homemade spice rubs for grilling enthusiasts. Pack them in Mason jars, decorative tins, or resealable bags with custom labels for a personal touch. My preference are the jars, as they look great. The resealable bags are not as nice to look at.
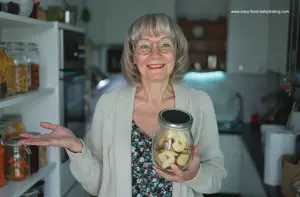
These healthy food gifts in a jar are not only delicious but also practical, healthy, and made with care!
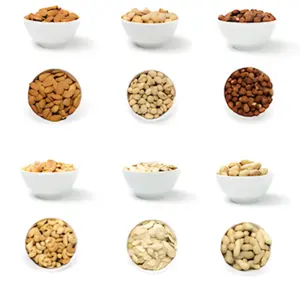
Assorted dehydrated nuts also make good presents for health nuts. Get it? Sorry.
Best Foods to Dehydrate for Gift Giving
The key to making top-quality dehydrated food gifts is starting with ripe, high-quality produce. Almost all fruits and vegetables dehydrate well, but some work better than others.
Best Choices for Dehydrating:
- Fruits – Apples, pears, bananas, mangoes, pineapples, and citrus slices.
- Vegetables – Zucchini, beets, carrots, bell peppers, and tomatoes.
- Extras – Fruit roll-ups, herb blends, and even DIY soup mixes!
When selecting fruit, choose ripe—but not overripe—produce. Ripe fruit has the best natural sweetness and texture, while overripe fruit can darken too quickly and spoil faster.
Tired of Socks? Give Dehydrated Gifts Instead

Let’s be real—how many times have you received boring gifts like socks, scarves, or yet another candle? Homemade dehydrated gifts are unique, useful, and full of love.
Plus, they offer health benefits! No preservatives, no added sugar—just pure, wholesome goodness. Your loved ones will appreciate the time and effort you put into crafting these edible treasures.
And don’t worry—your gifts won’t spoil! As long as they’re properly dried and stored, dehydrated foods stay fresh for months.

How to Dehydrate Foods the Right Way
Dehydrating food isn’t complicated, but it does require patience. The key to success? Proper drying and storage!
Step-by-Step Guide:
- Wash & Prep – Clean your fruits and veggies thoroughly. Slice them evenly for consistent drying.
- Dehydrate – Use a food dehydrator for the best results. If using an oven, keep it at the lowest temperature and crack the door open slightly.
- Cool & Store – Let food cool completely before sealing it in airtight containers, vacuum-sealed bags, or Mason jars.
Pro Tip: A dehydrator is the best tool for the job. Oven drying is possible but tricky—it’s easy to accidentally over-dry your food.
Must-Have Tools for Gift-Worthy Results
For the best results, invest in a quality food dehydrator. I personally recommend Nesco, Excalibur or Elite Gourmet dehydrators, which allow you to set and forget without worrying about uneven drying.
For storage, Mason jars are my favorite. They lock in freshness and look beautiful when packaged with a ribbon or handwritten label. I love the flip over and clamping jars for presenting the gift.
Creative Themes for Dehydrated Gift Baskets
Want to take your gifts up a notch? Theme them!
Consider creating custom gift baskets filled with a mix of dried fruits, veggies, or trail mixes. Here are some fun ideas:
- Tropical Delight – Dried pineapple, mango, coconut.
- Veggie Crunch – Zucchini and beet chips.
- Tea Time Treats – Dried apple slices, pear chips, candied ginger.
- Trail Mix Powerhouse – Banana chips, dried berries, nuts, and seeds.
- Rainbow Fruit Leather Basket – A mix of colorful fruit roll-ups for kids.
You can even add a personal touch by including a small recipe card with ideas on how to use the dehydrated goodies.

20 Gift Basket Ideas Your Friends Will Rave About
- Orchard Harvest (apples and pears).
- Fruity Fiesta (bananas, apples, and berries)
- Rollup Rainbow (different fruit leathers/rollups)
- Crunchy Courgette Cascade (zucchini chips)
- Zesty Zucchini Zing (for flavored zucchini chips)
- Berry Bliss (mixed berries)
- Exotic Explosion (for tropical fruits)
- Citrus Symphony (for dehydrated citrus fruits)
- Autumn Abundance (for fall fruits like apples and pears)
- Delightful Dried Medley (for a mix of different fruits)
- Veggie-Crunch Victory (for any mix of dehydrated vegetables)
- Classy Crunchables (for a high-end assortment)
- Healthy Heartful (include heart-healthy options)
- Campers Crunch (could include a mix of fruits and veggies loved by campers)
- Sunshine Snackables (fruits that are summer favorites)
- Fiber-Full Feast (for fruits and veggies rich in fiber)
- Sweet and Subtle Surprise (for subtly sweet fruits like apples and pears)
- Light and Crisp Delight (for lightly flavored options)
- Fruit Fun Fusion (for an eclectic mix)
- Bountiful Berry Basket (for a basket full of different kinds of berries)
🫖 Tea Time Treats
For tea lovers: Use dried apple slices, pear chips, and candied ginger!
🥾Trail Mix Powerhouse
For your health-conscious buddies: Use dried berries, banana chips, and assorted nuts and seeds.
🌈 A Rainbow Fruit Leather Basket!
For the kids! They love the different colors - and tastes - of naturally-sweet snacks.
How to Wrap, Pack, and Present Dehydrated Gifts

Presentation matters! Here are some creative ways to make your gifts extra special:
- Rustic Look – Use brown paper bags tied with twine for a charming farmhouse feel.
- Handwritten Notes – Add a personal touch with a heartfelt message or recipe suggestion.
- Tissue Paper & Clear Cellophane – Nestle jars in colorful tissue paper and wrap the whole basket in crinkly cellophane for a professional look.
- Decorative Ribbons & Bows – Use satin or organza ribbons for an elegant finish.
And don’t forget—clear plastic bags work great if you want a more compact, no-basket option!
For that good old-fashioned feel, use brown paper bags for your dehydrated food gifts! Nana will love it.
Handwritten Notes: The Secret Sauce to a Memorable Gift

Include a personalized handwritten note. It shows (even more!) how much you care.
Tissue, Bows & Cellophane: Final Gift-Giving Touches

Go for something high-quality, sturdy yet soft. Acid-free tissue paper is the star of the show
here because it won’t fade or damage our dried goodies in our
basket. Now, when it comes to colors, it's your, er, their party!

Soft chiffon ribbon rolls in 5 colors, perfect for weddings, gifts, crafts, and romantic décor.

10 clear basket bags with 10 pull bows in 5 colors—durable, festive, and perfect for holiday gift wrapping.

Not only does it give your gifts a lovely, see-through dress to wear(!), it also keeps everything clean and secure, like bubble wrap’s classy cousin.
Choose a clear or patterned
sheet depending on your gift's theme and vibe.

I also use these cellophane bags
Remember, everything we choose is a reflection of our great taste and the love we put into the gift.
Just like a favorite recipe, it's all the
ingredients combined that make the end result magnificent.

And if you don't want to go "the basket route," I use these lovely clear plastic bags that measure 5.9" x 6.3" - I use an assortment of smaller (half-pint size) Mason jars inside these bags!
As an Amazon Associate, I earn commission from qualifying purchases. The price you pay does not increase. Read disclosure here.
Which Mason Jar Size Should You Use?

Mason Jars Regular Mouth Quart Jars
- Ball brand regular mouth Glass Mason Jars. Quart size (32oz)
- Package of 12
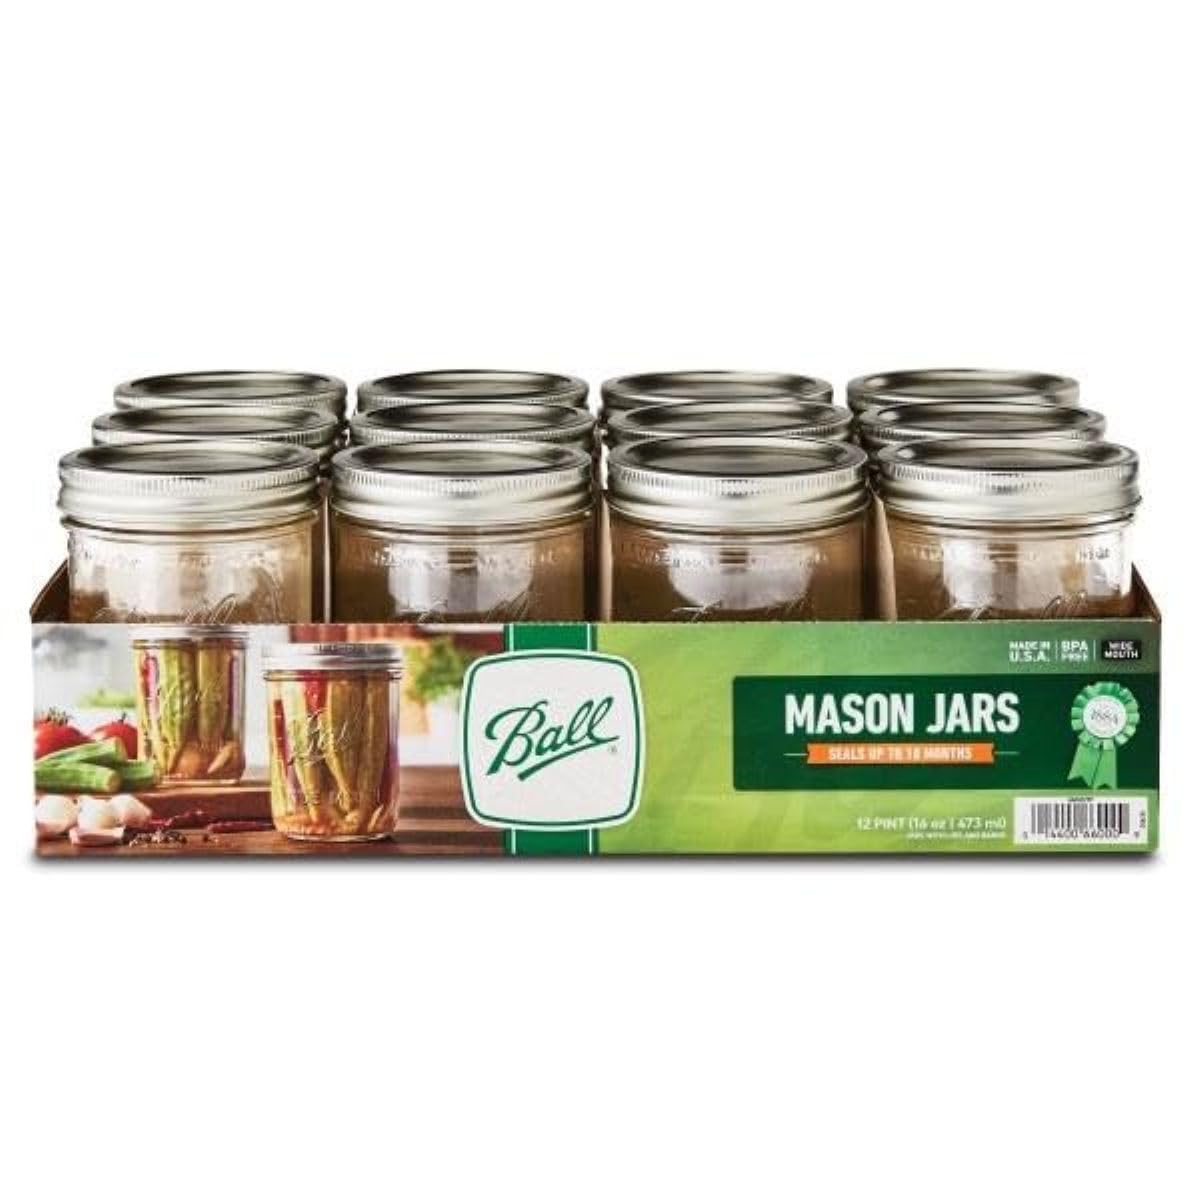
Mason Jars Wide Mouth Pint Jars
- Ball brand wide mouth Glass Mason Jars. Pint size (16oz)
- Package of 12

Mason Jars Wide Mouth Half Pint Jars
- Ball brand wide mouth Glass Mason Jars. Half-Pint (8oz)
- Package of 12

Kerr Wide Mouth Half-Pint Mason Jars
- Kerr brand wide mouth Mason jars with lids and bands
- Half pint (8oz)
- Package of 12
As an Amazon Associate, I earn from qualifying purchases — this does not affect the price you pay. Read full disclosure.
Embrace the Dehydrated Gift-Making Adventure
I love making delicious, long-lasting, and meaningful gifts, and I promise—you will too! Once you master the art of dehydrating, you might find yourself making these treats year-round.
Not just for holidays, dehydrated food gifts are perfect for birthdays, housewarming gifts, and care packages.
Before I sign off, please check out these beautiful potato-beaded necklaces by Janetta here.


And learn how to dehydrate potatoes here so you can try your hand at necklace-making - just like Janetta!
Wrapping it Up...
Dehydrated gifts are more than just food—they’re a gift from the heart. With the right ingredients, tools, and creativity, your homemade treats will be the most thoughtful, delicious gifts ever!
Gift Giving with Dried Foods: FAQ
Is dried fruit healthy?
Is dried fruit healthy?
Absolutely! Dried fruit retains most of its nutrients, making it a great healthy snack option. Learn more about the pros and cons of dried fruit here.
How do I package dried fruit gifts?
How do I package dried fruit gifts?
One of the best ways is using Mason jars, gift bags, or decorative baskets. Add a bow, a handwritten note, and an oxygen absorber and desiccant packet to keep everything fresh!
Can I sell my dehydrated food gifts?
Can I sell my dehydrated food gifts?
Yes, but check your local cottage food laws first. Many states allow small-scale sales of dried goods like fruits, herbs, and snack mixes with proper labeling. Read more on selling your dehydrated goodies at farmers markets here.
How long do dehydrated food gifts last?
How long do dehydrated food gifts last?
When properly dried and stored in airtight containers with oxygen absorbers, most dehydrated foods stay fresh for 6 months to a year—or longer!
Whether it’s a holiday, birthday, or just a sweet surprise, dehydrated food gifts offer a thoughtful, tasty twist your friends and family will adore. They're nutritious, beautiful to package, and made with love.
Before you go, don’t forget to download your free 5 Dried Food Recipes You'll Actually Love PDF (below) and start making gifts that are as nourishing as they are memorable!
Get 5 Dried Food Recipes You'll Actually Love

Here's where you can get your copy of our all new
5 Dried Food Recipes (That Actually Taste Great)
They're my all-time favorite easy dried food meals!
Get it here right now.
For Free!
You Might Like These
Food Shortage Preparedness: How to Get Ready Now
Practical steps to prepare for food shortages: what to stock, how to grow, dehydrate, & store food safely—without panic.
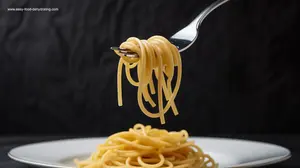
Rehydrating Pasta for Faster Meals, Less Water & Energy
Learn how rehydrating pasta saves water, fuel, and time. Perfect for faster meals, camping trips, and emergency prep.
Dehydrated Potato-Beaded Necklace: Janetta’s DIY Idea
Make a dehydrated potato-beaded necklace like Janetta: dry, paint, seal, and string rock-hard potato beads.
Food Dehydrating for Fun and Profit: New Revenue Stream?
Turn food dehydrating into a money-making side hustle! Sell dried snacks with low startup costs and high demand.
Why Dehydrate Food: 7 Important Reasons to Consider
Why Dehydrate Food? Keep a full pantry in times of natural disasters, power outages, and man-made messes.
Dehydrate Nuts and Seeds for Long-Lasting Freshness
Dehydrate Nuts and Seeds: Learn how to soak, dehydrate, and store nuts and seeds. Keep them crisp for months!


You Might Like These
Food Shortage Preparedness: How to Get Ready Now
Practical steps to prepare for food shortages: what to stock, how to grow, dehydrate, & store food safely—without panic.
Rehydrating Pasta for Faster Meals, Less Water & Energy
Learn how rehydrating pasta saves water, fuel, and time. Perfect for faster meals, camping trips, and emergency prep.
Dehydrated Potato-Beaded Necklace: Janetta’s DIY Idea
Make a dehydrated potato-beaded necklace like Janetta: dry, paint, seal, and string rock-hard potato beads.
Food Dehydrating for Fun and Profit: New Revenue Stream?
Turn food dehydrating into a money-making side hustle! Sell dried snacks with low startup costs and high demand.
Why Dehydrate Food: 7 Important Reasons to Consider
Why Dehydrate Food? Keep a full pantry in times of natural disasters, power outages, and man-made messes.
Dehydrate Nuts and Seeds for Long-Lasting Freshness
Dehydrate Nuts and Seeds: Learn how to soak, dehydrate, and store nuts and seeds. Keep them crisp for months!
Before You Go...
If you enjoyed this page, tap the ❤️ in the lower right-hand corner.
It saves this page to your Grow bookmarks so you can find it again later.
You’ll also see quick share buttons to copy the link, post to Facebook,
or save it straight to Pinterest.
What We Mean by “Dehydrate”
Here at Easy Food Dehydrating, “dehydrate” always means using an electric food dehydrator — the easy, reliable way to dry food at home.
Click the "Save" button (above) to pin
this page’s ideas to your Pinterest board!


LATEST READS on EFD
-
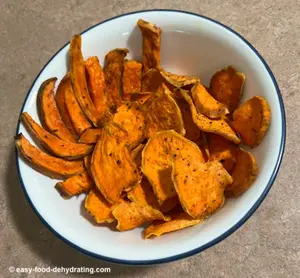
Dehydrated Sweet Potato Treats: Human and Dog Approved
May 12, 26 09:01 AM
 Make these dehydrated sweet potato treats for you AND your dog. Plus dog-safe tips for sharing the love of snacking!
 -
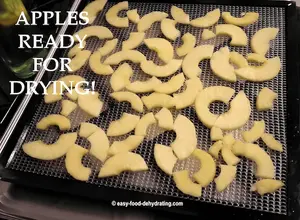
Dehydrate Apples for Snacks and Pantry Storage
May 11, 26 09:07 AM
 Dehydrate apples easily: slice, prevent browning, dry at 125–135°F, and store for snacks, pies, or pantry use.
 -
Green Split Pea Soup Made Easy in the Slow Cooker
Apr 30, 26 09:10 AM
 Easy slow cooker green split pea soup with ham, carrots, and celery—comforting, flavorful, and simple to make.

Unlock the Secrets of Food Dehydrating... from Fruit 'n' Veg to Doggie Dinners!


AFFILIATE DISCLOSURE: I am an Affiliate for Amazon, and other sellers of quality merchandise. Should you purchase an item through their links, I may receive compensation. The price you pay does not increase. THANKS for your support! Read full disclosure here.
easy FOOD DEHYDRATING: Making food preservation simple since 2010. I show you how to keep your food pantry full, whatever the reason or season!

HOME ARTICLES CONTACT DMCA DISCLAIMER FAQ PRIVACY SITEMAP TERMS TESTIMONIALS
ALL CONTENT COPYRIGHT © 2010-2025 • ALL RIGHTS RESERVED REGARDLESS OF LINKS OR ATTRIBUTIONS.
POWERED BY SBI! (SOLO BUILD IT!)
As an Amazon Associate, I earn from qualifying purchases.