What We Mean by “Dehydrate”
Here at Easy Food Dehydrating, “dehydrate” always means using an electric food dehydrator — the easy, reliable way to dry food at home.
- Home
- How to Store Dehydrated Food for Long-Term Freshness
- Dehydrated Food Storage Wall: Build Your Own Pantry Hub

Dehydrated Food Storage Wall

Create Storage “Out of Thin Air”
Pantry overflowing with buckets and bags? Don’t stress—you can create food storage out of thin air. With just a blank wall, a simple closet organizer kit, and a couple of hours of DIY, you’ll have a sturdy shelving system that keeps dehydrated food neat, protected, and easy to grab.
✅ Quick Answer: How do you build a dehydrated food storage wall?
You can build a dehydrated food storage wall in a few hours using a closet organizer kit. Pre-dimple metal uprights before drilling, plan bin orientation for space efficiency, and leave at least 1" clearance above buckets. Add a curtain to block light and hide clutter.
This method turns wasted wall space into an organized food storage wall that saves time, space, and headaches.

Here's a great starting point for our dehydrated food storage wall!

If there truly is no room in the house itself, please consider putting your closet organizer out in the garage (preferably an air-conditioned garage if you're that fortunate).
We started with two affordable closet organizer kits and a couple of extra wire shelves from the local hardware store. You can also grab them online and have them delivered right to your door.
- ClosetMaid ShelfTrack Kit
-
ClosetMaid Wire Closet Organizer System
Adjustable from 5 ft to 8 ft, includes shelves, rods, shoe shelf, and hardware. Made of durable white steel.
See the current ClosetMaid kit on Amazon, below.
Shelving Unit for Your Food Storage Wall on Amazon

ClosetMaid Wire Closet Organizer System
- ClosetMaid ShelfTrack Wire Closet Organizer System
- Adjustable from 5 ft to 8 ft
Comes with:
- Shelves, Clothes Rods, Shoe Shelf, and Hardware
- Durable Steel, White

Adjustable from 92"–127" long, this heavy-duty carbon steel unit features customizable rods and shelves to fit any space—even corners in an L-shape.
Rust-resistant, durable, and easy to assemble, it’s ideal for apartments, laundry rooms, or creating a sturdy food storage wall.
I love this unit as it means "no holes in the walls" plus you can make it L-shaped if you want. I think you should/could add a "strap" at the very top and screw it to the wall (find the stud first). This helps stop the tall unit from toppling on you!
As an Amazon Associate, I earn commission from qualifying purchases. The price you pay does not increase. Read disclosure here.
Delivery Tip: Why Ordering Online Saves Time & Backache

If you don’t have a handy helper around, do yourself a favor and shop online.
The kits arrive with clear instructions, and all you really need is a spirit level, a drill, and a couple of hours.
Ours took about three hours from start to finish.
Step-by-Step: How I Built My Dehydrated Food Wall
Here’s where the fun comes in — and a few tips to save frustration:
Drilling Made Easy (Podger & Nail Set Tip)
- Drilling Tips: When drilling into the metal uprights, use a podger, nail set, or even a large nail and hammer to make a small divot first. This keeps your drill bit from wandering.
Bucket & Bin Orientation Tricks
- Plan Your Bin Layout: Decide how you’ll face your bins and boxes. Wide side facing out means a shallower unit. Short side facing out saves wall space but requires deeper shelves.
Allowing Proper Clearance
- Bucket Clearance: Don’t forget vertical clearance! Leave at least 1" above your food-grade buckets. Most shelving units dip about 1.5" at the front edge, so plan accordingly.
Right now, my wall has four levels, but I may add another row on top since there’s still room left on the uprights.
Cost Breakdown: How Much a Food Wall Really Costs
Total cost: $100
(That’s without the buckets or food!)
Prices on these closet kits have gone up since I built mine — closer to $130 now — but it’s still a very cost-effective way to create a ton of storage in a small footprint.

Curtain Hack: Hide Your Food Wall & Block Out Light
I used some spare drapes!
Once the wall was built, I added a curtain to keep everything out of sight. I sewed curtain rings to some old drapes I found in the attic, mounted a rod to the shelving uprights, et voilà — my wall of food storage now looks like a hidden alcove instead of a supply warehouse.
And unless you know better, it could pass for a giant window!
Pro Tips: Organizing Bins, Buckets & Mylar Bags
A food storage wall isn’t just about space. It’s about organization and peace of mind. With everything in one place — buckets of dehydrated veggies, fruit, grains, and even proteins — I can quickly see what I have, rotate stock, and know my emergency food supply is ready whenever needed.
FAQs: Everything You Need to Know Before You Build
How much weight can these shelves hold?
How much weight can these shelves hold?
Closet organizer systems typically support 60–80 lbs per shelf when installed correctly. Always use wall anchors or studs for maximum safety.
Is it safe to keep dehydrated food in the garage?
Is it safe to keep dehydrated food in the garage?
Yes - only if your garage is air-conditioned. Heat and humidity will shorten the shelf life of dehydrated foods.
How much does it cost?
How much does it cost?
Basic kits start around $130, plus any extra shelving you add.
Should I cover my food storage wall with curtains?
Should I cover my food storage wall with curtains?
If it's out in the open? Definitely. Curtains block light, hide clutter, and make your setup look neat. Darker, heavier fabrics work best for protecting food.
Can I expand the wall later?
Can I expand the wall later?
Yes. Most systems allow you to add extra shelves as long as the uprights are properly secured.
What containers work best for a dehydrated food wall?
What containers work best for a dehydrated food wall?
Food-grade buckets with gamma lids, Mylar bags inside bins, and vacuum-sealed pouches all stack well and maximize shelf space.
So, if your pantry is overflowing and you’re wishing for more space, remember - you can create storage out of thin air. A simple shelving unit can transform a blank wall into a powerful storage solution for your dehydrated food.
Before you go, grab my free PDF: 5 Dried Food Recipes You’ll Actually Love. They’re my all-time favorite easy dried food meals, and they’ll show you exactly why food storage can be both practical and delicious.
Get 5 Dried Food Recipes You'll Actually Love

Here's where you can get your copy of our all new
5 Dried Food Recipes (That Actually Taste Great)
They're my all-time favorite easy dried food meals!
Get it here right now.
For Free!
You Might Like These
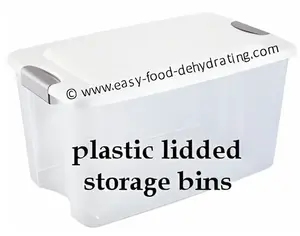
Plastic-Lidded Bins for Long-Term Food Storage Choices
Plastic-lidded bins keep dehydrated foods protected. Get airtight, sizing, and setup tips for long-term storage.
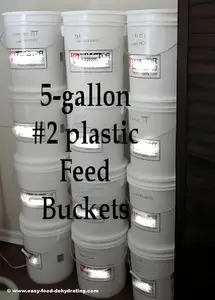
Feed Buckets With Lids: Safe Long-Term Food Storage
Food-grade feed buckets with lids keep dehydrated foods safe—airtight, pest-free, and stackable for long-term storage.
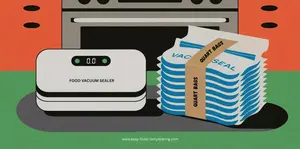
Food Vacuum Sealer Bags: Best Picks for Dehydrated Food
How to choose the best food vacuum sealer bags for dehydrated food—thickness, texture, sealing tips, and FAQs included!
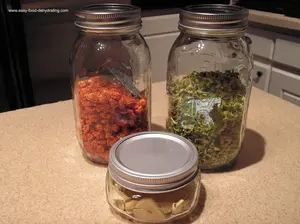
Mason Jars for Dehydrated Food: Fresh, Easy Storage
Airtight, reusable Mason jars keep dehydrated foods fresh & visible—perfect for quick daily use and long-term storage.
Food Vacuum Sealer Instructions - How-To Guide Part 2
How to use a FoodSaver® vacuum sealer with step-by-step instructions, part 2. Tips for sealing Mylar bags, and more.
Nesco Food Dehydrator: Reliable, Budget-Friendly Choice
The Nesco Food Dehydrator is a top pick for beginners or pros. Expandable trays, easy setup, and reliable results!
Plastic Wrap Guide: Stop Vacuum-Bag Punctures
Prevent vacuum-bag punctures: cushion sharp edges on vacuum-sealed packets. Easy steps, quick tools, reuse tips.
Wear Latex Gloves While Dehydrating (Stay Clean & Safe)
Stay safe and clean! Wear latex gloves while dehydrating food to keep germs away. Makes handling frozen foods easier.
Why the Excalibur Food Dehydrator Is a Smart Investment
Discover why the Excalibur Food Dehydrator is a top choice for food drying.


You Might Like These
Plastic-Lidded Bins for Long-Term Food Storage Choices
Plastic-lidded bins keep dehydrated foods protected. Get airtight, sizing, and setup tips for long-term storage.
Feed Buckets With Lids: Safe Long-Term Food Storage
Food-grade feed buckets with lids keep dehydrated foods safe—airtight, pest-free, and stackable for long-term storage.
Food Vacuum Sealer Bags: Best Picks for Dehydrated Food
How to choose the best food vacuum sealer bags for dehydrated food—thickness, texture, sealing tips, and FAQs included!
Mason Jars for Dehydrated Food: Fresh, Easy Storage
Airtight, reusable Mason jars keep dehydrated foods fresh & visible—perfect for quick daily use and long-term storage.
Food Vacuum Sealer Instructions - How-To Guide Part 2
How to use a FoodSaver® vacuum sealer with step-by-step instructions, part 2. Tips for sealing Mylar bags, and more.
Nesco Food Dehydrator: Reliable, Budget-Friendly Choice
The Nesco Food Dehydrator is a top pick for beginners or pros. Expandable trays, easy setup, and reliable results!
Plastic Wrap Guide: Stop Vacuum-Bag Punctures
Prevent vacuum-bag punctures: cushion sharp edges on vacuum-sealed packets. Easy steps, quick tools, reuse tips.
Wear Latex Gloves While Dehydrating (Stay Clean & Safe)
Stay safe and clean! Wear latex gloves while dehydrating food to keep germs away. Makes handling frozen foods easier.
Why the Excalibur Food Dehydrator Is a Smart Investment
Discover why the Excalibur Food Dehydrator is a top choice for food drying.
Before You Go...
If you enjoyed this page, tap the ❤️ in the lower right-hand corner.
It saves this page to your Grow bookmarks so you can find it again later.
You’ll also see quick share buttons to copy the link, post to Facebook,
or save it straight to Pinterest.
What We Mean by “Dehydrate”
Here at Easy Food Dehydrating, “dehydrate” always means using an electric food dehydrator — the easy, reliable way to dry food at home.
Click the "Save" button (above) to pin
this page’s ideas to your Pinterest board!


LATEST READS on EFD
-
Green Split Pea Soup Made Easy in the Slow Cooker
Apr 30, 26 09:10 AM
 Easy slow cooker green split pea soup with ham, carrots, and celery—comforting, flavorful, and simple to make.
 -
12 Common Mistakes When Dehydrating Food (and Fixes)
Apr 20, 26 09:37 AM
 Discover 12 common mistakes when dehydrating food—and simple fixes for even drying, better flavor, and longer storage.
 -
Dehydrated Tomato Minestrone Soup – Easy Pantry Meal
Apr 16, 26 10:32 AM
 Make dehydrated tomato minestrone soup with dried veggies, beans, and pasta—a cozy, shelf-stable meal ready anytime.


Unlock the Secrets of Food Dehydrating... from Fruit 'n' Veg to Doggie Dinners!


AFFILIATE DISCLOSURE: I am an Affiliate for Amazon, and other sellers of quality merchandise. Should you purchase an item through their links, I may receive compensation. The price you pay does not increase. THANKS for your support! Read full disclosure here.
easy FOOD DEHYDRATING: Making food preservation simple since 2010. I show you how to keep your food pantry full, whatever the reason or season!

HOME ARTICLES CONTACT DMCA DISCLAIMER FAQ PRIVACY SITEMAP TERMS TESTIMONIALS
ALL CONTENT COPYRIGHT © 2010-2025 • ALL RIGHTS RESERVED REGARDLESS OF LINKS OR ATTRIBUTIONS.
POWERED BY SBI! (SOLO BUILD IT!)
As an Amazon Associate, I earn from qualifying purchases.