What We Mean by “Dehydrate”
Here at Easy Food Dehydrating, “dehydrate” always means using an electric food dehydrator — the easy, reliable way to dry food at home.
- Home
- Articles On How To Dehydrate Food Safely
- Dehydrating Food In Convection Ovens

Can You Honestly Dehydrate Food in Convection Ovens?

Ever wondered if your convection oven can pull double duty as a food dehydrator? You’re not alone - it’s one of the most common questions I get. While dehydrators are designed for the job, your trusty convection oven can actually do a surprisingly good job of drying fruits, veggies, and even meats.
✅ Quick Answer: Can You Dehydrate Food in a Convection Oven?
Yes—set your oven to 125°F–135°F (52–57°C), arrange food on wire racks or mesh screens for airflow, and prop the door slightly so moisture escapes. Rotate trays every 1–2 hours and verify temperature with an oven thermometer for consistent results.
With steady low heat and built-in air circulation, it mimics the same process - making it a great option if you’re just starting out or don’t want to buy new gear right away.

Thanks to its steady heat and built-in fan, a convection oven can pull moisture from sliced fruits, veggies, and even meats, giving you that same concentrated flavor and chewy texture you’d get from a proper dehydrator.
Sure, you’ll need to babysit it a bit - rotate trays, crack the door, check temps - but for a lot of people, it’s a perfectly solid way to dive into dehydrating. So let’s walk through how to make it work in your own kitchen.
If you’re just starting out and don’t want to splurge on a dehydrator - but already own a convection oven - then I say, go for it!
Step-by-Step: How to Dehydrate Food in a Convection Oven
Simple Prep Steps for Oven Dehydration
Convection ovens are a quick and straightforward way to preserve fruits, vegetables, meats, and even seafood.
Here’s how to do it:
- Preheat the oven to the lowest setting (typically 125°F–135°F for fruits and vegetables).
- Place the food on a wire rack for better air circulation.
- Leave the oven door slightly open to let moisture escape. Use a wooden spoon to keep the door ajar.
- Monitor the food every few hours, rotating the trays as needed.
- Remove the food when it’s dehydrated to your desired level.
Typical Drying Times by Food Type
Exact times vary based on slice thickness, oven accuracy, humidity, and batch size, but these ranges are a good starting point:
| Food | Temperature | Estimated Time |
|---|---|---|
| Apples (sliced 1/4") | 125°F (52°C) | 6–8 hours |
| Bananas | 125°F (52°C) | 7–9 hours |
| Tomatoes (halved) | 130°F (54°C) | 8–10 hours |
| Herbs (basil, parsley, mint) | 95–105°F (35–40°C) | 1–3 hours |
| Beef Jerky (thin strips) | 135°F (57°C) | 6–8 hours |
Now that you’ve got a feel for timing, here’s how a convection oven stacks up against a dehydrator and a regular oven so you can match the method to your batch size, budget, and schedule.
Convection Oven vs Food Dehydrator vs Regular Oven for Dehydrating
If you’re wondering whether it’s worth investing in a dedicated food dehydrator, or if your convection oven can get the job done just as well, this side-by-side comparison makes it easy to see the trade-offs.
Each method has its own strengths and limitations - from temperature control and energy efficiency to capacity and convenience. Use the chart below to decide which option best fits your kitchen, budget, and drying needs.
| Criteria | Convection Oven | Food Dehydrator | Regular Oven |
|---|---|---|---|
| Typical Temp Range | ~125–135°F (52–57°C) if model supports low temps | 95–165°F (35–74°C) precise, per model | Often ≥170°F (77°C); many can’t go low enough |
| Airflow | Fan-assisted; decent circulation | Optimized, even airflow across trays | Minimal; stagnant without a fan |
| Door Ajar Needed? | Often helpful to vent moisture | No | Usually yes |
| Evenness of Drying | Good with tray rotation | Best; minimal rotation needed | Inconsistent; hot spots common |
| Capacity | Limited by oven racks | High; multiple stackable trays | Limited; 1–2 racks |
| Energy Efficiency | Moderate | High (purpose-built) | Low (heats large cavity) |
| Hands-On Time | Moderate; rotate trays, monitor | Low; mostly set-and-forget | High; monitor temps, door, rotation |
| Typical Drying Time* | 4–8+ hrs (depends on food thickness) | Fastest/most consistent | Often longest due to low airflow |
| Pros | Already in kitchen; good airflow; no new gear | Best control, capacity, consistency | Works in a pinch; no fan needed to start |
| Cons | May need door cracked; capacity limits | Requires purchase/storage space | Hard to keep temps low; uneven results |
| Best For | Beginners & occasional small batches | Regular users & bigger batch runs | Very occasional, small experiments |
*Time varies by food type, slice thickness, humidity, and load. Rotate trays for best results.
Convection vs. Regular Ovens: What’s the Real Difference?
For dehydration, airflow is everything. A regular oven lacks a fan, so heat stagnates and creates hot/cool spots - some pieces overdry while others stay damp. Most standard ovens also struggle to hold 125°F–135°F, so foods can brown or start cooking instead of gently drying (propping the door helps vent moisture but wastes heat and needs babysitting).
In a convection oven, the built-in fan solves these problems by circulating air evenly across the racks. This steady airflow helps moisture escape faster, giving you more consistent results and usually shorter drying times. The key is making sure your model can reach and hold the right low temperatures. If the lowest setting is closer to baking temps, you’ll risk cooking the food instead of drying it. Always double-check with an oven thermometer for accuracy.
Bottom line: if you don’t own a dehydrator, a convection oven is the more practical choice than a regular oven - provided it can hold a steady low temperature (confirm with a thermometer).
Common Challenges When Using a Convection Oven
One downside of convection ovens is their limited usable space. Most models come with only two or maybe three racks, which means you can’t dry very large batches at once. While you wouldn’t place food directly on the oven bars, the standard baking trays that come with the oven often block airflow, slowing the drying process. To work around this, many people invest in wire cooling racks or mesh screens that sit on top of the racks, allowing warm air to circulate freely around the food.
Another factor to keep in mind: food shrinks significantly during dehydration. Apple slices, for example, may lose half their size once dried. If pieces are cut too small to begin with, they may slip through mesh or shrink unevenly, leading to waste. Careful slicing and the right tray setup can go a long way toward overcoming these space and airflow limitations.
This is where a dedicated dehydrator shines - stackable trays are designed for airflow and larger, consistent batch drying.
Tips to Maximize Space & Airflow in a Convection Oven
Use Wire Racks or Mesh Screens – Place food on fine-mesh racks that sit inside baking trays so air circulates from all sides.
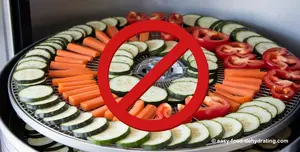
Slice Evenly – Keep pieces the same thickness so they shrink at the same rate and dry consistently.
Don’t Overlap – Lay food out in a single layer; overlapping traps moisture and extends drying time.
Rotate Racks – Swap the position of trays halfway through to counteract uneven airflow.
Crack the Door Slightly – Prop the oven door open with a wooden spoon to let moisture escape (if safe with your model).
Work in Small Batches – It’s better to dry less at a time than to overload trays and risk spoilage.
This is where a dedicated food dehydrator shines - with stackable trays designed for consistent airflow and larger batch drying.
Stacking Trays: The Big Advantage of Dehydrators
Unlike a convection oven, a dedicated food dehydrator isn’t limited to just two or three racks. Many models are designed to expand, letting you stack multiple trays without sacrificing airflow.
Some units - like certain Nesco dehydrators - can handle up to 30 trays at once, making them ideal for large harvests, bulk meal prep, or long-term storage projects.
Of course, that’s a serious amount of drying! If you do expand to the maximum, make sure you have the counter space - and maybe keep curious pets or kids clear of the towering stack. For most households, 6 to 12 trays strike a perfect balance between capacity and practicality.


Is It Worth Buying a Food Dehydrator?
If you’re serious about dehydrating food, it might be time to invest in a food dehydrator. I recommend starting with either the Excalibur or Nesco starter models shown above: They’re affordable and reliable.
Top Food Dehydrators to Compare
Here are some great options on Amazon:
Excalibur DEHYDRATORS Available on Amazon
💡 Tip: Outside the U.S.? Most dehydrating temps here are listed in Fahrenheit - use our quick converter to see the Celsius equivalent for your machine.

Excalibur 2400 Food Dehydrator, 4-Tray Starter
This is a square-shaped food dehydrator, that boasts 4 square feet of drying space. Black textured plastic body. Remove the front panel for access to its four trays.
- 220 watts of drying power
- 4 removable trays
- 16.25 x 13 x 6.5 inches (LxWxH)
- Temperature range: 95°F – 165°F
- Comes with: 4 trays, a digital download guide to dehydration
- Best for beginners with small kitchens

Excalibur 2900ECB 9-Tray Electric Food Dehydrator
This is a square-shaped food dehydrator, that boasts 15 square feet of drying space. Black textured plastic body. Remove the front panel for access to its nine trays.
- 400 watts of drying power
- 9 removable trays
- 19 x 17 x 12.5 inches (LxWxH)
- Temperature range: 105°F – 165°F
- Comes with: 9 trays, a digital download guide to dehydration
- Best for bulk drying & serious users

Excalibur 3900B 9-Tray Electric Food Dehydrator
This is a square-shaped food dehydrator, that boasts 15 square feet of drying space. Black textured plastic body. Remove the front panel for access to its 9 trays. Has a built-in on/off switch.
- 600 watts of drying power
- 9 removable trays
- 19 x 17 x 12.5 inches (LxWxH)
- Temperature range: 105°F – 165°F
- Comes with: 9 trays, a digital download guide to dehydration
As an Amazon Associate, I earn from qualifying purchases — this does not affect the price you pay. Read full disclosure.
Nesco DEHYDRATORS Available on Amazon
💡 Tip: Outside the U.S.? Most dehydrating temps here are listed in Fahrenheit - use our quick converter to see the Celsius equivalent for your machine.

Nesco FD-80A Food + Jerky Dehydrator
This is a square-shaped food dehydrator, perfect for snacks, fruit, and beef jerky. White with a top black tray edge, with a white lid.
- 700 watts of drying power
- Expandable to 8 trays
- 15.25 x 10.25 x 15.63 inches (LxWxH)
- Temperature range: 95°F – 160°F
- Comes with: 1 Clean-A-Screen, 1 Recipe Instruction Book, 1 Jerky Seasoning & Cure Sample

Nesco FD-61WHC Snackmaster Encore Food Dehydrator
This round Nesco Snackmaster comes with a jerky gun kit and 5 trays. It has a very light grey body with a darker grey lid.
- 500 watts of drying power
- Expandable to 12 trays
- 13.5 x 13.5 x 9.25 inches (LxWxH)
- Temperature range: 95°F – 160°F
- Comes with: 1 Jerky Gun with 3 tip attachments, 2 Fruit Roll Sheets, 2 Clean-A-Screens, 5 Jerky Seasoning & Cure Samples, Recipe & Instruction book
- Best budget-friendly jerky dehydrator

Nesco FD-60 Snackmaster Express Food Dehydrator
This is the new version of mine as it has an updated lid. It's a light grey body with a darker grey lid.
- 500 watts of drying power
- Expandable to 12 trays
- 13.5 x 13.5 x 9.25 inches (LxWxH)
- Temperature range: 95°F – 155°F
- Comes with: 1 Fruit Roll Sheet, 2 Original-Flavor Jerky Spice & Cure Packets
As an Amazon Associate, I earn from qualifying purchases — this does not affect the price you pay. Read full disclosure.
Which One Saves You More in the Long Run?
Using a dehydrator is more cost-effective over time. They’re energy-efficient, built for even drying, and can handle multiple trays at once - so you’re drying more food with less fuss (and less electricity).
A typical oven draws ~2,000–5,000 watts, while most dehydrators run on just ~500–700 watts. Even though dehydrators run for several hours, their lower wattage and smaller heated chamber mean they use significantly less energy per batch. Factor in less hands-on monitoring, and the lifetime cost (electricity + effort) almost always favors a dehydrator.
FAQs: Dehydrating Food in a Convection Oven
Can you dehydrate food in a convection oven?
Can you dehydrate food in a convection oven?
Yes, and it’s a common question! There are a few ways to dry food: using the sun, an electric food dehydrator, or an oven. Convection ovens, with their built-in fans, are superior to regular ovens for dehydration.
Can you use a regular oven for dehydration?
Can you use a regular oven for dehydration?
Yes, you can, but regular ovens are less efficient than convection ovens due to the lack of built-in air circulation. You’ll need to leave the oven door slightly open and rotate your trays frequently to ensure even drying.
Is dehydrating food in a convection oven as good as using a dehydrator?
Is dehydrating food in a convection oven as good as using a dehydrator?
While convection ovens do a decent job, food dehydrators are designed for consistent airflow and lower temperatures. They’re better for frequent dehydrating, but ovens are great for beginners.
Can I dehydrate meat in a convection oven?
Can I dehydrate meat in a convection oven?
Yes, you can — but be extra cautious with temperature and safety. Meat needs to reach a safe internal temp to avoid bacteria, so pre-cook thin slices before dehydrating, or use a food thermometer during the process.
For jerky, many home food safety guides (including USDA/FSIS) recommend pre-heating strips to 160 °F (71 °C) (or poultry to 165 °F / 74 °C) before drying, to help eliminate pathogens before the dehydration process.
How long does it take to dehydrate food in a convection oven?
How long does it take to dehydrate food in a convection oven?
Drying times vary, but expect 4–8 hours for most fruits and veggies. Keep your oven around 125°F–135°F, and check every couple of hours, rotating trays for even drying.
Does a dehydrator use less energy than an oven?
Does a dehydrator use less energy than an oven?
Yes. Most dehydrators use 500–700 watts compared to 2,000–5,000 watts for ovens. That means running a dehydrator for 8 hours can use less energy than running an oven for 2 hours — saving both money and electricity over time.
Whether you're experimenting with convection ovens or already eyeing a full-blown dehydrator, one thing's for sure - homemade dried food is both practical and delicious.
To help you get started, I’ve put together a handy free PDF (below) of my top 5 simple, tasty dried food recipes you can try right away. You don’t need fancy gear - just your oven and a little curiosity.👇
Get 5 Dried Food Recipes You'll Actually Love

Here's where you can get your copy of our all new
5 Dried Food Recipes (That Actually Taste Great)
They're my all-time favorite easy dried food meals!
Get it here right now.
For Free!
You Might Like These
Mylar Bags for Dehydrated Food Storage: Seal for Years!
Use Mylar bags for dehydrated food storage: oxygen absorbers, sealing tips, and sizes for long-term freshness.
What Are Food Dehydrators? How They Work & Benefits
Learn what food dehydrators are, how they work, and preserve food naturally—no refrigeration or additives needed.
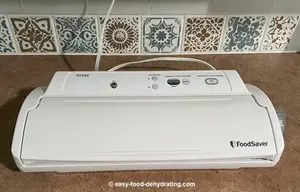
Food Vacuum Sealers – FoodSaver Models & Sealing Tips
FoodSaver food vacuum sealers, how they preserve food longer, and expert tips for safe, airtight storage.
Plastic Wrap Guide: Stop Vacuum-Bag Punctures
Prevent vacuum-bag punctures: cushion sharp edges on vacuum-sealed packets. Easy steps, quick tools, reuse tips.
How to Store Dehydrated Food for Long-Term Freshness
Keep dehydrated food fresh for years: Vacuum sealing, Mylar bags, oxygen absorbers, desiccant packets plus storage tips.
Why Oxygen Absorbers for Dehydrated Food are a Must
Keep dehydrated foods fresh longer with oxygen absorbers. Get sizes, tips, and FAQs for safe long-term pantry storage.


You Might Like These
Mylar Bags for Dehydrated Food Storage: Seal for Years!
Use Mylar bags for dehydrated food storage: oxygen absorbers, sealing tips, and sizes for long-term freshness.
What Are Food Dehydrators? How They Work & Benefits
Learn what food dehydrators are, how they work, and preserve food naturally—no refrigeration or additives needed.
Food Vacuum Sealers – FoodSaver Models & Sealing Tips
FoodSaver food vacuum sealers, how they preserve food longer, and expert tips for safe, airtight storage.
Plastic Wrap Guide: Stop Vacuum-Bag Punctures
Prevent vacuum-bag punctures: cushion sharp edges on vacuum-sealed packets. Easy steps, quick tools, reuse tips.
How to Store Dehydrated Food for Long-Term Freshness
Keep dehydrated food fresh for years: Vacuum sealing, Mylar bags, oxygen absorbers, desiccant packets plus storage tips.
Why Oxygen Absorbers for Dehydrated Food are a Must
Keep dehydrated foods fresh longer with oxygen absorbers. Get sizes, tips, and FAQs for safe long-term pantry storage.
Before You Go...
If you enjoyed this page, tap the ❤️ in the lower right-hand corner.
It saves this page to your Grow bookmarks so you can find it again later.
You’ll also see quick share buttons to copy the link, post to Facebook,
or save it straight to Pinterest.
What We Mean by “Dehydrate”
Here at Easy Food Dehydrating, “dehydrate” always means using an electric food dehydrator — the easy, reliable way to dry food at home.
Click the "Save" button (above) to pin
this page’s ideas to your Pinterest board!


📌 Pin It for Later

LATEST READS on EFD
-
Green Split Pea Soup Made Easy in the Slow Cooker
Apr 30, 26 09:10 AM
 Easy slow cooker green split pea soup with ham, carrots, and celery—comforting, flavorful, and simple to make.
 -
12 Common Mistakes When Dehydrating Food (and Fixes)
Apr 20, 26 09:37 AM
 Discover 12 common mistakes when dehydrating food—and simple fixes for even drying, better flavor, and longer storage.
 -
Dehydrated Tomato Minestrone Soup – Easy Pantry Meal
Apr 16, 26 10:32 AM
 Make dehydrated tomato minestrone soup with dried veggies, beans, and pasta—a cozy, shelf-stable meal ready anytime.


Unlock the Secrets of Food Dehydrating... from Fruit 'n' Veg to Doggie Dinners!


AFFILIATE DISCLOSURE: I am an Affiliate for Amazon, and other sellers of quality merchandise. Should you purchase an item through their links, I may receive compensation. The price you pay does not increase. THANKS for your support! Read full disclosure here.
easy FOOD DEHYDRATING: Making food preservation simple since 2010. I show you how to keep your food pantry full, whatever the reason or season!

HOME ARTICLES CONTACT DMCA DISCLAIMER FAQ PRIVACY SITEMAP TERMS TESTIMONIALS
ALL CONTENT COPYRIGHT © 2010-2025 • ALL RIGHTS RESERVED REGARDLESS OF LINKS OR ATTRIBUTIONS.
POWERED BY SBI! (SOLO BUILD IT!)
As an Amazon Associate, I earn from qualifying purchases.