What We Mean by “Dehydrate”
Here at Easy Food Dehydrating, “dehydrate” always means using an electric food dehydrator — the easy, reliable way to dry food at home.
- Home
- How to Dehydrate Meat
- How to Dehydrate Seafood
How to Dehydrate Seafood
for Long-Lasting, Safe Storage

While learning how to dehydrate seafood at home might sound a bit intimidating—but when done right, it’s safe, cost-effective, and delicious. Whether you’re preserving fish for backpacking, long-term storage, or just love savory snacks, dehydrating seafood is a smart way to lock in flavor and nutrients.
✅ Quick Answer: How do you dehydrate seafood safely at home?
To dehydrate seafood, start with fresh, clean fish fillets. Pat dry thoroughly, season if desired, and dry at 145°F until brittle and moisture-free. Store in airtight containers or freeze for longer shelf life. Never use previously frozen seafood, as it may pose a safety risk.
This guide walks you through exactly how to dehydrate salmon, shrimp, and tuna safely—plus the best seasonings to boost taste and important storage tips to keep your dried fish fresh.
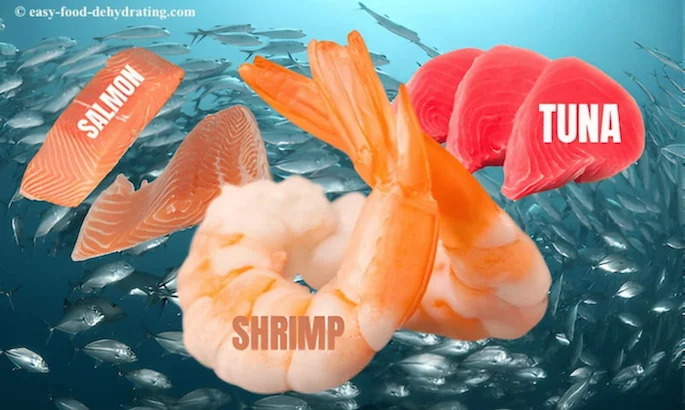
Before starting the drying process, it's important to purchase fresh fish fillets of your choice from a specialty fish market, or a trusty local supermarket.
Read how to choose fresh fish here.
If you can "smell fish," don't buy it. Fresh fish does not stink! Yeah, a slight fishy aroma is normal, but it shouldn't be overpowering.
How to Prep Fish Before Drying (And Why It Matters)
Clean your fish by removing any bones or shells, before drying - makes, sense, right?
Continue reading for the top three dried fish deets: Shrimp, Salmon, and Tuna.
Best Fish Seasonings for Dehydrated Seafood
Adding the right seasonings to your seafood before dehydrating enhances flavor. The key is to season the fish before drying, so the flavors infuse during the dehydration process.
Here are some of the best seasoning options:
Classic Salt & Pepper
Best for: All types of seafood (shrimp, salmon, tuna, white fish)
Application: Lightly sprinkle sea salt and freshly ground black pepper on both sides of the fish before dehydrating. Salt helps draw out moisture and acts as a natural preservative.
Lemon & Garlic Herb Blend
Best for: Salmon, tuna, shrimp
Application: Mix lemon zest, garlic powder, dried parsley, and a pinch of salt. Rub this seasoning onto the fish or mix it into a light marinade before dehydrating for a bright, fresh flavor.
Spicy Cajun Kick
Best for: Shrimp, tuna, mackerel
Application: Coat the fish with a blend of paprika, cayenne pepper, onion powder, garlic powder, and thyme before drying. This adds a bold, smoky heat to your dehydrated seafood.
Sweet & Savory Teriyaki
Best for: Salmon, tuna
Application: Marinate fish for 30 minutes in a mixture of soy sauce, honey, ginger, and sesame oil before patting it dry and placing it in the dehydrator. The result? A rich, umami-packed, slightly sweet flavor.
Smoky BBQ Rub
Best for: Salmon, shrimp
Application: Rub a blend of smoked paprika, brown sugar, chili powder, and garlic powder onto the fish for a sweet, smoky taste. Perfect for making jerky-style dehydrated seafood.
Mediterranean Herb Mix
Best for: Tuna, white fish
Application: Combine dried oregano, basil, rosemary, and a hint of lemon zest for a light and herbaceous flavor. Best when sprinkled on fish fillets before drying.
Hot Honey Glaze (Trending Flavor!)
Best for: Salmon, shrimp
Application: Brush a mix of honey and chili flakes onto the fish just before dehydrating for a sweet-heat combination that intensifies as it dries.
How to Apply Seasonings for the Best Results:
- Dry Rubs: Sprinkle seasonings evenly on both sides of the fish before dehydrating for the most concentrated flavor.
- Marinades: Soak fish in a flavored liquid for 30 minutes to 1 hour, then pat dry before dehydrating. This method works best for salmon and tuna.
- Brining: For extra preservation and tenderness, soak fish in a light salt brine before applying seasonings. This is especially useful for lean fish like cod or tilapia.
Pro Tips for Dehydrating Seafood Safely and Efficiently
By having uniformly sized fresh fish, we get better drying results. If the fish is not properly blotted dry before dehydrating (using paper towels), it may drip and cause sticking-to-the-tray issues.
If seafood is still dripping after blotting with a paper towel, it's still too wet! Dry fish are happy fish (in this case!)
Also, air drying the fish a little longer means it's on the dehydrator for a shorter time.
Once the fish is dried, store it in an airtight container in a cool, dry place.
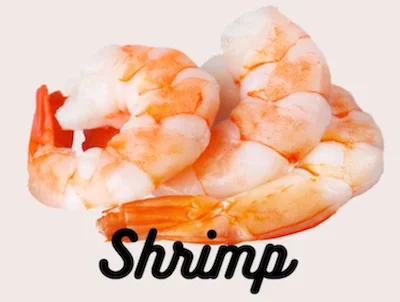
Step-by-Step: How to Dehydrate Shrimp at Home
Here are the steps for properly dehydrating shrimp at home:
- Make sure your shrimp are fresh. Clean them thoroughly, removing shells, tails, legs, veins, and then butterfly (cut in half from head to tail) if desired. Rinse well.
- Season as desired.
- Pat the shrimp dry before dehydrating using paper towels. Moisture is shrimp's enemy during drying.
- Arrange your whole or butterflied shrimp evenly in a single layer on the dehydrator trays without overlapping.
- Dehydrate for 4-10 hours at 145°F until completely stiff and brittle, with a slightly translucent, deep orange hue. The exact time varies due to the thickness of the shrimp and your home's humidity level.
- Test for doneness: Fully-dried shrimp will snap when bent rather than be flexible. No moist spots should remain inside.
- Cool completely then store your dried shrimp in an airtight container for up to 2 months, or in the freezer for 6 months.
💡 Tip: Outside the U.S.? Most dehydrating temps here are listed in Fahrenheit - use our quick converter to see the Celsius equivalent for your machine.
Monitor closely when dehydrating to prevent case hardening on the outside before the interior moisture fully evaporates. Rotate the trays occasionally for even drying.
Rehydrate before eating by soaking for 10-30 minutes in broth, water, or sauce - until pliable. Cook per your recipe's instructions and enjoy!
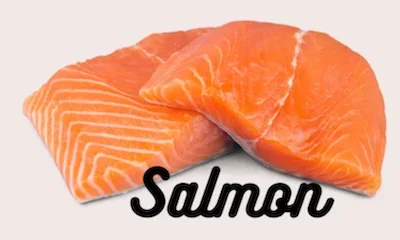
Best Method for Dehydrating Salmon While Keeping Flavor Intact
Here is how to dehydrate fresh salmon at home:
- Slice your salmon against the grain into 1/4-inch thick uniform strips.
- Season as desired.
- Drain salmon well and pat dry with paper towels. Arrange in a single layer on dehydrator trays.
- Dehydrate at 145°F for 5-7 hours until salmon strips are slightly shrunken down, darkened, and brittle, with no moist spots remaining inside when cut.
- Cool completely then store your dried salmon in an airtight container for 1 month refrigerated, or up to 3 months frozen.
💡 Tip: Outside the U.S.? Most dehydrating temps here are listed in Fahrenheit - use our quick converter to see the Celsius equivalent for your machine.
Enjoy your dried salmon pieces as a healthy snack!
The key is slicing salmon thinly so it dehydrates inside and out without overly hardening. Rotate your dehydrator trays periodically for consistent results.
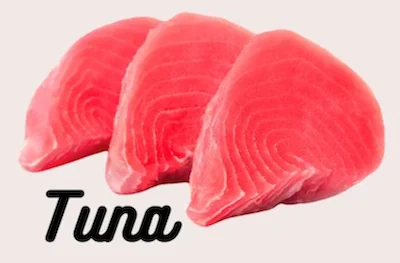
DIY Guide to Dehydrating Tuna for High-Protein Snacking
Here's how to dehydrate fresh tuna at home for a tasty, protein-packed snack in just a few easy steps:
- Slice tuna fillets against the grain into 1/8 to 1/4 inch thick uniformly sized strips.
- Season as desired.
- Arrange tuna strips close together but not overlapping on dehydrator trays lined with parchment paper.
- Dehydrate the salmon strips at 145°F for 5-7 hours, checking periodically. When done, tuna will be darkened, have shrunk slightly, be dry to the touch, and brittle.
- Cool completely then store your dried tuna strips in an airtight container for up to 2 weeks, or several months refrigerated/frozen.
💡 Tip: Outside the U.S.? Most dehydrating temps here are listed in Fahrenheit - use our quick converter to see the Celsius equivalent for your machine.
Proper slicing and rotating of your trays help ensures even drying. You can reconstitute your dried tuna in water before use.
Fatty vs. Lean Fish: What You Need to Know Before Dehydrating
When it comes to learning how to dehydrate seafood safely, there is a big difference between fatty fish and lean fish. Fatty fish, such as salmon, mackerel, and sardines, have a high oil content.
FATTY FISH:
Dehydrate fatty fish at a lower temperature for a shorter time.
LEAN FISH:
Dehydrate lean fish at a higher temperature for a longer time.
The oil helps to keep the fish moist and gives it its flavor.
Lean fish, such as cod, flounder, and haddock, have very little oil.
The difference in oil content affects how long you dehydrate the fish.
Best Ways to Store Dried Fish for Maximum Freshness
Dried fish can be an excellent addition to your food storage pantry.
Store your dried fish in food vacuum-sealer bags or make your own bags "to size" using vacuum-sealer rolls. Read more about bags here and rolls here.
How Long Does Dried Fish Last? Shelf-Life & Storage Tips
Properly dried fish aka 'preserved fish' is great for storing for the long-term. When done properly, the shelf-life of dried fish is months, or even years.
Check out the following tips to make sure your fish - preserved by dehydrating - stays safe and tasty.
Important Safety Tips for Drying Seafood Without Risk
- Make sure the fish is completely dry before you dehydrate it.
- Don't dehydrate fish that's been frozen or contains ice crystals (see FAQ at top of the page as to why).
- Dehydrate the fish at a low temperature to avoid bacteria growth. (See below)
- Store the dried fish in an airtight container in a cool, dark place.
The Secret to Drying Fish at Low Temperatures for Best Results
Drying fish at a low temperature is important because it helps prevent the growth of bacteria as we don't want to experience food poisoning, right? Right!
When fish is dried at a high temperature, we risk case hardening (tough, outer "skins") which stops foods from drying evenly on the inside. Keep an eye on the dehydration process closely.
TIP: If your dehydrator manual has specifics on drying fish, read it!
Best Containers for Storing Dehydrated Fish
The best storage containers for dehydrated food are airtight and are moisture-proof. This helps to keep the food fresh and prevents it from spoiling.
Check out this page on vacuum-sealer bags and store dried fish in glass Mason jars. Both are ideal for long-term storage.
How to Clean Your Dehydrator After Drying Seafood
Cleaning your dehydrator is important to avoid bacterial growth and to keep your dehydrator in excellent condition.
After dehydrating fish, here is the best way to clean your dehydrator:
- After unplugging the dehydrator and all the fish is removed, wipe down all the interior and exterior surfaces of the dehydrator with a warm, soapy cloth.
- Wipe off the soapy residue with hot water. (Never immerse a dehydrator's fan in water!)
- Allow your dehydrator to "air dry."
- Make sure the dehydrator is completely dry before plugging it back in and using it again.
For the trays: Rinse off any fishy residue in the kitchen sink, and then use your dishwasher the clean the trays!
Please note: Check to make sure your brand of tray is "dishwasher safe." I don't want them melting on you in the heat-drying cycle.
In fact, in other posts, I suggest using the wash and rinse cycles only on your dishwasher, and taking out the trays BEFORE the heat/dry cycle starts.
No dishwasher? Soak your trays in the sink in hot soapy water. Use a scrubby pad or an old toothbrush to get in the tight spaces. Rinse well and let air dry,
Fishing for Your Own Seafood? Here’s What You Need to Know

All there is to it is to simply have the patience to catch fish.
Or... do what I do... go to the store or fresh fish market!
Got Questions About Drying Seafood? Start Here!
Can you dehydrate fish?
Can you dehydrate fish?
Yes! You can dehydrate fish like salmon, shrimp, and tuna safely at home. This page walks you through the steps, including how to prep, dry, season, and store each type.
Can you rehydrate dried fish?
Can you rehydrate dried fish?
Absolutely. Just soak dried fish in water, broth, or sauce for 10 to 30 minutes—or overnight for thicker pieces—until soft and pliable. Then use as you would fresh fish in your recipe.
Can you dehydrate frozen fish? (See THIS surprising answer!)
Can you dehydrate frozen fish? (See THIS surprising answer!)
No. Freezing creates ice crystals that damage the fish’s cell structure. This can lead to unsafe bacterial growth during dehydrating. Always use fresh, never-frozen fish for best results.
Whether you’re drying salmon for snacking, shrimp for soup toppers, or tuna for long-term meals, dehydrating seafood opens up a world of flavor and shelf-stable possibilities.
Be sure to grab your free 5 Dried Food Recipes You'll Actually Love PDF (below)—it includes fan favorites like carrot soup, minestrone soup, split pea soup, spicy beef jerky, and banana cinnamon rolls!
Get 5 Dried Food Recipes You'll Actually Love
Here's where you can get your copy of our all new
5 Dried Food Recipes (That Actually Taste Great)
They're my all-time favorite easy dried food meals!
Get it here right now.
For Free!
Before You Go...
If you enjoyed this page, tap the ❤️ in the lower right-hand corner.
It saves this page to your Grow bookmarks so you can find it again later.
You’ll also see quick share buttons to copy the link, post to Facebook,
or save it straight to Pinterest.


