What We Mean by “Dehydrate”
Here at Easy Food Dehydrating, “dehydrate” always means using an electric food dehydrator — the easy, reliable way to dry food at home.
- Home
- Easy Dehydrated Food Recipes
- Homemade Jerky Guide

Easy Homemade Jerky Guide: Make
Beef, Chicken, Pork, Turkey, & Fish Jerky

Making homemade jerky doesn’t have to be complicated or expensive. With the right cuts of meat, a flavorful marinade, and your dehydrator, you can create bold, protein-packed snacks right at home. This guide walks you through every step — from choosing beef, chicken, pork, turkey, or fish to marinating, drying, storing, and even fixing common jerky mistakes.
✅ Quick Answer: How do you make homemade jerky?
To make jerky at home, slice lean meat thinly, marinate overnight, and dry it in a dehydrator at 160°F until firm but flexible. Store in airtight bags for up to 2 weeks, or refrigerate/freeze for longer freshness.
Homemade jerky costs less, tastes better, and lets you control the ingredients. Whether you’re prepping snacks for hiking, long road trips, or healthy everyday eating, you’ll find everything you need here to become your own jerky expert.

You don't have to settle for overpriced, preservative-filled jerky from the store. I'll show you how to make jerky that’s bursting with bold flavors!
Whether you prefer dehydrated beef, chicken, pork, or even fish, I'll walk you through every step of the jerky-making process in this homemade jerky guide, from selecting the best cuts to mastering marinades and perfecting the dehydration process.
Store-Bought vs. Homemade Jerky: Why DIY Always Wins
Making jerky at home gives you full control over everything—from the flavors you use to the final texture.
Homemade is a healthier option, too—unlike store-bought jerky—which often contains excessive sodium, preservatives, and artificial ingredients. Homemade jerky lets you focus on making fresh batches that don't require adding preservatives you can't pronounce...
You know exactly what goes into each batch, ensuring a clean, high-protein snack without unnecessary additives.
There’s also the cost factor. Store-bought jerky can be pricey, but when you dehydrate meat yourself, you get gourmet results for a fraction of the cost of store-bought.
Homemade jerky allows allows us to keep a human eye on the drying and seasoning processes, ensuring safe and high-quality results.
Flavor Hacks: Global Twists to Elevate Your Jerky
Jerky doesn’t have to be one-dimensional. Experiment with global flavors to keep things exciting.
How about a Korean BBQ-inspired marinade with soy sauce, sesame oil, and gochujang, or opt for a spicy chipotle version with smoked paprika and cayenne.
The possibilities are endless—adjust seasoning levels to suit your palate.
I've come up with four easy recipes for the jerky-lover in all of us:
Tools You’ll Need for Foolproof Jerky Making
Before you begin, gather the right tools! A dehydrator is the key piece of equipment—just about all dehydrators on the market today have an adjustable temperature setting to ensure precise drying. I own three dehydrators: Nesco, Exalibur, and an Elite Gourmet.
A sharp knife is a must for cutting uniform strips of meat, which helps with even dehydration. You’ll also need marinating containers, such as glass bowls (that won't absorb smells) or sealable bags, to allow the meat to soak up flavors.
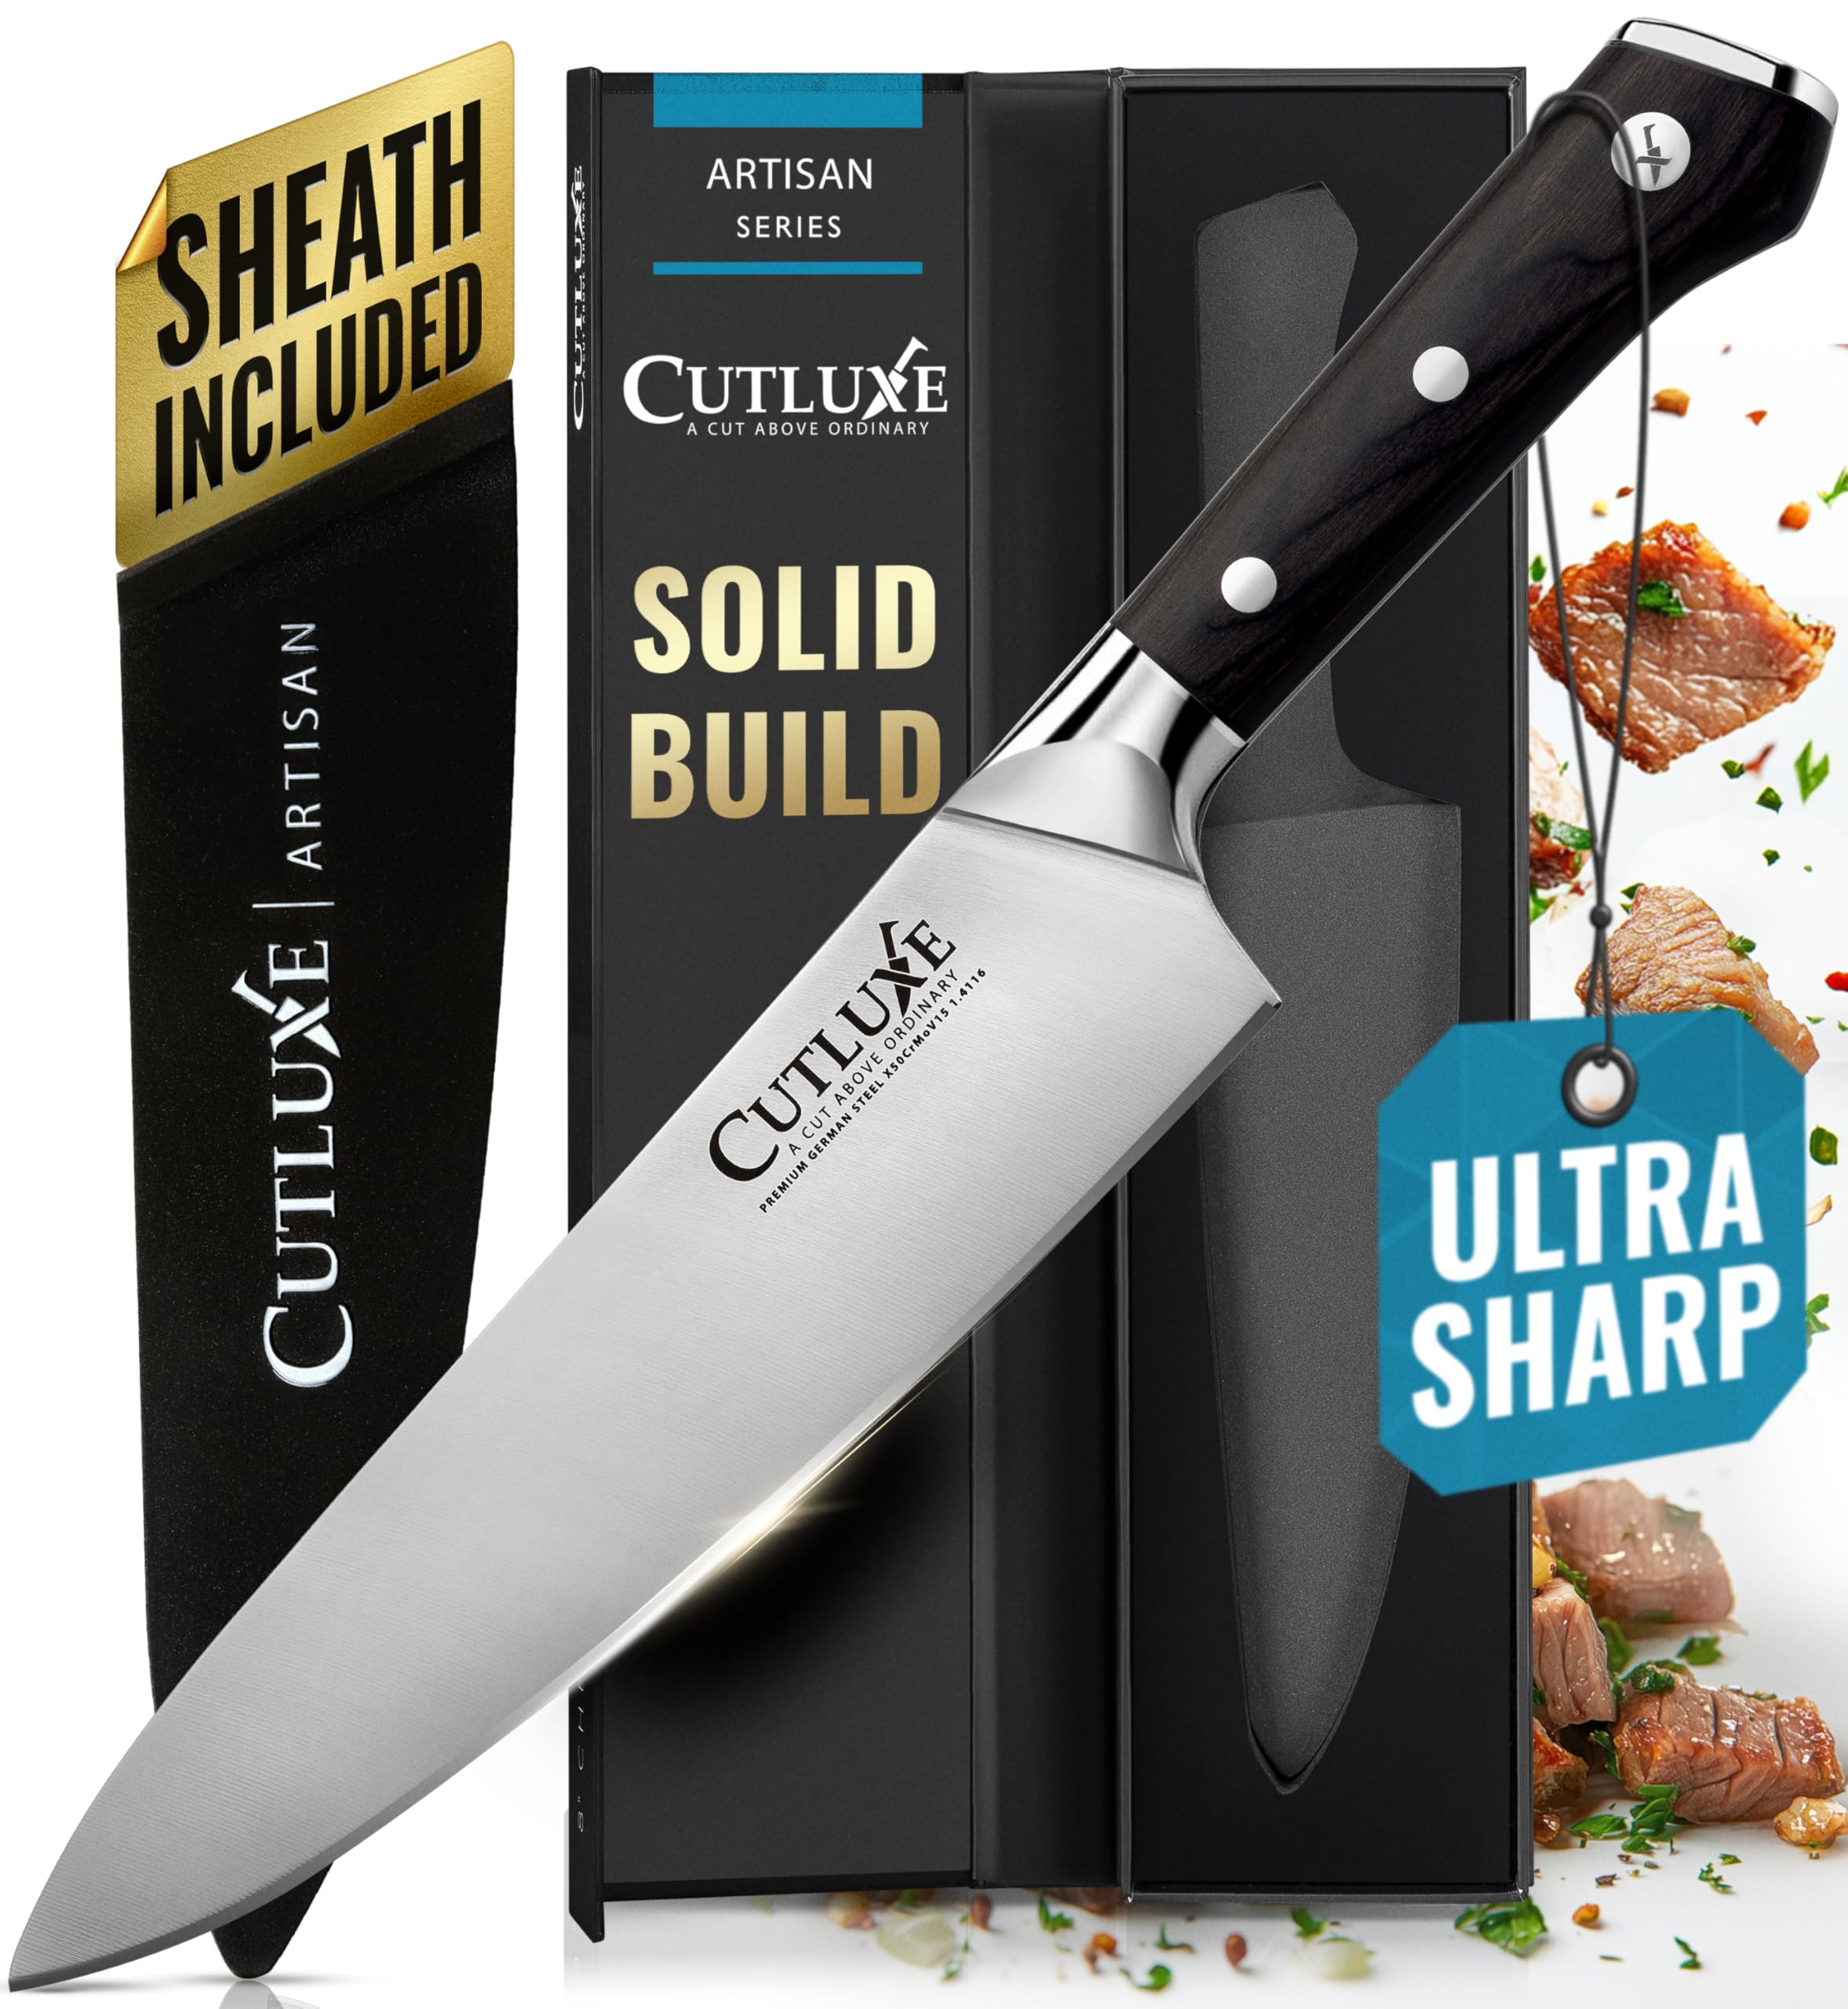
Begin by Using a Good Sharp Knife by Cutluxe!
Check out this great chef's knife with a full tang that means the handle and blade "are one" so they can't come apart when we're slicin' and a dicin'.
I know these Cutluxe Chef knives may be a little expensive, but they do last pretty much a lifetime when you maintain their cutting edges.
As an Amazon Associate, I earn from qualifying purchases — this does not affect the price you pay. Read full disclosure.
Finally, stock up on spices and seasonings so you can create signature flavor profiles to suit your taste buds.


Best Cuts of Meat for Jerky That Lasts and Tastes Great
Great jerky starts with great meat. Lean cuts with minimal fat are ideal since fat doesn’t dry well and can go rancid.
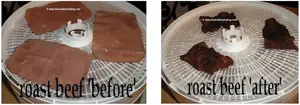
For dehydrated beef, choose top round, eye of round, or flank steak.
If you’re making chicken jerky, boneless, skinless breast meat is your best bet.
For pork, pork tenderloin works well.
And if you’re feeling adventurous, fish jerky—made from salmon or tuna—offers a delicious, high-protein alternative.
Whenever possible, choose high-quality, fresh cuts of meat. Remember, trimming excess fat before slicing helps ensure a long-lasting, evenly-dried yummy jerky.
Slice It Right: How to Prep Meat for Perfect Jerky
The way you slice your meat determines the texture of your jerky. Cutting the meat into ¼-inch-thick strips makes sure it dries consistently and is easy to chew.
For beef, slicing against the grain creates a more tender jerky, while chicken, pork, and fish benefit from being sliced with the grain for better texture.
Again, be sure to remove any sinew or visible fat to improve shelf life and avoid spoilage. Proper storage is key.
How to Store Homemade Jerky for Long-Lasting Freshness
Because homemade jerky lacks preservatives, proper storage is essential. Keep it in an airtight container or vacuum-sealed bag to maintain freshness.
If you plan to eat it within a few weeks, storing it in a cool, dark place works fine (in sealed bags). For long-term storage, refrigerate or freeze it to extend its shelf life up to six months.
Marinade Secrets: Infuse Bold Flavor Into Every Bite
Marinades are where the magic happens and this step infuses your meat with deep, rich flavors.
Traditional jerky marinades often include soy sauce, Worcestershire sauce, garlic, and brown sugar, but don’t be afraid to get creative.
For fish, adding citrus or ginger enhances natural flavors, while pork pairs well with a touch of honey or maple syrup.
For the best results, marinate your meat overnight. This allows the flavors to fully penetrate the meat strips.
Shake or stir the marinade occasionally to ensure even coating, and don’t rush this step—patience leads to bolder, more flavorful jerky.
Dehydrating Jerky: Timing and Tips for the Best Texture
Preheat your dehydrator to 160°F (70°C) and arrange the meat strips in a single layer, making sure they don’t overlap.
Drying time varies depending on meat type and thickness, but most jerky is ready between 6 to 12 hours. I always rotate my trays every couple of hours.
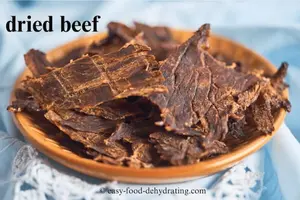
Is Your Jerky Ready? Easy Ways to Test for Doneness
Perfectly dried jerky should be firm, yet slightly flexible. It shouldn’t snap in half but should bend and show white fibers when torn.
Give it a quick taste test—if it’s chewy, flavorful, and makes you want more, you’ve nailed it!
Jerky Troubleshooting: Fixing Tough, Brittle, or Bland Batches
If your jerky turns out too brittle, it may be over-dried—shorten the dehydration time next batch.
If the flavor feels off, revisit your marinade balance and let it sit longer.
Jerky that’s too tough might need to be sliced thinner or against the grain.
Keep notes on each batch to refine your technique over time. Here's my handy free chart below:
Get your free FOOD DEHYDRATING log!
Download your free Dehydrating Food Log HERE or click the image!
Instant download - no email addy needed.

If you're having issues with your jerky-making, check out my Jerky Troubleshooting Guide here.
Pro Tips for Consistently Great Homemade Jerky
Making homemade jerky is as much an art as it is a science. Consistency is key—slice evenly, marinate thoroughly, and dry carefully.
Each batch is a learning experience. The more you create, the more skilled you’ll become, refining your flavors and technique with each batch.
Start Your Jerky-Making Journey Today
Your dehydrator is more than just another kitchen gadget—it’s your gateway to amazing, homemade jerky. Make it for yourself, or share your jerky with friends.
So, go sharpen your knives, mix your marinades, and get started on creating the best jerky of your life, one batch at a time!
How (and When) to Rehydrate Jerky for Cooking
While jerky is typically eaten dry, some people prefer to rehydrate it for use in recipes or for a softer texture.
To rehydrate beef jerky, soak it in warm water, broth, or even beer for about 10–30 minutes, depending on the desired consistency.
This technique works well for adding jerky to soups, stews, or pasta dishes.
Jerky FAQ: Quick Answers for Every Home Jerky Maker
What’s the best meat for homemade jerky?
What’s the best meat for homemade jerky?
The best cuts are lean and low in fat. For beef, use top round or flank steak; for chicken, go with boneless breasts; for pork, tenderloin works well; and for fish, try salmon or tuna.
How long does homemade jerky last?
How long does homemade jerky last?
Properly dried jerky lasts 1–2 weeks at room temperature in sealed bags, up to 6 months refrigerated, and up to a year when vacuum-sealed and frozen.
How do I know when jerky is done drying?
How do I know when jerky is done drying?
Jerky should bend and crack slightly without breaking. It should feel firm but still pliable, with white fibers showing when torn.
Do I need a dehydrator to make jerky?
Do I need a dehydrator to make jerky?
A dehydrator gives the most consistent results, but you can use an oven on its lowest setting with the door slightly open. Just monitor drying time closely.
Now that you’ve got the basics of jerky making — from meat selection to marinades and storage — you’re ready to start experimenting with your own batches.
And before you head off to try your first recipe, don’t forget to grab your free 5 Dried Food Recipes You’ll Actually Love PDF (below). You’ll find hearty soups like carrot, minestrone, and split pea, plus sweet and savory treats like spicy beef jerky and banana cinnamon rolls.
Get 5 Dried Food Recipes You'll Actually Love

Here's where you can get your copy of our all new
5 Dried Food Recipes (That Actually Taste Great)
They're my all-time favorite easy dried food meals!
Get it here right now.
For Free!
You Might Like These
How to Dehydrate Beef (Sliced, Safe & So Simple!)
Dehydrate beef using pre-cooked roast slices—perfect for snacks, storage, or jerky. Step-by-step guide + recipe!
How to Dehydrate Turkey (Safely & Easily)
Dehydrate turkey the easy way! Use pre-sliced or evenly cut pieces for safe, consistent drying results.
How to Dehydrate Meat: Safety Tips & Jerky Recipe
How to Dehydrate Meat: Learn safe methods for dehydrating cooked meats and grab our free beef jerky recipe!
How to Dehydrate Chicken the Safe & Simple Way
Learn how to dehydrate pre-cooked chicken for safe, tasty meals that last—perfect for prep, travel, or shelf storage.
Dehydrate Seafood at Home: Safe Salmon, Shrimp & Tuna
How to dehydrate seafood safely—salmon, shrimp, and tuna. Step-by-step prep, drying temps, and storage tips included.
How to Dehydrate Cooked Pork (Safely & Deliciously!)
How to Dehydrate Cooked Pork (Safely & Deliciously!) Dehydrate leftovers for soups and stews!
Before You Go...
If you enjoyed this page, tap the ❤️ in the lower right-hand corner.
It saves this page to your Grow bookmarks so you can find it again later.
You’ll also see quick share buttons to copy the link, post to Facebook,
or save it straight to Pinterest.
What We Mean by “Dehydrate”
Here at Easy Food Dehydrating, “dehydrate” always means using an electric food dehydrator — the easy, reliable way to dry food at home.
Click the "Save" button (above) to pin
this page’s ideas to your Pinterest board!


LATEST READS on EFD
-
Dehydrated Sweet Potato Treats: Human and Dog Approved
May 12, 26 09:01 AM
 Make these dehydrated sweet potato treats for you AND your dog. Plus dog-safe tips for sharing the love of snacking!
 -
Dehydrate Apples for Snacks and Pantry Storage
May 11, 26 09:07 AM
 Dehydrate apples easily: slice, prevent browning, dry at 125–135°F, and store for snacks, pies, or pantry use.
 -
Green Split Pea Soup Made Easy in the Slow Cooker
Apr 30, 26 09:10 AM
 Easy slow cooker green split pea soup with ham, carrots, and celery—comforting, flavorful, and simple to make.


Unlock the Secrets of Food Dehydrating... from Fruit 'n' Veg to Doggie Dinners!


AFFILIATE DISCLOSURE: I am an Affiliate for Amazon, and other sellers of quality merchandise. Should you purchase an item through their links, I may receive compensation. The price you pay does not increase. THANKS for your support! Read full disclosure here.
easy FOOD DEHYDRATING: Making food preservation simple since 2010. I show you how to keep your food pantry full, whatever the reason or season!

HOME ARTICLES CONTACT DMCA DISCLAIMER FAQ PRIVACY SITEMAP TERMS TESTIMONIALS
ALL CONTENT COPYRIGHT © 2010-2025 • ALL RIGHTS RESERVED REGARDLESS OF LINKS OR ATTRIBUTIONS.
POWERED BY SBI! (SOLO BUILD IT!)
As an Amazon Associate, I earn from qualifying purchases.