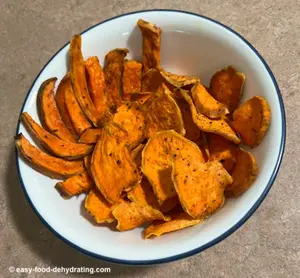
Sweet Potatoes
Slice thinly and dehydrate into chips before stringing onto a cord for necklaces or attaching to earring hooks.
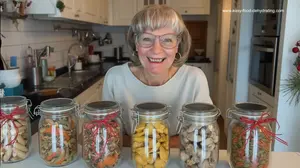
Here at Easy Food Dehydrating, “dehydrate” always means using an electric food dehydrator — the easy, reliable way to dry food at home.

Looking for a unique way to turn everyday vegetables into wearable art? A dehydrated potato-beaded necklace is a quirky DIY jewelry project that transforms ordinary spuds into colorful, rock-hard beads you can paint, seal, and string. It’s budget-friendly, eco-friendly, and guaranteed to start conversations.
✅ Quick Answer: Can you make a necklace out of dehydrated potatoes?
Yes! Slice potatoes, dry them until rock-hard, make holes before dehydrating, then paint, seal, and string them with beads. They become lightweight, durable, and surprisingly stylish as handmade jewelry.
This project was pioneered on our site by Janetta, a creative dehydrating fan who turned simple potatoes into funky turquoise jewelry—and her method is easy enough for anyone to try.

Prior to her necklace-making success, she needed to know how to dehydrate potatoes for stringing into a necklace so she dropped me an email.
Well, to be honest, I didn't know a thing about it, so Janetta promised to try her hand with the necklaces on her own.
I'd say she was very successful!. She kindly sent in these lovely pictures of her dehydrated potato-beaded necklace to prove it!
BTW: Here's how to dehydrate potatoes to eat!
NOTE: She doesn't currently have a dehydrator. So she did the next best thing. She used her regular oven, set at 170°F for two hours. She then left the potatoes in the oven until the next day.
Janetta says, "They turned out like rocks but I guess that isn't bad!"
She also noted that she should have cut the potatoes into larger pieces (even though she did consider shrinkage), as they did dry too small, in her opinion.
Janetta also thinks that the beads were too small and some got lost in the potato indentations!
Still, it was her first try and she and her friends were pleased with the effort.

Fast forward to March 12, 2013, and Janetta sent two more lovely photos of her beads.
This batch of beads dried at 200°F for three hours and was made from three large potatoes. Janetta had the bright idea of using a skewer to make the holes!
"They are like rocks and hard to force holes after they are baked," says Janetta, and she reminds us to make sure the holes are big before dehydrating.
I asked her what she painted them with. "I painted them with turquoise acrylic paint and I intend to put some kind of sealer on them."

To add decoration and spacing between the turquoise dried spuds, she strung silver beads between the pieces and used nylon jewelry cord. She said the nylon cord was stiff enough that she didn't need to use a needle to thread the cord through the potato holes.
While Janetta fully intended to make one strand long enough to drop over her head, the strings were too short this time around. Lesson: Make sure your nylon cord is long enough before stringing!
"This was a two-day process," says Janetta. "I could have put two beads in between each potato but didn't think of it at the time. It took a long time to paint them!" she added.
Thank you, Janetta, for sharing your dehydrated potato and bead necklaces with us all!
Here's more inspiration for potato bead necklaces.
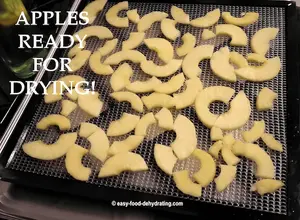
Here are some other good vegetable options besides potatoes for dehydrating and making into jewelry - like necklaces or earrings:
Slice thinly and dehydrate into chips before stringing onto a cord for necklaces or attaching to earring hooks.
Grate or thinly slice, dehydrate completely, and use the flat discs or chips for decorative jewelry.
Thinly slice into rounds, dehydrate until crisp, and use the jewel-toned pieces for necklaces and earrings.
Dehydrate whole cloves and string them for a bold, aromatic necklace (great for novelty or insect-repellent vibes!).
Cut into very thin disks, dehydrate, and use the concentric ring patterns for eye-catching pieces.
Slice bell peppers into strips or rings, dehydrate, and add as a colorful component in assembled jewelry.
Slice thinly, dehydrate, and incorporate the bright red pieces as accents in necklaces or earrings.
Shave into thin ribbons, dehydrate completely, and weave the “green noodles” into lightweight designs.
So get creative with your veggie dehydrating and drying and make some funky handmade jewelry!
*Garlic necklaces may not appeal to everyone due to their potential strong aroma! Here are a few reasons why some people may enjoy garlic jewelry:
Garlic necklaces and earrings can be given as silly gifts or worn for laughs and attention. The strong scent adds to the fun.
Strongly scented herbs like garlic are believed to deter insects. Wearing a garlic necklace could act as a natural bug repellent.
Some say garlic’s scent provides therapeutic benefits. Wearing it as jewelry might offer aromatherapy, though many find the smell overpowering.
Dried garlic cloves are a quirky craft material. For some, the fun lies in creating the jewelry itself, even if it’s not widely worn.
So while garlic jewelry definitely won't suit everyone's tastes, the dried cloves themselves are interesting and aromatic enough that some may find wearing garlic oddly appealing!
But it's probably not going to be the next big jewelry trend unless the benefits outweigh the bold scent.

Before I go, here is a post I wrote about making dehydrated food gifts. It's complete with ideas on baskets, cellophane, ribbons, and more.
It's a great way to share your dehydrated goodies, not just at Christmas, but year 'round!
Can you really make beaded jewelry out of potatoes?
Yes! Once dehydrated, potato slices or chunks become rock-hard, making them perfect for painting, sealing, and turning into beads.
Do I need a dehydrator, or will an oven work?
An oven works fine. Set it to the lowest temperature (around 170°F), bake for 2–3 hours, then leave the potatoes in overnight until fully dry.
What’s the best way to make holes in potato beads?
Use a skewer or sturdy straw to poke holes before dehydrating. Once dry, potatoes are too hard to drill without breaking.
What kind of paint and sealer lasts longest?
Acrylic craft paint plus a clear acrylic spray sealer works best. The sealer prevents moisture from ruining the beads.
What cord works best for stringing the beads?
Nylon jewelry cord is strong and stiff enough to thread without a needle. Just remember to cut it longer than you think you’ll need!
Can I use other vegetables besides potatoes?
Yes! Beets, carrots, zucchini, and even garlic cloves make fun alternatives for colorful, textured jewelry.
Who knew humble potatoes could turn into such eye-catching jewelry? Whether you’re painting spuds turquoise or stringing carrots and beets for a splash of color, the creativity is endless.
And if you’d like to explore more tasty (and edible!) dehydrating projects, don’t miss the free 5 Dried Food Recipes You'll Actually Love PDF below—featuring carrot soup, minestrone soup, split pea soup, spicy beef jerky, and even banana cinnamon rolls. Enjoy crafting and cooking!

Here's where you can get your copy of our all new
5 Dried Food Recipes (That Actually Taste Great)
They're my all-time favorite easy dried food meals!
Get it here right now.
For Free!
Practical steps to prepare for food shortages: what to stock, how to grow, dehydrate, & store food safely—without panic.
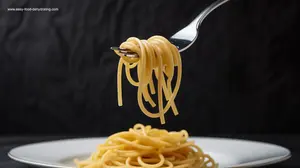
Learn how rehydrating pasta saves water, fuel, and time. Perfect for faster meals, camping trips, and emergency prep.
Turn food dehydrating into a money-making side hustle! Sell dried snacks with low startup costs and high demand.
Why Dehydrate Food? Keep a full pantry in times of natural disasters, power outages, and man-made messes.
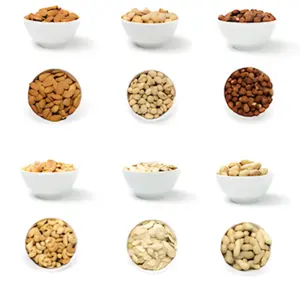
Dehydrate Nuts and Seeds: Learn how to soak, dehydrate, and store nuts and seeds. Keep them crisp for months!
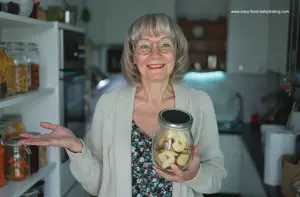
Make dehydrated food gifts that are healthy, unique, and long-lasting—perfect for DIY gifting in jars, bags, or baskets!
Practical steps to prepare for food shortages: what to stock, how to grow, dehydrate, & store food safely—without panic.
Learn how rehydrating pasta saves water, fuel, and time. Perfect for faster meals, camping trips, and emergency prep.
Turn food dehydrating into a money-making side hustle! Sell dried snacks with low startup costs and high demand.
Why Dehydrate Food? Keep a full pantry in times of natural disasters, power outages, and man-made messes.
Dehydrate Nuts and Seeds: Learn how to soak, dehydrate, and store nuts and seeds. Keep them crisp for months!
Make dehydrated food gifts that are healthy, unique, and long-lasting—perfect for DIY gifting in jars, bags, or baskets!
If you enjoyed this page, tap the ❤️ in the lower right-hand corner.
It saves this page to your Grow bookmarks so you can find it again later.
You’ll also see quick share buttons to copy the link, post to Facebook,
or save it straight to Pinterest.
Here at Easy Food Dehydrating, “dehydrate” always means using an electric food dehydrator — the easy, reliable way to dry food at home.
Click the "Save" button (above) to pin
this page’s ideas to your Pinterest board!
May 12, 26 09:01 AM
May 11, 26 09:07 AM
Apr 30, 26 09:10 AM

AFFILIATE DISCLOSURE: I am an Affiliate for Amazon, and other sellers of quality merchandise. Should you purchase an item through their links, I may receive compensation. The price you pay does not increase. THANKS for your support! Read full disclosure here.
easy FOOD DEHYDRATING: Making food preservation simple since 2010. I show you how to keep your food pantry full, whatever the reason or season!

HOME ARTICLES CONTACT DMCA DISCLAIMER FAQ PRIVACY SITEMAP TERMS TESTIMONIALS
ALL CONTENT COPYRIGHT © 2010-2025 • ALL RIGHTS RESERVED REGARDLESS OF LINKS OR ATTRIBUTIONS.
POWERED BY SBI! (SOLO BUILD IT!)
As an Amazon Associate, I earn from qualifying purchases.