- Home
- How to Store Dehydrated Food
- Conditioning Fruits and Vegetables After Dehydrating

Conditioning Fruits and Vegetables After Dehydrating: What to Know

Conditioning home-dried fruit is an important step before final packaging and storage. It allows moisture remaining in the pieces to become more evenly distributed and helps you identify fruit that needs additional drying. Properly dried vegetables generally do not need conditioning because they should already be crisp or brittle.
✅ Quick Answer: What is conditioning after dehydrating fruits and vegetables?
Conditioning is a 7–10-day process generally used for home-dried fruit—not vegetables. Loosely place the cooled fruit in sealed glass or food-safe plastic containers, shake the containers daily, and check for condensation. If moisture appears, return the fruit to the dehydrator for additional drying. Properly dried vegetables generally do not need conditioning because they contain much less moisture than dried fruit.
Below, I’ll show you how to condition dried fruit correctly, what to do if you see moisture, and how the process differs for dried vegetables.
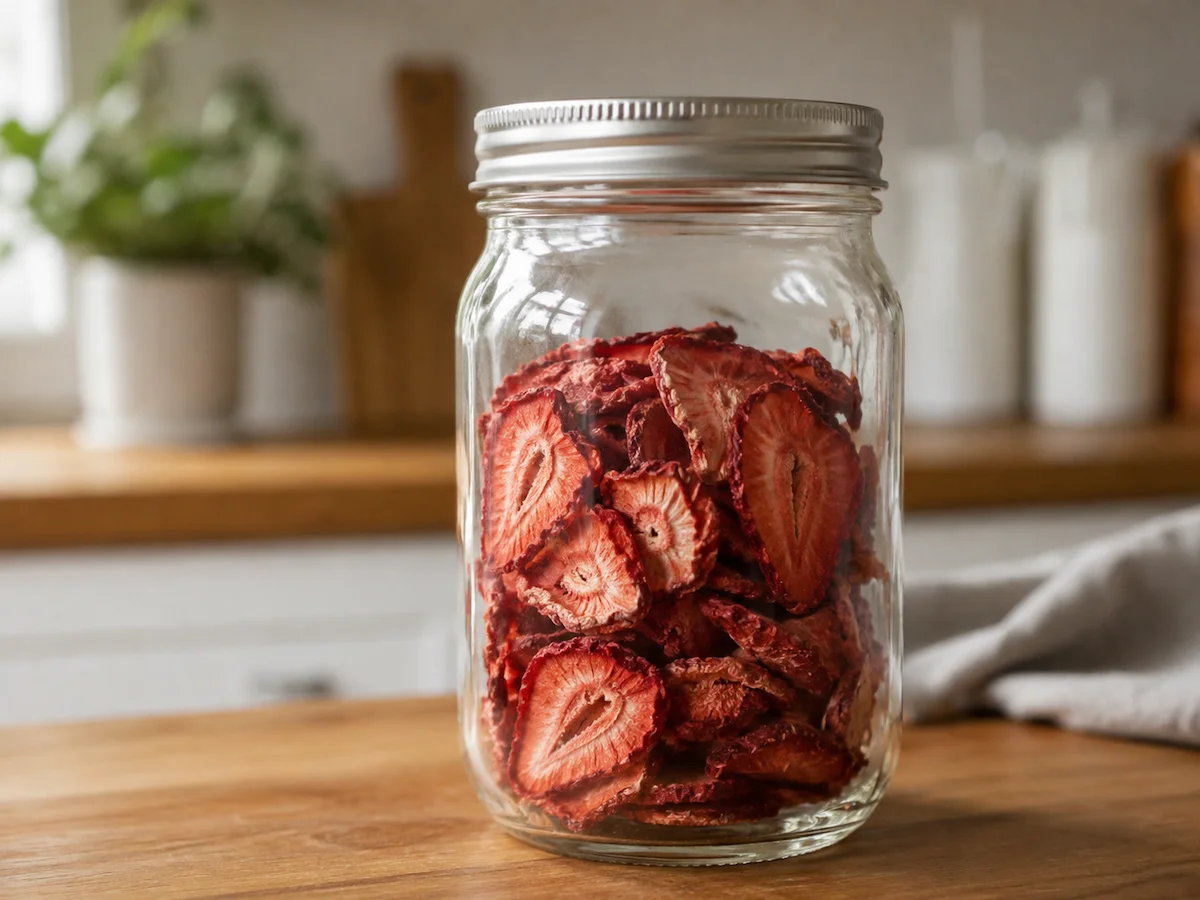
Once the dried fruit has cooled completely, pack it loosely into clean, dry glass or food-safe plastic containers. Fill each container no more than about two-thirds full so the pieces have room to move, and then seal the container.
Leave the fruit at room temperature for 7–10 days. Shake or gently turn the container every day to separate the pieces and check for condensation or other signs of moisture.
If condensation appears, return the entire batch to the dehydrator and continue drying it until it reaches the proper dryness. Allow the fruit to cool completely, and then restart the 7–10-day conditioning period.
What Containers Work Best for Conditioning Dried Fruit?
Glass Jars vs. Food-Safe Plastic Containers
Clean, dry glass jars with tight-fitting lids are the easiest containers to use for conditioning dried fruit. Because the jars are transparent, you can easily check for condensation, and their rigid sides make it easy to shake or turn the fruit each day.
Food-safe plastic containers with tight-fitting lids can also be used. Whichever type you choose, loosely fill each container no more than about two-thirds full so the fruit pieces have room to move.
The lid should be closed securely during conditioning, but this is not the time to vacuum-seal the fruit or add oxygen absorbers. Wait until the fruit has completed the full conditioning period without showing any signs of excess moisture.

Do Fruits and Vegetables Both Need Conditioning?
No. Home-dried fruit is generally conditioned before final packaging, but properly dried vegetables ordinarily do not need this step.
Condition Fruit, but Thoroughly Dry Vegetables
Dried fruit may retain approximately 20% moisture and remain pliable. Because individual pieces may contain different amounts of moisture, conditioning helps equalize that moisture and reveals whether any pieces require additional drying.
Properly dried vegetables contain much less moisture—approximately 10%—and should generally be crisp or brittle. Because they are dried more thoroughly than fruit, they ordinarily do not need to be conditioned.
These recommendations follow the National Center for Home Food Preservation’s guidance on conditioning fruit and determining the dryness of vegetables.
Do not rely solely on how a few pieces of fruit feel when deciding whether to skip conditioning. Pieces of different sizes or from different areas of the dehydrator may not have dried evenly. Conditioning the entire batch provides an opportunity to discover that uneven moisture before the fruit is packaged for storage.
If cooled vegetables are not as crisp or brittle as directed in the individual vegetable’s drying instructions, return them to the dehydrator. Continue drying them until they pass the appropriate dryness test, and then allow them to cool completely before packaging.
Do Dehydrated Mushrooms Need Conditioning?
Mushrooms are fungi rather than vegetables, but they follow the same general storage principle: they must be dried thoroughly before packaging. Properly dried mushroom pieces should be brittle or crisp rather than soft, flexible, or damp.
Authoritative home-food-preservation guidance does not identify mushrooms as a special food that must always be conditioned or automatically returned to the dehydrator for a second drying period.
Allow the mushrooms to cool before testing them. If any pieces still bend or feel soft instead of breaking, return the entire batch to the dehydrator and continue drying. Once the mushrooms are thoroughly dry and completely cool, package them promptly in airtight containers.
What If Dried Fruit Feels Sticky During Conditioning?
Fruit pieces may sometimes cling together because of their natural sugars, so stickiness alone is not always a reliable test for dryness. Check the recommended dryness test for the particular fruit. Properly dried fruit is generally pliable or leathery, but it should not contain visible moisture when a cooled piece is cut or squeezed.
Signs the Fruit Needs More Drying
Shake or gently turn the container every day and watch for fruit that becomes unusually soft, wet, or tightly clumped. Condensation on the inside of the container is a definite sign that the batch needs additional drying.
If you see condensation or other evidence of excess moisture, return the entire batch to the dehydrator and continue drying until it reaches the proper dryness. Let the fruit cool completely, place it in a clean, dry container, and restart the full 7–10-day conditioning period.
Do not vacuum-seal or package the fruit for long-term storage while there is any evidence of excess moisture.
Condensation Means Redry; Mold Means Discard
Conditioning does not make inadequately dried fruit safe. It is an observation period that helps you discover uneven moisture before the fruit goes into final storage.
If You See Condensation
Return all the fruit from that container to the dehydrator and continue drying it until it reaches the proper dryness. Allow it to cool completely, place it in a clean, dry container, and restart the full 7–10-day conditioning period.
If You See Mold
Discard all the fruit in that container. Do not taste it, remove only the visibly moldy pieces, or attempt to make the remaining fruit safe by redrying it.
Conditioning fruit in several smaller containers can prevent one problematic piece from ruining an entire large batch.
How to Condition Dehydrated Fruit Step by Step
Follow these seven steps after the fruit has finished drying:
- Test the fruit for dryness. Allow a few representative pieces to cool before testing them according to the instructions for that particular fruit. Warm fruit may feel softer and moister than it really is.
- Cool the entire batch completely. Placing warm fruit in a closed container can create condensation.
- Loosely fill clean, dry containers. Use glass jars or food-safe plastic containers with secure lids. Fill each container no more than about two-thirds full so the pieces can move when shaken.
- Close the containers securely. Do not vacuum-seal the fruit or add oxygen absorbers during the conditioning period.
- Condition the fruit for 7–10 days. Keep the containers at room temperature and away from direct sunlight, heat, and excess humidity.
- Shake and inspect the fruit daily. Gently shake or turn each container to separate the pieces. Look for condensation, wetness, unusual softness, tight clumping, or mold.
- Package the fruit after conditioning. If no excess moisture or mold appears during the full conditioning period, transfer the fruit to its final airtight packaging. Label it with the type of fruit and packaging date, and store it in a cool, dry, dark location.
Your Food Conditioning Questions—Answered
Still unsure about conditioning? These answers cover the most common questions about preparing dried fruit for storage.
How long should I condition dehydrated fruit?
How long should I condition dehydrated fruit?
Condition home-dried fruit for 7–10 days. Shake or gently turn the container every day and inspect it for condensation, unusual wetness, or mold.
Do dehydrated vegetables need conditioning?
Do dehydrated vegetables need conditioning?
Properly dried vegetables generally do not need conditioning. They should be crisp or brittle when cool and should be packaged promptly in airtight containers. If the vegetables are still soft or flexible when they should be brittle, return them to the dehydrator.
Do I need to condition fruit if it feels completely dry?
Do I need to condition fruit if it feels completely dry?
Conditioning is still recommended for home-dried fruit intended for storage. Testing a few pieces cannot always reveal uneven moisture throughout the entire batch.
Can I condition dried fruit in glass jars?
Can I condition dried fruit in glass jars?
Yes. Clean, dry glass jars with tight-fitting lids are ideal because they make condensation easy to see and allow the fruit to be shaken each day. Food-safe plastic containers with secure lids can also be used.
What should I do if I see condensation?
What should I do if I see condensation?
Return all the fruit from that container to the dehydrator and continue drying it until it reaches the proper dryness. Cool it completely, place it in a clean, dry container, and restart the full 7–10-day conditioning period.
What should I do if I find mold?
What should I do if I find mold?
Discard all the fruit in that container. Do not taste it, remove only the visibly affected pieces, or try to save the batch by redrying it.
Is conditioning the same as final storage?
Is conditioning the same as final storage?
No. Conditioning is a temporary observation period before final packaging. Once the fruit has completed 7–10 days without showing excess moisture or mold, place it in airtight packaging and store it in a cool, dry, dark location.
For more information about packaging, containers, and moisture protection, see How to Store Dehydrated Food for Long-Term Freshness.
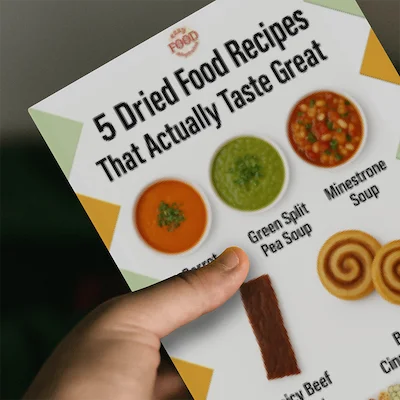
Before you head off, don’t forget to grab your free 5 Dried Food Recipes That Actually Taste Great PDF below—featuring carrot soup, minestrone, split pea soup, spicy beef jerky, and even banana cinnamon rolls.
5 Free Dried Food Recipes
That Actually Taste Great
Put your dried food to delicious use!
Five very different recipes.
Not one dull bite...
5 Free Dried Food Recipes
That Actually Taste Great
Put your dried food to delicious use!
Five very different recipes.
Not one dull bite...
More From Easy Food Dehydrating
Be Prepared for Hurricane Season: Food, Water, Safety
Be prepared for hurricane season: store water, prep dehydrated foods, secure shutters, and gather supplies early.
Dehydrating Food Articles: Dehydrate Food Safely
Dehydrating Food Articles: See WHY you should be dehydrating food right now...
Fight Inflation and Be Survival Savvy with Dehydrating
Fight inflation and be survival savvy: dehydrate food, bake basics, and cut waste to save money and stock your pantry.
Hurricanes Frances and Jeanne: Our 2004 Survival Story
How we survived hurricanes Frances and Jeanne in 2004—lessons learned, food loss, and how dehydration changed our prep.
Rehydrating Dehydrated Food: Easy Methods That Work
Learn how to rehydrate dehydrated food with safe water ratios and soaking times for fruits, vegetables, and meat, plus storage and texture tips.
Greenhouse Using Recycled Windows: Bev’s Clever Build
See how Bev combined recycled windows with new materials to create a greenhouse and potting shed beneath her deck, complete with bins, shelves, and smart ideas.



More From Easy Food Dehydrating
Be Prepared for Hurricane Season: Food, Water, Safety
Be prepared for hurricane season: store water, prep dehydrated foods, secure shutters, and gather supplies early.
Dehydrating Food Articles: Dehydrate Food Safely
Dehydrating Food Articles: See WHY you should be dehydrating food right now...
Fight Inflation and Be Survival Savvy with Dehydrating
Fight inflation and be survival savvy: dehydrate food, bake basics, and cut waste to save money and stock your pantry.
Hurricanes Frances and Jeanne: Our 2004 Survival Story
How we survived hurricanes Frances and Jeanne in 2004—lessons learned, food loss, and how dehydration changed our prep.
Rehydrating Dehydrated Food: Easy Methods That Work
Learn how to rehydrate dehydrated food with safe water ratios and soaking times for fruits, vegetables, and meat, plus storage and texture tips.
Greenhouse Using Recycled Windows: Bev’s Clever Build
See how Bev combined recycled windows with new materials to create a greenhouse and potting shed beneath her deck, complete with bins, shelves, and smart ideas.
Before You Go...
If you enjoyed this page, tap the ❤️ in the lower right-hand corner.
It saves this page to your Grow bookmarks so you can find it again later.
You’ll also see quick share buttons to copy the link, post to Facebook,
or save it straight to Pinterest.
What We Mean by “Dehydrate”
Here at Easy Food Dehydrating, “dehydrate” always means using an electric food dehydrator — the easy, reliable way to dry food at home.
What We Mean by “Dehydrate”
Here at Easy Food Dehydrating, “dehydrate” always means using an electric food dehydrator — the easy, reliable way to dry food at home.


LATEST READS on EFD


-
Better Than Bouillon: Uses, Storage & Cube Comparison
Sep 11, 26 10:46 AM
 Learn how to use Better Than Bouillon, how much makes one cup of broth, how it compares with cubes, and how to store opened jars safely.
 -
How to Dehydrate Bananas for Easy, Healthy Snacking
Sep 09, 26 02:32 PM
 Learn how to dehydrate bananas at 135°F, reduce browning, test for doneness, condition, and store them for delicious homemade snacks.
 -
How to Dehydrate Peas: Fresh, Frozen & Canned
Sep 09, 26 11:21 AM
 Learn how to dehydrate fresh, frozen, or canned peas with the right preparation, temperature, drying time, storage tips, and an easy glove trick!
Unlock the Secrets of Food Dehydrating... from Fruit 'n' Veg to Doggie Dinners!


AFFILIATE DISCLOSURE: I am an Affiliate for Amazon, and other sellers of quality merchandise. Should you purchase an item through their links, I may receive compensation. The price you pay does not increase. THANKS for your support! Read full disclosure here.
easy FOOD DEHYDRATING: Making food preservation simple since 2010. I show you how to keep your food pantry full, whatever the reason or season!

HOME ARTICLES CONTACT ADVERTISING DISCLOSURE DISCLAIMER FAQ PRIVACY SITEMAP TERMS TESTIMONIALS
ALL CONTENT COPYRIGHT © 2010-2025 • ALL RIGHTS RESERVED REGARDLESS OF LINKS OR ATTRIBUTIONS.
POWERED BY SBI! (SOLO BUILD IT!)
As an Amazon Associate, I earn from qualifying purchases.