What We Mean by “Dehydrate”
Here at Easy Food Dehydrating, “dehydrate” always means using an electric food dehydrator — the easy, reliable way to dry food at home.
- Home
- Food Vacuum Sealer Instructions (Part 1) for FoodSaver V2240 Model
- Food Vacuum Sealer Instructions (Part 2) for FoodSaver V2240 Model - Part 2

Food Vacuum Sealer Instructions –
Easy How-To Guide (Part 2)

Welcome to Food Vacuum Sealer Instructions.
This is Part 2 for the FoodSaver V2240
(See part 1 here.)
Vacuum sealing is one of the easiest ways to keep your dehydrated foods, meats, and even soups safe and fresh for months longer. In this Part 2 guide, I’ll walk you through exactly how to place your bags, get the perfect seal, and even handle Mylar bags the right way.
✅ Quick Answer: How do you use a FoodSaver vacuum sealer?
Place the bag’s cut edge in the vacuum channel, clamp it with the lever, and press Vacuum & Seal. For Mylar bags, skip the vacuum step and press Seal only. This method locks out air, prevents spoilage, and keeps dehydrated food fresh much longer.
Whether you’re sealing green beans, jerky, or soup ingredients for long-term storage, these FoodSaver V2240 instructions will help you avoid common mistakes and save time in the kitchen.
Start Here: Proper Bag Placement for a Perfect Seal

Step-by-Step Food Vacuum Sealer Instructions (Part 2)
The photo above shows you WHERE TO PLACE the CUT EDGE of your food vacuum sealer bag.
The edge of the bag goes right in the center of the black oval vacuum channel.
Hold the bag in place with your fingertips at the front edge of the machine and try to keep them out of the way when you close the lid. (Takes a bit of practice!)
Press the lever down that's on the right side of the
machine. This holds the bag in place (see photo farther down the page) and must be done so it's ready to have the air drawn out.

Smooth the Bag First: Prevent Punctures & Spoilage
While the bag is clamped, I smooth out the contents of the bag, making it lie pretty flat.
Doing this small step reduces bag punctures because when most food dries, it becomes brittle, and sharp. Smoothing out the bag before vacuum-sealing it makes it much easier to store it later on in the Mylar bags.
Next, simply press the dark "vacuum and seal" button. You'll now experience the air being drawn out of the bag, and this takes about 6-10 seconds.
Seal Mode Explained: How the Auto-Switch Works

When the vacuuming is finished, the machine switches over to the "seal" mode—and the seal button will light up in red - as shown in the photo.
Let the machine seal the bag and be patient! This takes about 6 seconds.
When you see the light go off, raise the handle (the handle you just used to lock the lid down to keep the bag in place). Raise the lid, and remove the vacuumed and sealed bag!
NEXT UP—Important:
For Mylar Bags Only!
NOTE:
Sometimes we do not need to use the vacuum feature—
such as when we are simply sealing the Mylar bags.
How to Seal Mylar Bags the Correct Way

Look at the 'open wide' photo above and you'll see the dark rectangular strip on the bottom part of the machine, just in front of the oval
vacuum-sealer channel. This strip works in conjunction with the upper bar/roller.
The lower strip is flush against the Mylar bag's bottom when the lid is closed. Just press the SEAL button this time, and your Mylar bag will be sealed with no vacuuming taking place!
When the lid is down, the top bar heats up and the heated bar works to seal the Mylar bag.
Simply place the edge of your Mylar bag beyond the first dark strip—about an inch is good. There is no need for the bag's edge to be in the center of the oval vacuum chamber when sealing.
Also, don't be tempted to "shorten" your Mylar bags by cutting off the excess at the top. Why? Because when you want to take a vacuum-sealed package out of the Mylar bag, you have to cut off the top of the Mylar bag's seal.
Sealing pretty close to the top of Mylar bags leaves you with "room" to re-seal the Mylar bag over and over.
Pro Tip: Let the Heating Strip Cool Between Seals
Pro Tip:
Let the Heating Strip
Cool Between Seals
When you're vacuuming and sealing a few plastic
vacuum-sealer bags or just sealing Mylar bags—
please wait 20
seconds between each sealing
to allow the strip to cool down before
re-use!
When you're vacuuming and
sealing a few plastic vacuum-
sealer bags or just sealing
Mylar bags— please wait
20
seconds between
each sealing
to allow the strip to
cool down before
re-use!
This is a great feature because if that strip is still hot, it may partially seal the new bag BEFORE you get a chance to draw out the air. In fact, the FoodSaver will flash rapidly letting you know that it's not ready yet to do a new seal, or a vacuum and seal.
Using Standard Vacuum-Sealer Bags
Shown below are some green beans before and after vacuuming.

Labeling Vacuum-Sealed Bags for Easy Storage
I use a black felt-tipped pen for writing the bag's contents and the date on the very top of the bag
(above the seal) that I've just vacuumed.
Yes, I know you can see through the bag, but sometimes green beans can be mistaken for peas! :-)

Thanks for reading our food vacuum sealer instructions; remember, this is part 2.
Click the link to read Part 1 of our food vacuum sealer instructions.
Bonus Tip: Double Seal for Extra Peace of Mind
I'd like to add this that our visitor, Paul, sent in recently. I echo his sentiments.
"When
I've vacuum-sealed a bag, I seal it again by moving the bag slightly—and seal again above the first seal—in effect, sealing it twice as a
safety measure. Sometimes bags puncture during storage, or the seal may
fail. Remember to rotate your stock and check for any 'soft' bags."
— Thanks for writing in Paul!
Compare Top FoodSaver Models & Starter Kits
The FoodSaver machines remove air, one of the main causes of mold and food spoilage - and they create an airtight seal to lock in freshness.

Bonsenkitchen Vacuum Sealer Machine
The Bonsenkitchen Vacuum Sealer is a powerful, low-noise machine built for high-speed, continuous use. It features a handle-locked design, built-in cutter, and comes with 2 bag rolls plus 100 vacuum bags — everything you need for easy, efficient food preservation.

Keep food fresh up to 5x longer with the FoodSaver 4800 2-in-1 Vacuum Sealer. Automatic sealing, built-in handheld sealer, and easy-clean drip tray make it perfect for everyday meals or bulk storage.

FoodSaver 8" x 20' rolls, 6-pk
FoodSaver GameSaver 8" x 20' Vacuum Seal Long Roll with BPA-Free Multilayer Construction
- Keep game and fish fresh up to 5x Longer with FoodSaver GameSaver 8-inch rolls.
- Create custom-sized bags - simply cut a piece to your desired length, seal one end, fill, and then vacuum seal.
- 8" x 20' rolls
- BPA-free
- Pack of six rolls

FoodSaver 1-Quart Food Storage Sealer bags
- Constructed of durable yet pliable material that creates an airtight barrier around foods, extending freshness and locking in flavors
-
Quickly and easily portion food
from bulk shopping or when storing leftovers.
- BPA-FREE MATERIAL: Safe for storing raw and cooked foods, it's also freezer, refrigerator, microwave, and boil-safe
- 1-quart size precut bags, 44-count

FoodSaver Pint-size Food Storage Sealer bags
- Constructed of durable yet pliable material that creates an airtight barrier around foods, extending freshness and locking in flavors
-
Quickly and easily portion food
from bulk shopping or when storing leftovers.
- BPA-FREE MATERIAL: Safe for storing raw and cooked foods, it's also freezer, refrigerator, microwave, and boil-safe
- 1-pint size precut bags, 28-count
As an Amazon Associate, I earn commission from qualifying purchases. The price you pay does not increase. Read disclosure here.
Frequently Asked Questions About Food Vacuum Sealers
Do I always need to vacuum before sealing?
Do I always need to vacuum before sealing?
Not always. For Mylar bags, you always seal without vacuuming if you’re storing non-perishable foods like dried grains or pasta. For dehydrated fruits and veggies, vacuuming first gives you the best long-term results.
Why does my vacuum sealer stop?
Why does my vacuum sealer stop?
This usually happens when the heating strip hasn’t cooled enough between uses. Always wait about 20 seconds before sealing your next bag to avoid partial seals.
Can I reseal bags after opening them?
Can I reseal bags after opening them?
Yes! Cut open the bag slightly below the seal, then reseal the top edge. This works especially well if you left extra space when sealing the first time.
What kind of marker works best for labeling?
What kind of marker works best for labeling?
A black permanent marker or felt-tip pen works great.
Thanks for following along with my Food Vacuum Sealer Instructions – Part 2. Once you’ve mastered sealing, you’ll be ready to stock up on soups, jerky, and snacks that last!
And before you go, don’t miss your chance to grab the free 5 Dried Food Recipes You'll Actually Love PDF (below). Inside, you’ll find my personal favorites: carrot soup, minestrone soup, split pea soup, spicy beef jerky, and banana cinnamon rolls. They’re simple, tasty, and the perfect way to put your dehydrating and sealing skills to work.
(Reminder to visit Part 1 here.)
Get 5 Dried Food Recipes You'll Actually Love

Here's where you can get your copy of our all new
5 Dried Food Recipes (That Actually Taste Great)
They're my all-time favorite easy dried food meals!
Get it here right now.
For Free!
You Might Like These
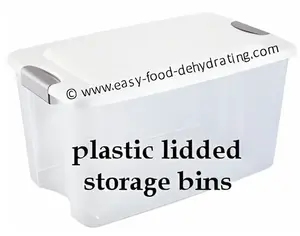
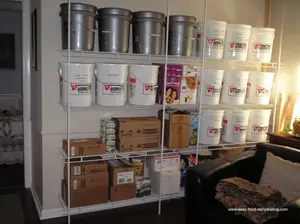
Plastic-Lidded Bins for Long-Term Food Storage Choices
Plastic-lidded bins keep dehydrated foods protected. Get airtight, sizing, and setup tips for long-term storage.
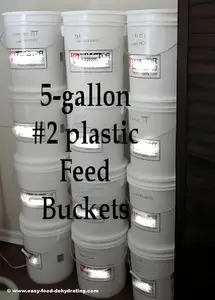
Feed Buckets With Lids: Safe Long-Term Food Storage
Food-grade feed buckets with lids keep dehydrated foods safe—airtight, pest-free, and stackable for long-term storage.
Food Vacuum Sealer Bags: Best Picks for Dehydrated Food
How to choose the best food vacuum sealer bags for dehydrated food—thickness, texture, sealing tips, and FAQs included!
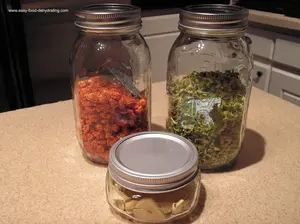
Mason Jars for Dehydrated Food: Fresh, Easy Storage
Airtight, reusable Mason jars keep dehydrated foods fresh & visible—perfect for quick daily use and long-term storage.
Dehydrated Food Storage Wall: Easy DIY Pantry Hub
Build a dehydrated food storage wall with DIY tips, cost-saving ideas, and photos to inspire your pantry plan.
Nesco Food Dehydrator: Reliable, Budget-Friendly Choice
The Nesco Food Dehydrator is a top pick for beginners or pros. Expandable trays, easy setup, and reliable results!

You Might Like These
Plastic-Lidded Bins for Long-Term Food Storage Choices
Plastic-lidded bins keep dehydrated foods protected. Get airtight, sizing, and setup tips for long-term storage.
Feed Buckets With Lids: Safe Long-Term Food Storage
Food-grade feed buckets with lids keep dehydrated foods safe—airtight, pest-free, and stackable for long-term storage.
Food Vacuum Sealer Bags: Best Picks for Dehydrated Food
How to choose the best food vacuum sealer bags for dehydrated food—thickness, texture, sealing tips, and FAQs included!
Mason Jars for Dehydrated Food: Fresh, Easy Storage
Airtight, reusable Mason jars keep dehydrated foods fresh & visible—perfect for quick daily use and long-term storage.
Dehydrated Food Storage Wall: Easy DIY Pantry Hub
Build a dehydrated food storage wall with DIY tips, cost-saving ideas, and photos to inspire your pantry plan.
Nesco Food Dehydrator: Reliable, Budget-Friendly Choice
The Nesco Food Dehydrator is a top pick for beginners or pros. Expandable trays, easy setup, and reliable results!
Before You Go...
If you enjoyed this page, tap the ❤️ in the lower right-hand corner.
It saves this page to your Grow bookmarks so you can find it again later.
You’ll also see quick share buttons to copy the link, post to Facebook,
or save it straight to Pinterest.
What We Mean by “Dehydrate”
Here at Easy Food Dehydrating, “dehydrate” always means using an electric food dehydrator — the easy, reliable way to dry food at home.
Click the "Save" button (above) to pin
this page’s ideas to your Pinterest board!


LATEST READS on EFD
-
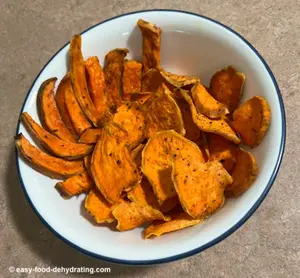
Dehydrated Sweet Potato Treats: Human and Dog Approved
May 12, 26 09:01 AM
 Make these dehydrated sweet potato treats for you AND your dog. Plus dog-safe tips for sharing the love of snacking!
 -
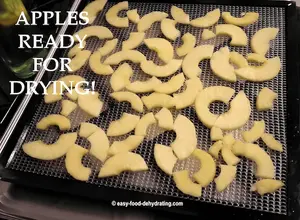
Dehydrate Apples for Snacks and Pantry Storage
May 11, 26 09:07 AM
 Dehydrate apples easily: slice, prevent browning, dry at 125–135°F, and store for snacks, pies, or pantry use.
 -
Green Split Pea Soup Made Easy in the Slow Cooker
Apr 30, 26 09:10 AM
 Easy slow cooker green split pea soup with ham, carrots, and celery—comforting, flavorful, and simple to make.

Unlock the Secrets of Food Dehydrating... from Fruit 'n' Veg to Doggie Dinners!


AFFILIATE DISCLOSURE: I am an Affiliate for Amazon, and other sellers of quality merchandise. Should you purchase an item through their links, I may receive compensation. The price you pay does not increase. THANKS for your support! Read full disclosure here.
easy FOOD DEHYDRATING: Making food preservation simple since 2010. I show you how to keep your food pantry full, whatever the reason or season!

HOME ARTICLES CONTACT DMCA DISCLAIMER FAQ PRIVACY SITEMAP TERMS TESTIMONIALS
ALL CONTENT COPYRIGHT © 2010-2025 • ALL RIGHTS RESERVED REGARDLESS OF LINKS OR ATTRIBUTIONS.
POWERED BY SBI! (SOLO BUILD IT!)
As an Amazon Associate, I earn from qualifying purchases.