What We Mean by “Dehydrate”
Here at Easy Food Dehydrating, “dehydrate” always means using an electric food dehydrator — the easy, reliable way to dry food at home.
- Home
- Dehydrating Fruits: Step-by-Step Guides by Type
- How to Dehydrate Grapes

How to Dehydrate Grapes for Nature’s Candy Anytime

Want to make the juiciest, plumpest raisins right at home? Learn how to dehydrate grapes into chewy, sweet treats that beat anything from the store.
✅ Quick Answer: How do you dehydrate grapes into raisins?
To dehydrate grapes, rinse and slice them in half, then dry them on dehydrator trays at 125°F–135°F. Small grapes take 6–10 hours, larger ones 10–15. Whole grapes may take up to 36 hours. Cut-side-up helps prevent mess and ensures even drying.
Whether you’re snacking, baking, or prepping trail mixes, homemade raisins are naturally better.
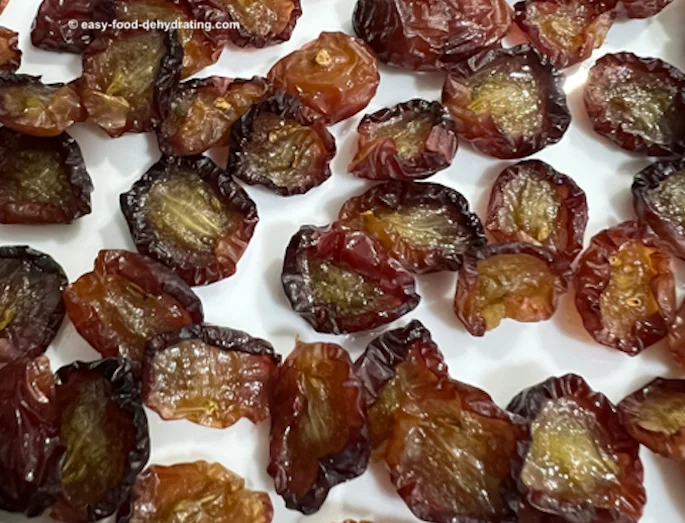
No sulfur, no additives—just real grapes transformed into nature’s candy using your food dehydrator.
Are Raisins Really Just Dried Grapes? Let’s Settle It
You'll find homemade raisins taste better than the boxed variety... and our raisins are far plumper than the compressed stuffed in a box store-bought raisins, too.
Not only that, they just plain taste better!
OK, you could also say that raisins are grapes in disguise! What say you?
What’s Inside a Grape? Nutrition Information
Did you know that grapes have been dried for thousands of years and have many hidden health benefits?
VITAMINS: Vitamins A, C, and K before they become raisins BUT when they ARE raisins, they have more Choline, Niacin, Folate, and Betaine, with higher trace amounts of Thiamine, and Riboflavin!
MINERALS: Raisins beat grapes hands down in Potassium, Calcium, Magnesium, and Fluoride.
Both grapes and raisins contain Omega-3 and Omega-6 fatty acids.
12 Surprising Benefits of Grapes and Raisins
I know grapes are good for us... and here is why:
Top 12 Top Health Benefits of Grapes:
- Contains antioxidants like resveratrol that protect cells from free radical damage and may help prevent cancer and heart disease.
- Provide potassium which helps balance fluids and mineral levels in the body. Important for blood pressure.
- Rich in vitamin K which plays a role in proper blood clotting and bone health.
- May have anti-inflammatory properties that may help reduce joint pain and arthritis symptoms.
- Their pigments provide vision-protective carotenoids like lutein and zeaxanthin.
- May support healthy digestion due to nutrients like organic acids.
- Packed with vitamin C to support immune system function.
- B vitamins in grapes, especially vitamin B6 (pyridoxine), assist in red blood cell production.
- May help prevent obesity due to polyphenols that suppress fat genes.
- Compounds in red grapes may help protect memory, delaying the effects of Alzheimer's.
- Nutrients like magnesium and potassium are electrolytes that can boost energy levels.
- Excellent sources of hydration due to their high water content when eaten raw. Can help flush toxins.
Check out how to dehydrate other kinds of fruits here.
My Best Tips for Juicier, Faster Raisins

Step-by-Step: How to Dehydrate Grapes at Home
Get ready to dehydrate grapes of any color and turn them into delicious, plump raisins!
For the richest, darkest raisins, opt for black or dark red grapes.
If you love classic red raisins, go for red grapes.
Prefer a lighter, golden hue? Green grapes will give you beautiful sultanas with a mild, sweet flavor.
It's Super Easy to Make Raisins:
- Rinse the grapes and blanch them in a small amount of boiling water if drying whole.
- Cut the grapes in half (or quarters) and place them on your food dehydrator sheets, cut side up to prevent drips on the lower trays!
- Turn on your dehydrator and set the temperature between 125°F and 135°F (or per your food dehydrator's instructions).
- Drying time: Small grapes: Between 6 – 10 hours. For large grapes, 10 - 15 hours. Whole (unsliced) grapes: 15 - 36 hours.
💡 Tip: Outside the U.S.? Most dehydrating temps here are listed in Fahrenheit - use our quick converter to see the Celsius equivalent for your machine.
Read about blanching here (my page refers to veg, but also applies to certain fruits). Blanching reduces drying time because the quick dip in boiling water cracks the skins allowing the air to "get in there" which aids in drying.
But... and there's always a but! But if you're short on time and don't want to blanch your whole grapes first, you have my permission to skip it! :-)
See how my large red grapes turned out, scroll down a bit.
- Dehydrated grapes will feel pliable when sufficiently dried.
- Remember to rotate your food dehydrator trays, for even drying.
Why Homemade Raisins Taste Better Than Store-Bought
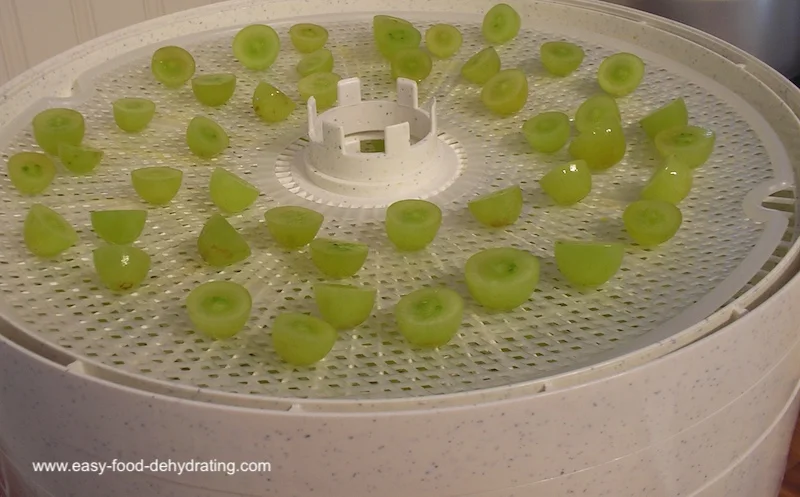
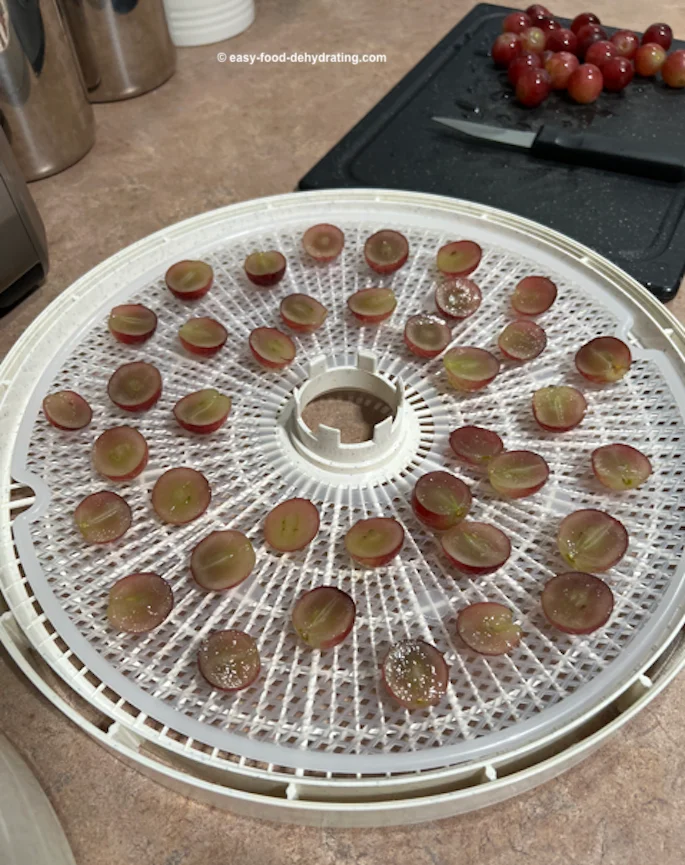 Here's how to dehydrate grapes: "cut-side" up!
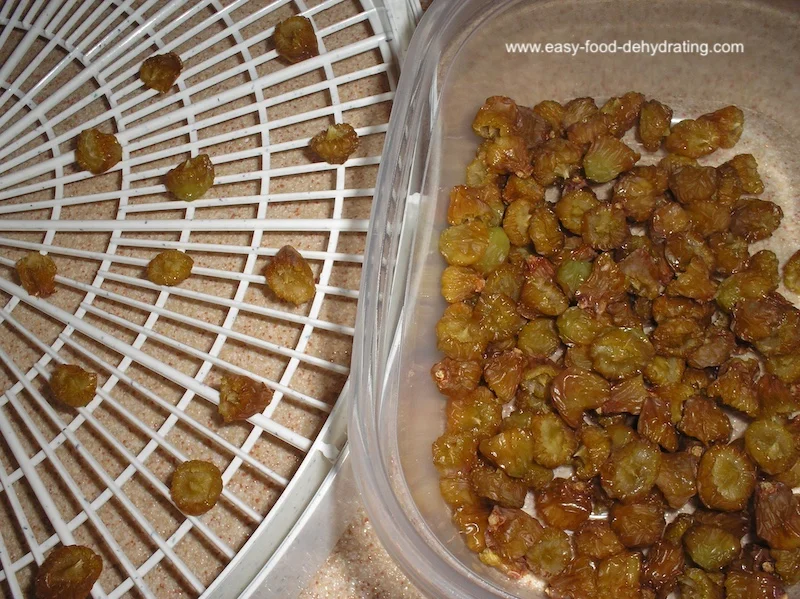
And here they are, approximately 15 hours later!
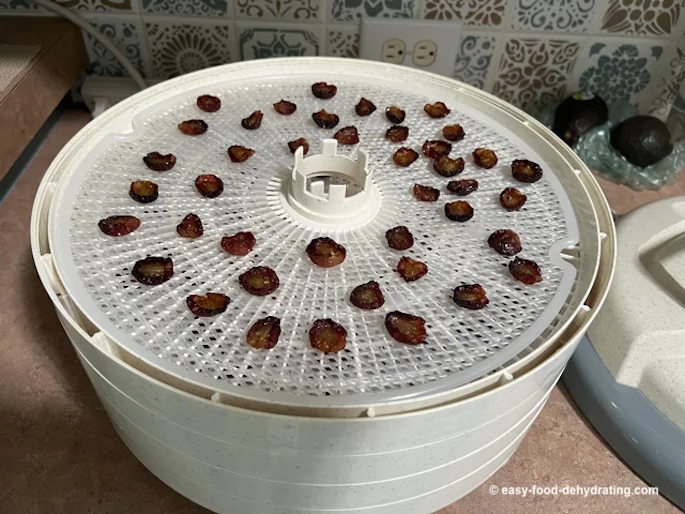
This Simple Prep Trick Makes All the Difference
If you blanch WHOLE grapes first (see step one in the pink "how to" box above) you can save a ton of drying time in the dehydrator.
But I'm lazy. I skipped the blanching step and simply cut them in half after rinsing them. I put them "cut side up" on the Nesco dehydrator sheets that are called Clean-a-Screen so the grape juice doesn't drip down to the trays below!
These Clean-a-Screens really help with clean up, as their name implies! Just a quick wipe-over of the actual tray with a damp dishcloth after the Clean-a-Screen is taken out is all you need.
For cleaning the removable Clean-a-Screens: I use Dawn Powerwash spray and let it sit a few seconds (in the bottom of my sink) and then use a scrubby pad to clean both sides.
You can either let them air dry in a dish drainer, or dry with a super absorbent dish towel (I use dish towels made from bamboo, they are awesome!)
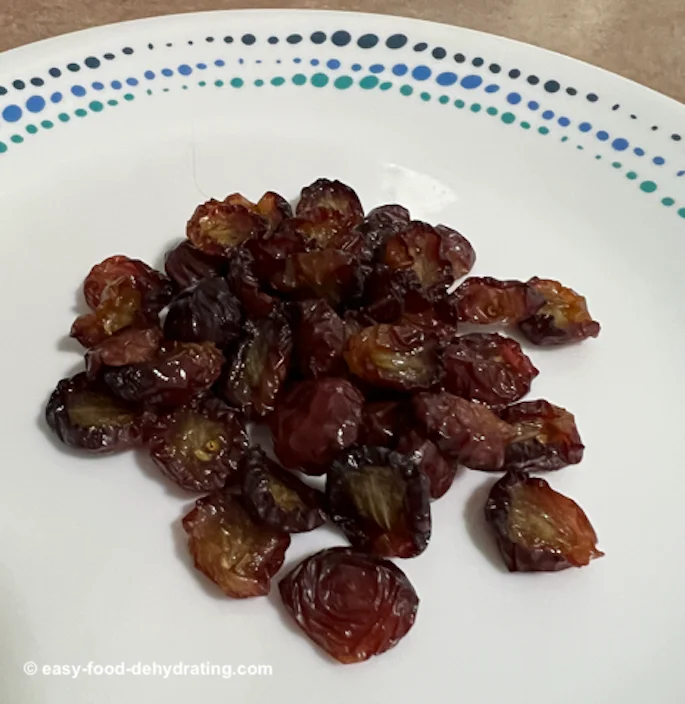
Because I didn't blanch them whole first, the drying time took 15 hours at 135°F. Drying times do vary, depending on the room temperature and humidity.
I used to dry the grapes 'whole' but the trays got really
sticky... and they took far longer to dehydrate. Cutting the grapes in half is how I now make raisins.
Homemade raisins have that sweetness, but also a great tangy/tart taste too! (Try saying that fast five times!)
You'll find they are really easy to make and are larger and much juicier than the boxed store variety too.
Save Hours: Cut Grapes Before Dehydrating
Reminder: If drying your grapes whole, the drying time jumps to 15 to 36 hours, even with blanching, so please bear that in mind.
I highly recommend cutting the grapes in half AND drying them "cut side up" so they don't drip, as mentioned earlier!
My Favorite Knife for Slicing Grapes (and Why It Rocks)

Begin by Using a Good Sharp Knife by Cutluxe!
Check out this great chef's knife with a full tang that means the handle and blade "are one" so they can't come apart when we're slicin' and a dicin'.
I know these Cutluxe Chef knives may be a little expensive, but they do last pretty much a lifetime when you maintain their cutting edges.
As an Amazon Associate, I earn from qualifying purchases — this does not affect the price you pay. Read full disclosure.
Make Golden Raisins from Green Grapes—No Sulfur Needed
These golden raisins are often called sultanas. Commercially, they treat them with sulfur dioxide to retain the lighter color of the grape. But we don't have to!
For the green grapes, I simply wash and slice
the grapes in half, without blanching first. It works a treat! And zero additives.
Snacks, Smoothies, and More: Raisins for Every Occasion
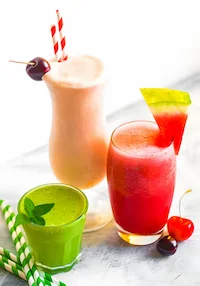
As you know, raisins make snacking easy—whether you're sat at home or are getting sunshine and exercise while backpacking in the great outdoors!
Also, they're great nutrition for kids... Add grapes to fruit roll-ups too and for added sweetness to smoothies!
Raisins are also great in bread recipes and in your breakfast cereal.
As mentioned at the top of the page, you'll notice that your homemade raisins are plumper, and a little more moist.
I absolutely love 'em and you will too!
FAQ: Dehydrating Grapes the Easy Way
Are raisins really just dehydrated grapes?
Are raisins really just dehydrated grapes?
Yes! Raisins are simply grapes with the moisture removed. Dehydrating concentrates their natural sugars, making them chewy, sweet, and plump—especially when made at home.
Are dried grapes good for weight loss?
Are dried grapes good for weight loss?
They can be! Raisins are high in fiber and low in fat, helping you feel full. Plus, they have a lower glycemic index than other snacks, which helps control cravings when eaten in moderation.
Do raisins have the same nutrients as fresh grapes?
Do raisins have the same nutrients as fresh grapes?
Not exactly. Raisins are more concentrated in fiber, potassium, and antioxidants due to moisture loss, but fresh grapes retain more vitamin C and hydration. Both are nutrient-rich in their own way.
How long does it take to dehydrate grapes?
How long does it take to dehydrate grapes?
Drying time depends on grape size and prep. Small halves: 6–10 hrs, large halves: 10–15 hrs, whole (blanched): 15–24 hrs, whole (unblanched): up to 36 hrs. Halving speeds things up!
Do I need to blanch grapes before dehydrating?
Do I need to blanch grapes before dehydrating?
Only if drying whole grapes. Blanching helps crack the skin so moisture escapes faster. But if you cut the grapes in half, you can skip this step and still get great results.
What’s the best way to store homemade raisins?
What’s the best way to store homemade raisins?
Store in an airtight container in a cool, dry spot. For longer shelf life, vacuum-seal or keep them in the fridge—or freeze them for months of freshness.
Making your own raisins is surprisingly easy—and tastier than anything you’ll find in a box. Whether you use them in baking, trail snacks, or smoothies, homemade raisins bring that perfect balance of tart and sweet.
Before you go, don’t forget to grab your free 5 Dried Food Recipes You'll Actually Love PDF (below). You’ll get delicious ideas like carrot soup, minestrone soup, split pea soup, spicy beef jerky, and even banana cinnamon rolls—perfect ways to enjoy your dried food stash.
Get 5 Dried Food Recipes You'll Actually Love
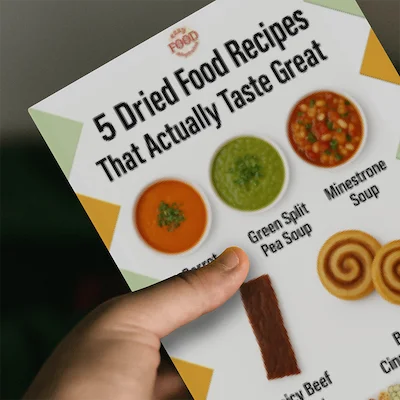
Here's where you can get your copy of our all new
5 Dried Food Recipes (That Actually Taste Great)
They're my all-time favorite easy dried food meals!
Get it here right now.
For Free!
You Might Like These
How to Dehydrate Pears: Easy Steps & Long Shelf Life
Dehydrate pears the easy way for snacks, smoothies, and baking. Save money and enjoy sweet pear flavor all year long!
How to Dehydrate Apricots: Quick, Easy, Step-by-Step
Learn how to dehydrate apricots: syrup blanch (3–4 min), drying temps and times, storage tips, and doneness checks.
How to Dehydrate Melons for Sweet Snacks & Storage
Learn how to dehydrate melons, including watermelon and honeydew, for sweet snacks and long-term storage!
How to Dehydrate Rhubarb: Easy Method + Sauce & Jam
Learn how to dehydrate rhubarb at 125–135°F in 6–14 hours, plus easy rhubarb sauce and jam recipes for year-round use.
How Much Fruit Fills a Dehydrator: Tray Guide & Tips
Find out how much fruit fills a dehydrator with our easy tray guide for Nesco, Excalibur, and Elite Gourmet machines.
How to Dehydrate Citrus: Lemons, Limes, and Oranges
Learn how to dehydrate citrus at home! Simple steps for lemons, limes & oranges—great for storage, snacks, and recipes.

You Might Like These
How to Dehydrate Pears: Easy Steps & Long Shelf Life
Dehydrate pears the easy way for snacks, smoothies, and baking. Save money and enjoy sweet pear flavor all year long!
How to Dehydrate Apricots: Quick, Easy, Step-by-Step
Learn how to dehydrate apricots: syrup blanch (3–4 min), drying temps and times, storage tips, and doneness checks.
How to Dehydrate Melons for Sweet Snacks & Storage
Learn how to dehydrate melons, including watermelon and honeydew, for sweet snacks and long-term storage!
How to Dehydrate Rhubarb: Easy Method + Sauce & Jam
Learn how to dehydrate rhubarb at 125–135°F in 6–14 hours, plus easy rhubarb sauce and jam recipes for year-round use.
How Much Fruit Fills a Dehydrator: Tray Guide & Tips
Find out how much fruit fills a dehydrator with our easy tray guide for Nesco, Excalibur, and Elite Gourmet machines.
How to Dehydrate Citrus: Lemons, Limes, and Oranges
Learn how to dehydrate citrus at home! Simple steps for lemons, limes & oranges—great for storage, snacks, and recipes.
Before You Go...
If you enjoyed this page, tap the ❤️ in the lower right-hand corner.
It saves this page to your Grow bookmarks so you can find it again later.
You’ll also see quick share buttons to copy the link, post to Facebook,
or save it straight to Pinterest.
What We Mean by “Dehydrate”
Here at Easy Food Dehydrating, “dehydrate” always means using an electric food dehydrator — the easy, reliable way to dry food at home.
Click the "Save" button (above) to pin
this page’s ideas to your Pinterest board!


LATEST READS on EFD


-
Green Split Pea Soup Made Easy in the Slow Cooker
Apr 30, 26 09:10 AM
 Easy slow cooker green split pea soup with ham, carrots, and celery—comforting, flavorful, and simple to make.
 -
12 Common Mistakes When Dehydrating Food (and Fixes)
Apr 20, 26 09:37 AM
 Discover 12 common mistakes when dehydrating food—and simple fixes for even drying, better flavor, and longer storage.
 -
Dehydrated Tomato Minestrone Soup – Easy Pantry Meal
Apr 16, 26 10:32 AM
 Make dehydrated tomato minestrone soup with dried veggies, beans, and pasta—a cozy, shelf-stable meal ready anytime.


Unlock the Secrets of Food Dehydrating... from Fruit 'n' Veg to Doggie Dinners!




AFFILIATE DISCLOSURE: I am an Affiliate for Amazon, and other sellers of quality merchandise. Should you purchase an item through their links, I may receive compensation. The price you pay does not increase. THANKS for your support! Read full disclosure here.
easy FOOD DEHYDRATING: Making food preservation simple since 2010. I show you how to keep your food pantry full, whatever the reason or season!

HOME ARTICLES CONTACT DMCA DISCLAIMER FAQ PRIVACY SITEMAP TERMS TESTIMONIALS
ALL CONTENT COPYRIGHT © 2010-2025 • ALL RIGHTS RESERVED REGARDLESS OF LINKS OR ATTRIBUTIONS.
POWERED BY SBI! (SOLO BUILD IT!)
As an Amazon Associate, I earn from qualifying purchases.