What We Mean by “Dehydrate”
Here at Easy Food Dehydrating, “dehydrate” always means using an electric food dehydrator — the easy, reliable way to dry food at home.
- Home
- Dehydrating Fruits: Step-by-Step Guides by Type
- How to Dehydrate Pears

How to Dehydrate Pears the Easy Way —
Slice, Dry, Store!

If you’ve ever wondered how to dehydrate pears, you’re in the right place! Drying pears is one of the easiest ways to preserve their natural sweetness so you can enjoy them year-round in snacks, smoothies, or baked goods.
✅ Quick Answer: How do you dehydrate pears?
To dehydrate pears, wash and slice them, pre-treat with lemon juice to prevent browning, then dry in a food dehydrator at 125–135°F for 6–16 hours. Finished pears should be pliable, not sticky, and store best in airtight containers or vacuum-sealed Mason jars or food vacuum sealer bags.
In this guide, I’ll show you exactly how to slice, pre-treat, and dehydrate pears at home, along with tips for ripeness, storage, and the best pear varieties for drying.

Dehydrate pears when they are in season so you and your family can enjoy them all year long in pies and smoothies!
Nutritional Benefits of Pears You’ll Love
VITAMINS: Vitamin A, and Vitamin K, followed by Vitamin C, Folate, and Choline.
MINERALS: Pears rank high in Potassium, followed by Phosphorus, Calcium, Magnesium, and Fluoride.
Pears also contain Omega-6 fatty acids, are a great source of carbohydrates, and contain a good amount of dietary fiber, too!
Creative Ways to Use Dehydrated Pears Beyond Snacking
Dehydrated pears are also tasty as snacks, cookies, fritters, breads, and granola. Also great in fruit rolls! Juicy pears are also 'stars' in my morning smoothies.
Try this in your morning smoothie:
- Wash one whole pear, cut off its top, and slice to remove the center core.
- Add a banana and 1 cup of Silk-brand Light Vanilla Soy milk.
- Put all in the blender—blend until smooth—and enjoy!
Best Tools for Quick and Easy Pear Prep

Begin by Using a Good Sharp Knife by Cutluxe!
Check out this great chef's knife with a full tang that means the handle and blade "are one" so they can't come apart when we're slicin' and a dicin'.
I know these Cutluxe Chef knives may be a little expensive, but they do last pretty much a lifetime when you maintain their cutting edges.
As an Amazon Associate, I earn from qualifying purchases — this does not affect the price you pay. Read full disclosure.
Step-by-Step Guide: How to Dehydrate Pears at Home
Let's get busy learning how to dry pears in a food dehydrator!
If using frozen pears, ignore steps 1 and 2.
- Wash fresh pears, peel if desired, remove the core, and either slice into halves, or quarters or cut into 3/8" slices
- Fresh pears need to be pre-treated, so place the pears in a bowl and spray liberally with lemon juice TIP: Use a pump top from a new unused spray bottle, pick one that fits your lemon juice bottle, and look for one that has a long enough plastic tube that will reach the bottom of your lemon juice bottle.
- If you decided to simply cut your pears into halves or quarters, place them on your food dehydrator trays with the cut-side up to prevent drips on the lower trays!
- Turn on your dehydrator and set the temperature between 125°F and 135°F (or per your food dehydrator's instructions).
💡 Tip: Outside the U.S.? Most dehydrating temps here are listed in Fahrenheit - use our quick converter to see the Celsius equivalent for your machine.
- Drying time for dehydrated pears: between 6-16 hours and they will feel pliable when dried.
- Remember to rotate your food dehydrator trays, for even drying.
How to Tell If Pears Are Ripe and Ready for Drying

TIP: Dehydrate pears or other fruits at peak ripeness.
The usual way to test for ripeness is simply pressing on the fruit's skin—if you leave a slight indentation with your thumb, then the fruit is ripe. Don't go puncturing the skin. If you do, it'll go brown and you may attract those pesky fruit flies and we don't want that to happen!
To speed up the ripening process, put your fruit inside a brown paper bag, like one of those used for lunch bags. If your grocery store still uses those small brown paper bags at the checkout counter, save and use those... we do!
To speed up the process,
leave a piece of fully ripened fruit in the brown paper bag, and the gas
that it emits will help ripen the newly added fruit! Honest!
Enjoy Roquefort Pear Salad!

Enjoy a luscious Roquefort Pear Salad, from Allrecipes.com - Recipe is by Michelle Krzmarzick and she says, "This is the best salad I've ever eaten and I make it all the time. It is tangy from the blue cheese, fruity from the pears, and crunchy from the caramelized pecans. The mustard vinaigrette pulls it all together."
Start dehydrating pears when they are in season so you and your family can enjoy them all year long!
Best Pear Varieties for Dehydrating Success

There are many different types of pears, but the two most common varieties are the Bartlett and the Bosc.
Bartlett pears are also known as Williams' pears. They are round with green skin that turns yellow when ripe.
Bosc pears are long in shape with brown skin and a crispy texture.
Did you spot the Partridge in the pear tree, above?
No? (Just kidding!) Made you look...
Your Pear Dehydrating Questions — Answered!
Do pears need to be peeled before dehydrating?
Do pears need to be peeled before dehydrating?
No — peeling is optional. The skin adds fiber and texture, but some prefer peeling for smoother use in baking or baby food.
Do I need to soak pears in lemon juice before drying?
Do I need to soak pears in lemon juice before drying?
Yes. Pre-treating with lemon juice helps prevent browning and preserves the pears’ natural color. Either dip slices in a bowl of lemon water or spritz them directly using a clean spray bottle.
Can I use frozen pears for dehydrating?
Can I use frozen pears for dehydrating?
Yes! Thaw them first, then skip pre-treating since frozen pears are already softened. Slice and dry as usual.
Can I dehydrate pears in the oven?
Can I dehydrate pears in the oven?
Yes, absolutely! Set your oven to its lowest temperature (130–140°F if possible). Slice pears evenly, place on parchment-lined trays, and prop the oven door open slightly to let moisture escape. Drying takes about 6–8 hours.
How do I know when my dehydrated pears are done?
How do I know when my dehydrated pears are done?
Dehydrated pears should feel pliable but not sticky, like soft leather. If you bend a slice and it cracks, it’s too dry. If it feels tacky, give it more time. Fully dried pears should have no visible moisture when torn in half.
What can you use dehydrated pears for?
What can you use dehydrated pears for?
Enjoy dried pears in a variety of ways:
- Snacking - Dehydrated pears make for a healthy sweet snack on their own. They are high in fiber and antioxidants. Their portable size makes them ideal for taking on-the-go.
- Baking - Chop rehydrated pears to mix into quick breads like muffins, scones, and bars. Or use as an alternative to raisins in cookies, granola and bread pudding.
- Cereals & Porridge - Diced pears lend sweetness and texture mixed into breakfast cereals like oatmeal or chia pudding.
- Salads - Toss chopped rehydrated pears for a nutrition and crunch boost over fresh greens, chicken, grains, or cheese.
- Dessert Toppings - Rehydrate pear slices to use in plates of cakes, waffles or ice cream sundaes. The concentrated flavor makes an excellent topping.
- Blending - Add a few pieces when making smoothies for extra fiber, potassium, vitamin C... and sweetness.
What's the best pear variety for dehydrating?
What's the best pear variety for dehydrating?
Bartlett pears are a popular choice for their sweetness and fast drying time. Bosc pears work well too and hold their shape better when sliced. Avoid overly soft or bruised pears — they dry unevenly and may spoil faster.
How long do dehydrated pears last in storage?
How long do dehydrated pears last in storage?
Properly dried and sealed pears last 6–12 months in a cool, dark pantry. Vacuum sealing with oxygen absorbers can extend shelf life beyond a year.
What’s the best way to rehydrate dried pears?
What’s the best way to rehydrate dried pears?
Soak in warm water or juice for 20–30 minutes, or simmer gently if using in oatmeal, compotes, or baked dishes.
Thanks for visiting my guide on how to dehydrate pears! Now you can enjoy their natural sweetness in snacks, smoothies, and baking all year long.
If you’d like even more tasty ideas, be sure to grab the free 5 Dried Food Recipes You’ll Actually Love PDF below — it includes my favorite recipes like carrot soup, minestrone, split pea, spicy beef jerky, and even banana cinnamon rolls!
Get 5 Dried Food Recipes You'll Actually Love

Here's where you can get your copy of our all new
5 Dried Food Recipes (That Actually Taste Great)
They're my all-time favorite easy dried food meals!
Get it here right now.
For Free!
You Might Like These
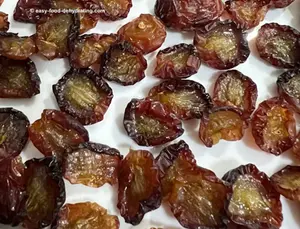
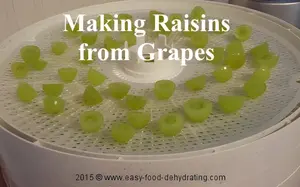
How to Dehydrate Grapes for Nature’s Candy Anytime
Dehydrate grapes to make chewy, sweet bites of nature’s candy AKA raisins! Perfect for snacking or adding to recipes!
How to Dehydrate Apricots: Quick, Easy, Step-by-Step
Learn how to dehydrate apricots: syrup blanch (3–4 min), drying temps and times, storage tips, and doneness checks.
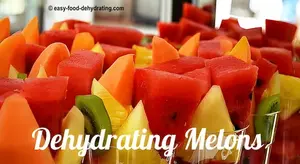
How to Dehydrate Melons for Sweet Snacks & Storage
Learn how to dehydrate melons, including watermelon and honeydew, for sweet snacks and long-term storage!
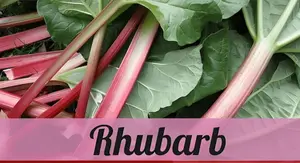
How to Dehydrate Rhubarb: Easy Method + Sauce & Jam
Learn how to dehydrate rhubarb at 125–135°F in 6–14 hours, plus easy rhubarb sauce and jam recipes for year-round use.
How Much Fruit Fills a Dehydrator: Tray Guide & Tips
Find out how much fruit fills a dehydrator with our easy tray guide for Nesco, Excalibur, and Elite Gourmet machines.
How to Dehydrate Citrus: Lemons, Limes, and Oranges
Learn how to dehydrate citrus at home! Simple steps for lemons, limes & oranges—great for storage, snacks, and recipes.


You Might Like These
How to Dehydrate Grapes for Nature’s Candy Anytime
Dehydrate grapes to make chewy, sweet bites of nature’s candy AKA raisins! Perfect for snacking or adding to recipes!
How to Dehydrate Apricots: Quick, Easy, Step-by-Step
Learn how to dehydrate apricots: syrup blanch (3–4 min), drying temps and times, storage tips, and doneness checks.
How to Dehydrate Melons for Sweet Snacks & Storage
Learn how to dehydrate melons, including watermelon and honeydew, for sweet snacks and long-term storage!
How to Dehydrate Rhubarb: Easy Method + Sauce & Jam
Learn how to dehydrate rhubarb at 125–135°F in 6–14 hours, plus easy rhubarb sauce and jam recipes for year-round use.
How Much Fruit Fills a Dehydrator: Tray Guide & Tips
Find out how much fruit fills a dehydrator with our easy tray guide for Nesco, Excalibur, and Elite Gourmet machines.
How to Dehydrate Citrus: Lemons, Limes, and Oranges
Learn how to dehydrate citrus at home! Simple steps for lemons, limes & oranges—great for storage, snacks, and recipes.
Before You Go...
If you enjoyed this page, tap the ❤️ in the lower right-hand corner.
It saves this page to your Grow bookmarks so you can find it again later.
You’ll also see quick share buttons to copy the link, post to Facebook,
or save it straight to Pinterest.
What We Mean by “Dehydrate”
Here at Easy Food Dehydrating, “dehydrate” always means using an electric food dehydrator — the easy, reliable way to dry food at home.
Click the "Save" button (above) to pin
this page’s ideas to your Pinterest board!


LATEST READS on EFD
-
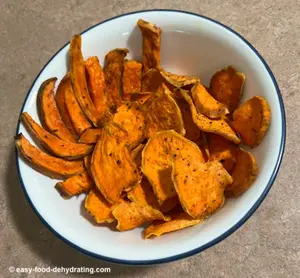
Dehydrated Sweet Potato Treats: Human and Dog Approved
May 12, 26 09:01 AM
 Make these dehydrated sweet potato treats for you AND your dog. Plus dog-safe tips for sharing the love of snacking!
 -
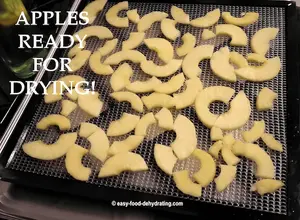
Dehydrate Apples for Snacks and Pantry Storage
May 11, 26 09:07 AM
 Dehydrate apples easily: slice, prevent browning, dry at 125–135°F, and store for snacks, pies, or pantry use.
 -
Green Split Pea Soup Made Easy in the Slow Cooker
Apr 30, 26 09:10 AM
 Easy slow cooker green split pea soup with ham, carrots, and celery—comforting, flavorful, and simple to make.

Unlock the Secrets of Food Dehydrating... from Fruit 'n' Veg to Doggie Dinners!


AFFILIATE DISCLOSURE: I am an Affiliate for Amazon, and other sellers of quality merchandise. Should you purchase an item through their links, I may receive compensation. The price you pay does not increase. THANKS for your support! Read full disclosure here.
easy FOOD DEHYDRATING: Making food preservation simple since 2010. I show you how to keep your food pantry full, whatever the reason or season!

HOME ARTICLES CONTACT DMCA DISCLAIMER FAQ PRIVACY SITEMAP TERMS TESTIMONIALS
ALL CONTENT COPYRIGHT © 2010-2025 • ALL RIGHTS RESERVED REGARDLESS OF LINKS OR ATTRIBUTIONS.
POWERED BY SBI! (SOLO BUILD IT!)
As an Amazon Associate, I earn from qualifying purchases.