
How to Store Dehydrated Food for Maximum Shelf Life

Learning how to store dehydrated food properly protects it from moisture, heat, air, light, insects, and contamination. The food must be thoroughly dry and completely cool before it is packaged in a clean, airtight container.
Your choice of container depends on how soon you plan to use the food. Mason jars work well for foods you open regularly, while moisture-resistant bags and sealed containers offer additional protection for longer storage.
✅ Quick Answer: How do you store dehydrated food?
Cool the food completely, condition it when appropriate, and package it in clean, airtight containers in small quantities. Label each container with the food and date, then store it in a cool, dry, dark location. Check periodically for moisture, mold, insects, unusual odors, or other signs of spoilage.
Most properly packaged home-dehydrated foods retain their best quality for approximately four months to one year. Shelf life varies considerably according to the food, dryness, packaging, storage temperature, and exposure to moisture.
This guide explains how to choose containers, when oxygen absorbers or desiccants may be useful, where to store the finished packages, and how to recognize problems before they ruin an entire batch.

Quick Storage Duration Guide for Dehydrated Foods
| Food Type | General Storage Guidance | Important Notes |
|---|---|---|
| Dried fruits | Up to 1 year at 60°F; approximately 6 months at 80°F | Package airtight and check regularly for moisture |
| Dried vegetables | Approximately 6 months at 60°F; about 3 months at 80°F | Vegetables generally keep about half as long as dried fruits |
| Home-dried jerky | Up to 2 weeks at room temperature | Refrigerate or freeze for longer storage and best quality |
| Fruit leather | Approximately 1 month at room temperature | Freeze tightly wrapped fruit leather for storage up to 1 year |
These storage guidelines are based on recommendations from the National Center for Home Food Preservation’s dried-food storage guidance and its home-dried jerky guidance.
Essential Storage Methods for Dehydrated Food
The best storage method depends on what you dried, how soon you plan to use it, and where it will be kept. Use the guides below to compare containers, sealing supplies, and protective storage options.
Clean Hands and Tools Protect Stored Food
Wash your hands thoroughly with soap and water before handling cooled, dehydrated food or clean storage containers. Make sure your hands, utensils, work surface, and containers are completely clean and dry.
You can also use food-safe disposable gloves to reduce direct hand contact with ready-to-store food. Gloves do not replace proper handwashing, and disposable gloves should never be washed or reused.
Change gloves if they become torn, soiled, or contaminated by touching your face, phone, cabinet handles, faucets, raw food, or another unclean surface. If you have a latex allergy, use food-safe nitrile or vinyl gloves instead.
For more guidance, see the University of Minnesota Extension’s advice on using single-use disposable gloves safely.
Cool and Condition Food Before Storage
Allow dehydrated food to cool completely before packaging it. Warm food can create condensation inside a sealed container, returning moisture to food you worked hard to dry.
Dried fruit should be conditioned before final storage. Pack the cooled fruit loosely in clean glass or plastic containers, seal them, and let them stand for 7 to 10 days. Shake the containers daily to separate the pieces and check for condensation.
If condensation appears, return the fruit to the dehydrator for additional drying. Allow it to cool completely before beginning the check again.
Properly dried vegetables should be brittle or crisp and generally do not require conditioning in the same way fruit does. Package them only after they are fully dry and completely cool.
See my complete guide to conditioning dehydrated food for the step-by-step process.
Oxygen Absorbers: When They Help—and When They Don’t
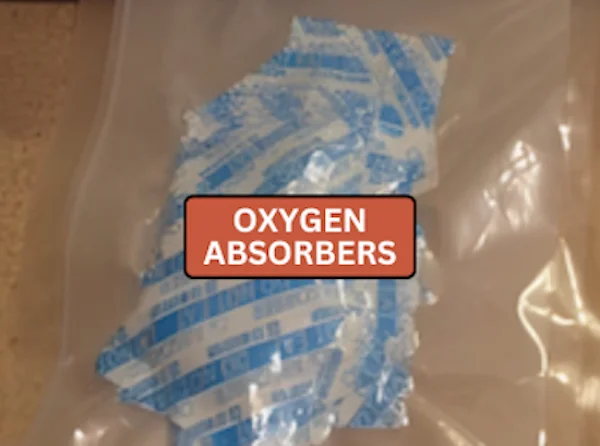
Oxygen absorbers remove oxygen from a sealed container. They can help slow oxidation, protect flavor and color, and control insects in certain properly dried foods.
However, oxygen absorbers are optional—not something every jar or bag automatically needs. They do not remove moisture, sterilize food, or make incompletely dried food safe.
⚠️ Only use oxygen absorbers with food that is thoroughly dried to a suitably low moisture level. Utah State University Extension warns that products packaged with oxygen absorbers should contain approximately 10% moisture or less. Moist food stored in a reduced-oxygen environment can create a botulism risk.
Home-dried fruit may retain approximately 20% moisture, even when properly dried and conditioned. For conservative home storage, package dried fruit in small airtight containers, keep it cool, dry, and dark, and use it within recommended quality timeframes rather than assuming an oxygen absorber will make it suitable for years of storage.
Do not use oxygen absorbers with home-dried jerky, leathery foods, food that feels moist, or any batch whose final dryness is uncertain. Refrigerate or freeze jerky for longer storage.
If you use oxygen absorbers with suitably dry foods:
- Choose an absorber based on the container’s volume and remaining airspace.
- Follow the absorber manufacturer’s directions.
- Add it immediately before sealing the container.
- Reseal unused absorbers promptly in an airtight container.
- Remember that opening the package reintroduces oxygen.
See my guides to using oxygen absorbers for dehydrated food and choosing the correct oxygen-absorber size.
Desiccant Packets: Moisture Control, Not a Drying Fix
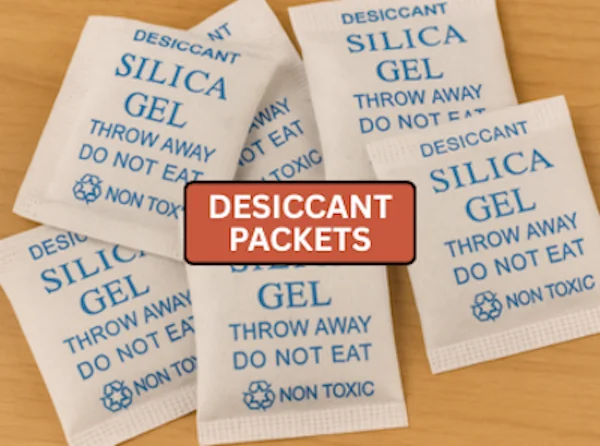
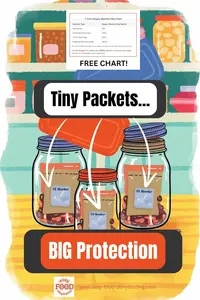
Food-safe desiccant packets absorb small amounts of moisture from the air inside a sealed container. They can be helpful in humid climates—hello, Florida!—and in containers that are opened and resealed regularly.
Desiccants work best as added protection for food that is already thoroughly dry. They cannot safely finish drying an under-dried batch or correct moisture trapped inside pieces of food.
When using desiccants:
- Choose packets labeled food-safe.
- Follow the manufacturer’s sizing directions.
- Add them only after the food has cooled completely.
- Replace them according to the manufacturer’s instructions or after prolonged exposure to humid air.
- Never open the packet or consume its contents.
Do not automatically combine a desiccant with an oxygen absorber unless the manufacturer says the two products are compatible. Some oxygen absorbers require a certain amount of humidity to activate properly.
If you see condensation inside a storage container, remove the food immediately. If there is any mold, unusual odor, discoloration, or other sign of spoilage, discard it. Food that has absorbed moisture but shows no spoilage may be redried, cooled completely, and repackaged.
Read my complete guide to desiccant packets for dehydrated food.
Mylar Bags: A Barrier Against Light, Air, and Moisture
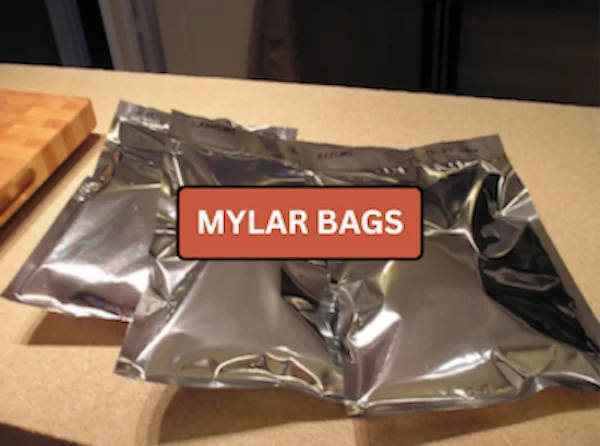
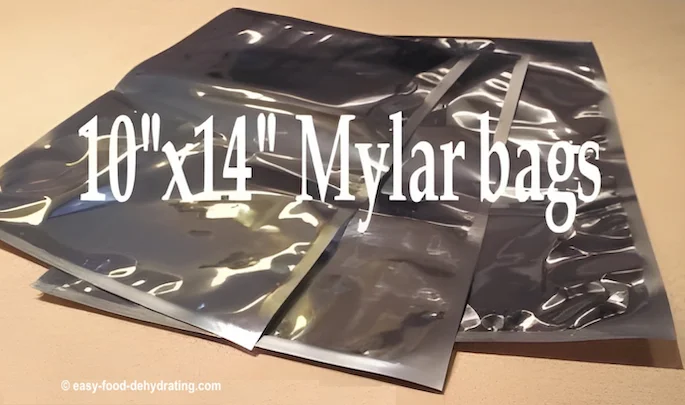
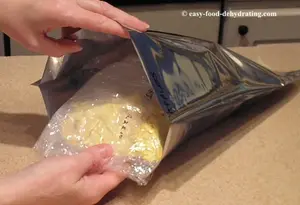
Food-grade Mylar bags provide a strong barrier against light, moisture, and oxygen when they are sealed correctly. They are useful for dry foods that will not need to be inspected or opened frequently.
Mylar can be used as the primary package for suitably dry food or as an optional outer layer around already sealed packages. Placing every vacuum-sealed bag inside another Mylar bag is not required for ordinary home storage.
If packaging food directly in Mylar:
- Make sure the food is thoroughly dry and completely cool.
- Use food-grade bags designed for food storage.
- Fill the bags without contaminating the sealing area.
- Remove as much excess air as practical without crushing the food.
- Heat-seal the bag according to the manufacturer’s directions.
- Check the seal for gaps, wrinkles, or food particles.
- Label the bag with the contents and packaging date.
A zipper closure alone should not be treated as a long-term airtight seal. Use the recommended heat-sealing method for your particular bags.
Only add an oxygen absorber when the food is dry enough for reduced-oxygen storage and the absorber is appropriate for the package size. Mylar bags do not make moist or improperly dried food safe.
One disadvantage of opaque Mylar is that you cannot see condensation or changes inside the package. If you are still monitoring a batch—or expect to use it frequently—a clear Mason jar may be more practical.
For more guidance, see my complete guide to Mylar bags for dehydrated food storage.
Vacuum-Sealer Bags for Dehydrated Food
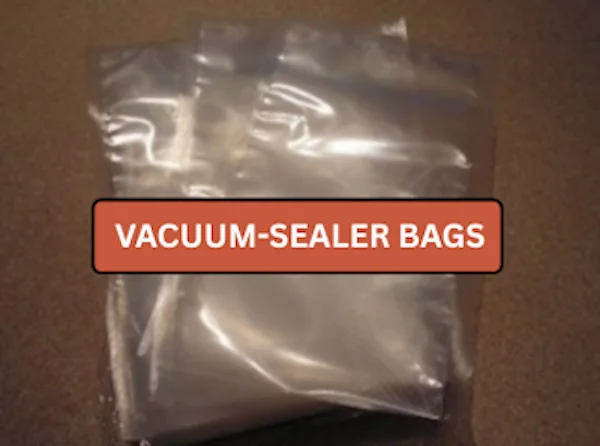
Vacuum-sealer bags remove most of the air surrounding dehydrated food and create a tight seal. They work well for food you plan to use within its normal recommended storage period, particularly when you want to package it in small, convenient portions.
Use food-grade vacuum-sealer bags made for your particular machine. External-suction sealers generally require textured or embossed bags that allow air to travel out through the channels before the bag seals.
For the best results:
- Make sure the food is thoroughly dry and completely cool.
- Package food in amounts you are likely to use at one time.
- Leave enough empty space above the food for a strong seal.
- Keep the inside of the sealing area clean and dry.
- Check the finished seal for wrinkles, gaps, or trapped food.
- Label each package with the contents and date.
- Store clear bags away from light in a cool, dry location.
Vacuum sealing removes air, but it does not sterilize food or make moist food shelf-stable. Do not vacuum-seal a batch if you are uncertain whether it is fully dry.
Sharp dried pieces can puncture bags. Position sharp edges away from the plastic or cushion them with a small piece of food-safe parchment before sealing. Store finished packages where they won’t be crushed or rubbed against one another.
Standard vacuum-sealer bags may slowly allow oxygen and moisture to pass through during extended storage. For ordinary home-dehydrated food, rotate your supply and follow the recommended quality timeframes rather than assuming that vacuum sealing makes food last indefinitely.
See my complete guide to food vacuum-sealer bags.
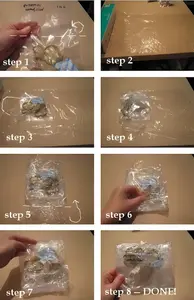
Tip for sharp dried foods: Brittle foods with pointed edges—such as dried carrots—can puncture a vacuum-sealer bag as the material tightens around them. Wrap the food in food-safe plastic wrap before placing it in the bag to provide an extra cushioning layer. After vacuum sealing, inspect the package carefully for tiny holes or a loss of vacuum.
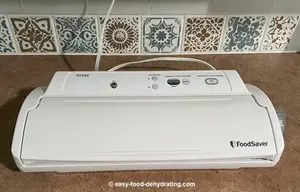
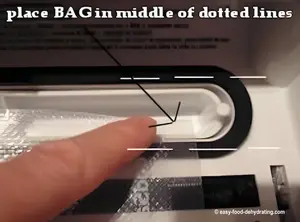
Shown below is the FoodSaver V2240 vacuum sealer I’ve used since 2010. It’s an oldie but a goodie—and proof that choosing the right equipment can pay dividends. If you’re comparing machines, read more about food vacuum sealers here.
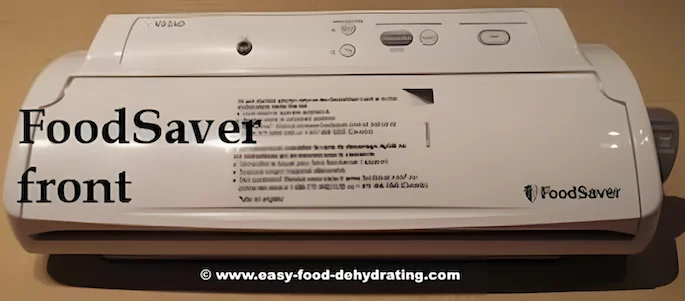
Believe it or not, I didn’t realize that the instructions on the center of the lid peel off—it’s just a reference sticker! It only took me ten years to figure that out… better late than never.
Once dehydrated food is completely dry and cool—and fruit has been properly conditioned when needed—it can be divided into practical portions and vacuum sealed. Label each package with the food and date, check that the seal is secure, and store clear bags away from heat and light.
Important: Vacuum sealing does not make moist food or home-dried jerky shelf-stable. Refrigerate or freeze jerky for longer storage.
Vacuum-Sealer Rolls: Cut Each Bag to the Size You Need
Vacuum-sealer rolls let you create bags that fit the amount and shape of the food you’re storing. Cut the material to the required length, seal one end, add the completely dry and cooled food, and then vacuum seal the open end.
I use Wevac rolls in two widths—8 inches and 11 inches—so I can make smaller bags for everyday portions or longer bags for bulkier foods. Before purchasing any roll, check that its width and textured material are compatible with your vacuum-sealer model.
Leave enough empty material at the open end to create a clean, secure seal. After sealing, inspect both ends for gaps or wrinkles, label the bag with its contents and date, and store it away from heat and light.
I chose this Wevac two-roll package because, when I compared the available options, the second roll cost only about one dollar more than purchasing a single roll. The package includes one 8-inch-wide roll and one 11-inch-wide roll, each measuring 50 feet long.
I also prefer that these rolls do not have a white writing strip. I’ve found that residue from the white strip on some other brands can collect on the vacuum sealer’s rollers and interfere with proper contact. With the Wevac material, I simply write the contents and date directly on the smooth side.
In the video below, I open the Wevac package and explain why I chose the two-roll option.

Mason Jars: Convenient Storage You Can See
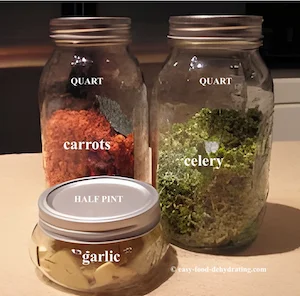
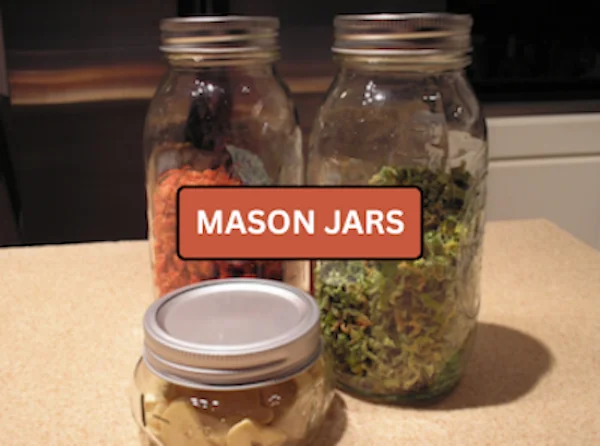
Mason jars work especially well for dehydrated foods you use regularly. They are airtight when fitted with sound lids, easy to label, and let you check the food for condensation, mold, insects, or other changes without opening the container.
Choose a jar that closely matches the quantity of food so there is less air inside, and divide large batches among several smaller jars. Make sure the food is completely dry and cool before filling the clean, dry jars. Label each jar with the contents and storage date, then keep it in a cool, dry, dark cupboard because clear glass does not protect food from light.
An oxygen absorber is optional—not an automatic requirement. Use one only when the food is dry enough for reduced-oxygen storage and follow the absorber manufacturer’s sizing instructions. For foods you open frequently, a secure lid and sensible rotation may be all you need.
You may also vacuum seal compatible Mason jars using a jar attachment. This removes much of the air, but it does not sterilize the food or make moist or improperly dried food shelf-stable.
Read more about using Mason jars for storing dehydrated food.
Choosing a Safe Location for Stored Dehydrated Food
Store dehydrated food in a cool, dry, dark location with a reasonably stable temperature. An interior pantry, cupboard, or climate-controlled closet is generally preferable to a garage, shed, attic, or other space exposed to Florida’s heat and humidity.
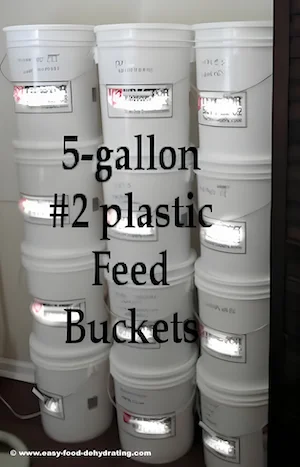
For additional protection from light, insects, and accidental damage, sealed bags or jars may be organized inside clean, lidded food-storage bins. The outer bin is secondary protection; it does not replace properly dried food or airtight primary packaging.
Arrange packages so the oldest food is used first, and avoid stacking anything heavy enough to damage bags or jar lids. Label the outside of each bin and keep it raised off the floor, particularly in areas where leaks, flooding, or pests could become a problem.
Check stored food periodically. Look for:
- Condensation or moisture inside the package
- A broken seal or bag that has lost its vacuum
- Mold, insects, unusual odors, or discoloration
- Cracked jars, damaged lids, or punctured bags
If you find mold or other signs of spoilage, discard the food. Do not taste it to determine whether it is safe.
For an additional layer of organization and physical protection, place sealed Mylar bags or vacuum-sealed packages inside clean plastic lidded bins or food-grade feed buckets with lids. Choose containers with secure, well-fitting lids, label them clearly, and keep them in a cool, dry, climate-controlled location—not in a hot garage or shed.
These outer containers can help protect packages from light, pests, punctures, and accidental damage, but they do not replace airtight primary packaging. If you’re storing organically grown foods, see my Best Organic Dried Foods Long-Term Storage Family Guide for additional considerations.
Dehydrated Food Storage Options at a Glance
No single container is best for every situation. Choose a storage method according to the food, how often you will open it, and how long you expect to keep it.
| Storage option | Best suited for | Advantages | Important reminder |
|---|---|---|---|
| Mason jars | Food used regularly or batches you want to monitor | Reusable, airtight, and easy to inspect | Store clear jars away from light and use smaller jars to reduce repeated air exposure |
| Vacuum-sealer bags | Portioned foods and compact pantry or freezer storage | Remove most air and take up little space | Protect bags from sharp food edges and inspect the seal |
| Mylar bags | Suitably dry foods needing protection from light, air, and moisture | Provide a strong barrier when properly heat-sealed | Use oxygen absorbers only when appropriate for the food and its moisture level |
| Lidded bins or food-grade buckets | Organizing and protecting sealed primary packages | Help guard against light, pests, punctures, and accidental damage | They are secondary protection and do not replace airtight food packaging |
Remember: Every storage method begins with food that is thoroughly dried and completely cool. Label each package with its contents and date, store it in a cool, dry, dark location, and check it periodically for moisture or spoilage.
My Food Storage Wall: How We Built 8 Feet of Pantry Space
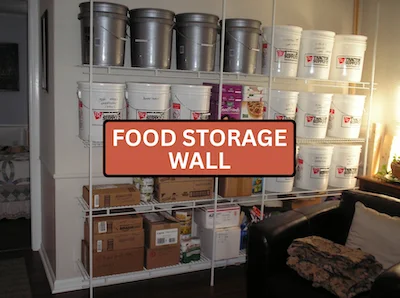
Running short of pantry space inspired us to create an eight-foot span of shelving for organized food storage. See how we built my dehydrated food storage wall and view the finished result in the photo.
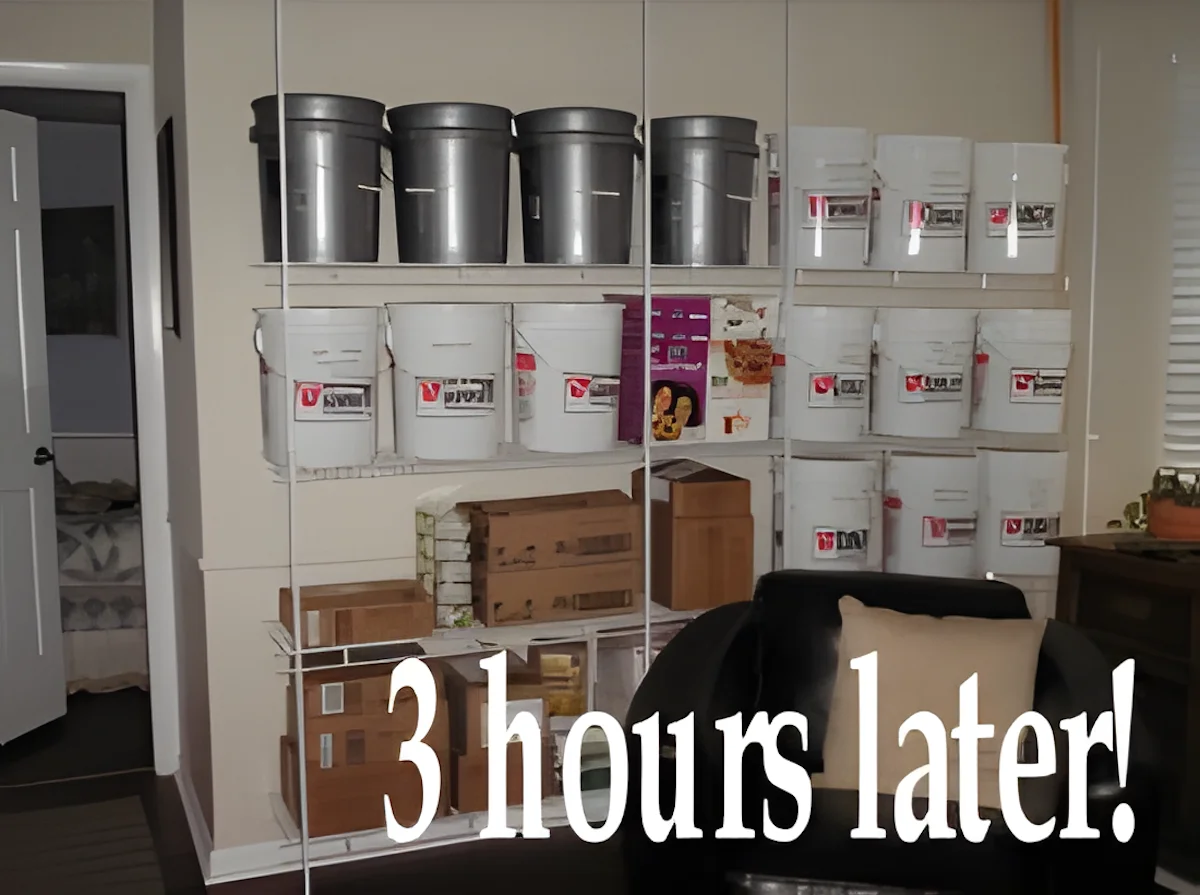
Keep shelving in a cool, dry, indoor location away from direct sunlight, heat-producing appliances, water pipes, and areas vulnerable to leaks. Place heavier containers on lower shelves, avoid overloading the shelving, and arrange packages so the oldest food is used first.
For foods with sharp or brittle edges, see my Plastic Wrap Guide for an optional way to help protect vacuum-sealed bags from punctures.
Other dry pantry staples have different storage requirements. Read how to store salt and sugar and how to store rice and flour in their separate guides.
Your Top Questions About Storing Dehydrated Food
How do you store dehydrated food?
How do you store dehydrated food?
Cool the food completely, condition fruit when appropriate, and place it in clean, airtight containers in small quantities. Label each container with the food and date, then store it in a cool, dry, dark location.
Do you need oxygen absorbers for dehydrated food?
Do you need oxygen absorbers for dehydrated food?
Not always. Oxygen absorbers may help protect suitably dry foods from oxidation, but they do not remove moisture or make improperly dried food safe. Do not use them with jerky, moist or leathery foods, or food of uncertain dryness.
How long does dehydrated food last when vacuum sealed?
How long does dehydrated food last when vacuum sealed?
Vacuum sealing can help preserve quality, but it does not establish one guaranteed shelf life. Most properly dried and packaged home-dehydrated foods retain their best quality for approximately four months to one year, depending on the food and storage conditions. Home-dried jerky should be used within two weeks at room temperature or refrigerated or frozen for longer storage.
What is the best temperature for storing dehydrated food?
What is the best temperature for storing dehydrated food?
Store dehydrated food in the coolest practical indoor location that remains dry and dark. Temperatures around 60°F preserve quality better than warmer conditions, but avoiding heat, humidity, and temperature fluctuations is especially important.
Can Mason jars be used to store dehydrated food?
Can Mason jars be used to store dehydrated food?
Yes. Clean, dry Mason jars with secure lids are particularly convenient for foods you use regularly because you can inspect their contents easily. Keep clear jars in a dark cupboard, and use smaller jars to limit the amount of air and moisture introduced whenever one is opened.
Proper storage begins with thoroughly dried, completely cooled food. Choose an airtight container suited to how you’ll use it, label it with the contents and date, and keep it in a cool, dry, dark location.
Check your stored food periodically for moisture, damaged packaging, insects, mold, or unusual odors. When anything appears questionable, discard it rather than tasting it.
To put your new skills into action, grab the free 5 Dried Food Recipes That Actually Taste Great PDF below—featuring carrot soup, minestrone, split pea soup, spicy beef jerky, and even banana cinnamon rolls.

5 Free Dried Food Recipes
That Actually Taste Great
Put your dried food to delicious use!
Five very different recipes.
Not one dull bite...
5 Free Dried Food Recipes
That Actually Taste Great
Put your dried food to delicious use!
Five very different recipes.
Not one dull bite...
More From Easy Food Dehydrating
How to Use Mylar Bags for Dehydrated Food Storage
Learn how to use Mylar bags for dehydrated food storage, choose bag thickness, heat-seal correctly, and use oxygen absorbers when appropriate.
What Are Food Dehydrators? How They Work & Benefits
Learn what food dehydrators are, how they work, and preserve food naturally—no refrigeration or additives needed.
Food Vacuum Sealers – FoodSaver Models & Sealing Tips
FoodSaver food vacuum sealers, how they preserve food longer, and expert tips for safe, airtight storage.
Plastic Wrap Guide: Stop Food Vacuum-Bag Punctures
Prevent food vacuum-bag punctures: cushion sharp edges on vacuum-sealed packets. Easy steps, quick tools, reuse tips.
Why Oxygen Absorbers for Dehydrated Food are a Must
Keep dehydrated foods fresh longer with oxygen absorbers. Get sizes, tips, and FAQs for safe long-term pantry storage.
Keep Your Food Pantry Full: Why & Exactly How to Do It
Keep your pantry full with simple strategies. Get the free Six Simple Steps email mini-course to dehydrate safely.


More From Easy Food Dehydrating
How to Use Mylar Bags for Dehydrated Food Storage
Learn how to use Mylar bags for dehydrated food storage, choose bag thickness, heat-seal correctly, and use oxygen absorbers when appropriate.
What Are Food Dehydrators? How They Work & Benefits
Learn what food dehydrators are, how they work, and preserve food naturally—no refrigeration or additives needed.
Food Vacuum Sealers – FoodSaver Models & Sealing Tips
FoodSaver food vacuum sealers, how they preserve food longer, and expert tips for safe, airtight storage.
Plastic Wrap Guide: Stop Food Vacuum-Bag Punctures
Prevent food vacuum-bag punctures: cushion sharp edges on vacuum-sealed packets. Easy steps, quick tools, reuse tips.
Why Oxygen Absorbers for Dehydrated Food are a Must
Keep dehydrated foods fresh longer with oxygen absorbers. Get sizes, tips, and FAQs for safe long-term pantry storage.
Keep Your Food Pantry Full: Why & Exactly How to Do It
Keep your pantry full with simple strategies. Get the free Six Simple Steps email mini-course to dehydrate safely.
Before You Go...
If you enjoyed this page, tap the ❤️ in the lower right-hand corner.
It saves this page to your Grow bookmarks so you can find it again later.
You’ll also see quick share buttons to copy the link, post to Facebook,
or save it straight to Pinterest.
What We Mean by “Dehydrate”
Here at Easy Food Dehydrating, “dehydrate” always means using an electric food dehydrator — the easy, reliable way to dry food at home.
What We Mean by “Dehydrate”
Here at Easy Food Dehydrating, “dehydrate” always means using an electric food dehydrator — the easy, reliable way to dry food at home.


📌 Pin It for Later

LATEST READS on EFD


-
How to Make Homemade Dog Food: Chicken & Beef Recipes
Sep 18, 26 01:11 PM
 Meet Chicken Chow-Chow and Bow Wow Beefy Chow, learn how I prepared Minnie’s meals, and discover what to consider before feeding homemade dog food daily.
 -
Spicy Homemade Beef Jerky Recipe: Bold & Tasty Snack
Sep 18, 26 12:52 PM
 Make spicy homemade beef jerky safely with smoky heat, bold flavor, proper heating, dehydrating, doneness, and storage steps.
 -
Food Vacuum Sealer Instructions: FoodSaver V2240 Part 2
Sep 18, 26 10:04 AM
 Follow step-by-step FoodSaver V2240 instructions for placing bags, vacuum sealing, heat-sealing Mylar bags, checking seals, and avoiding common mistakes.

Unlock the Secrets of Food Dehydrating... from Fruit 'n' Veg to Doggie Dinners!




AFFILIATE DISCLOSURE: I am an Affiliate for Amazon, and other sellers of quality merchandise. Should you purchase an item through their links, I may receive compensation. The price you pay does not increase. THANKS for your support! Read full disclosure here.
easy FOOD DEHYDRATING: Making food preservation simple since 2010. I show you how to keep your food pantry full, whatever the reason or season!

HOME ARTICLES CONTACT ADVERTISING DISCLOSURE DISCLAIMER FAQ PRIVACY SITEMAP TERMS TESTIMONIALS
ALL CONTENT COPYRIGHT © 2010-2025 • ALL RIGHTS RESERVED REGARDLESS OF LINKS OR ATTRIBUTIONS.
POWERED BY SBI! (SOLO BUILD IT!)
As an Amazon Associate, I earn from qualifying purchases.