What We Mean by “Dehydrate”
Here at Easy Food Dehydrating, “dehydrate” always means using an electric food dehydrator — the easy, reliable way to dry food at home.
- Home
- How to Store Dehydrated Food for Long-Term Freshness
- Mylar Bags for Dehydrated Food Storage

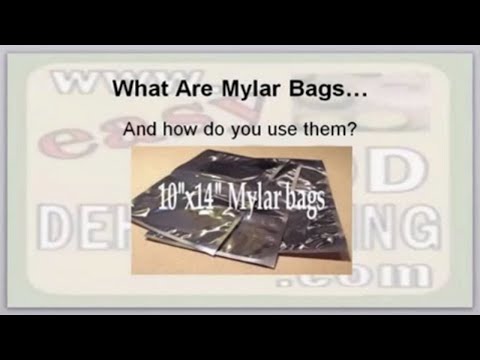
Mylar Bags for Dehydrated Food Storage: Seal for Years!

Looking for the best way to keep your dehydrated foods fresh for years? Mylar bags are the go-to solution for long-term food storage because they block out light, air, and moisture - the three biggest enemies of shelf life.
✅ Quick Answer: What are Mylar bags used for in dehydrated food storage?
Mylar bags are durable, airtight pouches that protect dehydrated food from air, moisture, and light. When sealed with oxygen absorbers, they extend shelf life for 5 to 25 years—making them one of the best options for safe, long-term food storage.
Whether you’re storing crunchy vegetables, homemade jerky, or emergency supplies, Mylar bags add an extra layer of protection you can’t get from regular vacuum-sealer bags alone.
They’re strong, puncture-resistant, and easy to seal with oxygen absorbers, giving you peace of mind that your food will still taste great when you need it most.
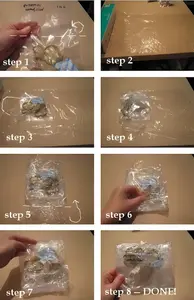
 Putting vacuum-sealed packages inside Mylar bag
In the image above, you see me inserting cling-wrapped vacuum-sealed dried foods into the Mylar bag.
I can get three to four packages in the Mylar bag. I use pint- and quart-sized food vacuum sealer bags and I also make custom-sized bags from rolls.

When your Mylar bags have been filled and sealed, the final step for long-term food storage is inside plastic lidded bins, or buckets. Doing all this is for "serious" food preppers.
How Mylar Bags Stop Spoilage: Air, Moisture & Light Defense
These special bags are made from a polyester film and are very
shiny in appearance. I use them to keep out air, light, moisture, and BUGS!
Mylar bags are very tough and tear-resistant and are ideal for food packaging—they provide an extra layer of protection to our individual food packets.
Where to Find the Best Deals on Mylar Bags

Dry-Packs 1-Gallon ShieldPro Mylar Bags
- 10" x 14" Dry-Packs ShieldPro Mylar Bags
- Includes 60x 300cc Oxygen Absorbers (in packs of 20)

- 10" x 14" Genuine Mylar Bags for Long-Term Food Storage
- Pack of 50
- No oxygen absorbers included
As an Amazon Associate, I earn from qualifying purchases — this does not affect the price you pay. Read full disclosure.
A Quick Look at the Surprising History of Mylar Bags
Mylar is a thin, silvery gray polyester film that was first invented in the 1950s by the DuPont chemical company. Now commonly called Mylar, it paved the way for a versatile new form of durable and flexible plastic sheeting.
Today, Mylar polyester film is manufactured by a number of corporations around the world. It continues to be valued for its unique combination of strength, flexibility, and thinness.
Unlike many plastics, Mylar polyester films can be stretched and flexed without tearing or cracking. Mylar also resists punctures which is good to know. Why? Many dried foods are brittle and have sharp points!
Why Preppers Swear by Mylar Bags for Food Storage
When it comes to storing dried foods, Mylar bags are ideal. They are airtight and moisture-resistant as mentioned above. Keeping your dried foods inside Mylar bags helps keep it fresh and free from mold and other contaminants (bugs!).
I put my filled and sealed Mylar bags inside food storage containers (like lidded bins and buckets), or on a shelf, loose. If you need storage room (and who doesn't?!) check out how to make storage space out of thin air here!
IMPORTANT: Mylar bags offer an extra layer of protection
against the three enemies:
👉 MOISTURE
👉 AIR
👉 LIGHT
If you're looking for a simple and effective way to store your dried foods,
use Mylar bags.
IMPORTANT: Mylar bags offer
an extra layer of protection
against the three enemies:
👉 MOISTURE
👉 AIR
👉 LIGHT
If you're looking for a simple and
effective way to store your
dried foods, use Mylar bags.
Can You Vacuum Seal a Mylar Bag? Here’s Why You Don’t Need To
Mylar bags are smooth, both inside and out, unlike food vacuum-sealer bags.
As stated earlier, the reason you can't vacuum these bags, (or at the very least is hard to do), is that both sides of the Mylar bag are smooth and when clamped closed in the food vacuum-sealer, the air cannot be drawn out. But really there's no need to draw the air out.
We simply use the Mylar bags to store our filled vacuum-sealed bags as extra protection.
Here's the reason for the "textured side" in vacuum-sealer bags:
Food vacuum-sealer bags need to have one inner side textured. You need to have a way for the air to be drawn out when vacuum-sealing your packages that are filled with dehydrated food!
Pro Tip: How to Use Desiccants with Oxygen Absorbers the Right Way
Oxygen absorbers are designed to remove residual oxygen and keep your food fresher for longer. Desiccant packets (like silica gel or food-safe bentonite) are excellent for controlling moisture, especially in humid environments.
⚠️ But here’s the catch: oxygen absorbers need a little humidity to activate properly. If a desiccant is placed too close, it may pull that moisture away before the absorber can do its job.
✔️ Best practice:
- Inside food-storage bags (Mylar or vacuum sealer) → use oxygen absorbers on their own.
- If you want both → put the desiccant at the bottom, add your food, and place the oxygen absorber on top before sealing.
- Or, keep the oxygen absorber inside the food bag, and place the desiccant packet outside in your larger container (like a 5-gallon bucket with lid).
This way, you control both oxygen and moisture without them working against each other.
Understanding Vacuum-Sealer Bags
Look closely at the plastic vacuum bags that the dehydrated food goes into first; you'll notice that one side is smooth and the other side is 'bumpy', for want of a better word.
Vacuum-sealer bags have a bumpy side to enable air removal effectively. Without this texture, air cannot be properly vacuumed out!
Click the images below to view them bigger!


Smart Labeling Tricks to Avoid Confusion Later

When you've filled your 10-inch x 14-inch Mylar bags, use a black felt-tipped pen to describe the contents of the bags.
Write the date on it too!
Keep reading to see the reasonable number of vacuum-sealed packages that can fit inside one of the bags.
Remember to write on the center of the bag, or at the bottom(!) so that the date and its contents won't get cut off at the top when opening, and resealing. Trust me, rewriting bag labels gets old fast—ask me how I know! 😂
Step-by-Step: Packing & Sealing Mylar Bags Without Mistakes
I can get at least three plastic-wrapped vacuum-packed packages into one bag, sometimes four. Do not over-stuff, though.
Overpacking risks punctures—and losing your food stash when you need it most. That's the reason why I plastic-wrap the packages after vacuum sealing.
For a 10-inch by 14-inch Mylar bag, don't forget to add a 300cc oxygen absorber for long-term storage, before sealing. Adding an oxygen absorber before sealing is for when you know you won't be going in the bag for a long time. I also add a 20g desiccant packet in there too.
NOTE: To make sure you're following along—we do NOT vacuum the air out of the Mylar bags when using them for dehydrated food storage. Only use the sealing function on the vacuum-sealer machine; not the air removal function.
The vacuum AND sealing function takes place only when using food vacuum-sealer bags or food vacuum-sealer rolls. We only draw the AIR out of our food vacuum sealer bags that have the oxygen absorber and desiccant packet (if desired) are tucked in before vacuuming it!
I know I keep going on about it, but I want to make sure it sinks in.
Sealed and Safe: Storing Dehydrated Food the Smart Way

Don't forget to check out Amazon for the best prices for Mylar bags—and as you can see in the Amazon ads shown farther up the page, some Mylar bags come complete with a matching number of appropriately sized oxygen absorbers!
Handy Storage Reference Chart for Long-Term Food Safety
This is my proven step-by-step layering method—simple, repeatable, and pantry-safe.
| Layer | Container | What Goes Inside | O₂ Absorber | Desiccant | Seal Method | Notes |
|---|---|---|---|---|---|---|
| Primary | Vacuum-sealer bag | Dry food | 100cc | 5g | Vacuum seal | Wrap in cling film (abrasion guard) |
| Secondary | Mylar bag | 3–4 primary packs | 300cc | 20g | Heat-seal (no vacuum) | Barrier + light block; label contents & date |
| Storage | Pantry/Shelf | Finished Mylar bundles | — | — | — | Cool, dark, dry; rotate oldest first |
Mylar Bag Thickness Guide (Quick Reference)
| Thickness | Best Use | Notes |
|---|---|---|
| 3.5 mil | Short-term storage or inner bag inside bucket | Most flexible; easier to puncture with sharp foods |
| 5 mil | Standard long-term storage for dehydrated foods | Best balance of barrier + durability; heat-seals cleanly |
| 7 mil+ | Heavy-duty use; sharp or frequently handled packs | Maximum puncture/light protection; slightly less flexible |
| Stand-up 4–5 mil | Snacks / daily-use items you open often | Usually has zipper; still heat-seal for longer storage |
Common Mistakes to Avoid When Using Mylar Bags
⚠️ Even seasoned food preservers can slip up with Mylar storage. Here are the most common mistakes I’ve seen - and how to steer clear of them:
- Not letting food fully cool and dry. Warm or slightly moist food creates condensation once sealed. Always let dehydrated foods rest until room temperature and crisp before bagging.
- Using the wrong oxygen absorber size. A tiny absorber won’t remove enough air, while an oversized one wastes money. Match absorber size to the bag volume - for example, 300 cc for quart-size bags and 500 cc for gallon bags.
- Skipping the desiccant in humid climates. If your local humidity runs above 60%, add a desiccant packet outside the inner bag but inside the storage bucket to control moisture.
- Reusing bags without checking for pinholes. It’s fine to reseal good-quality Mylar - just inspect each one under bright light first. A single pinhole ruins your seal.
- Forgetting to label or date your bags. Future-you will thank present-you for noting contents and sealing dates. Permanent markers work best on the dull side of the bag. Write CLOSE to the top so there's plenty of room to re-seal and re-write what's left in the Mylar bag.
👉 Pro Tip: Store sealed Mylar bags in buckets or bins to prevent accidental punctures and light exposure.
Your Top Questions About Mylar Bags Answered
Can I reuse Mylar bags for food storage?
Can I reuse Mylar bags for food storage?
Yes - if the bag isn’t punctured or contaminated, you can trim the seal and reseal it again. Always check for pinholes or odors before reusing.
What thickness of Mylar bag is best for long-term storage?
What thickness of Mylar bag is best for long-term storage?
For most dehydrated foods, 5–7 mil bags provide the best protection against punctures. Thinner bags (3.5 mil) are fine for short-term or less sharp foods.
How do I know what size oxygen absorber to use in Mylar bags?
How do I know what size oxygen absorber to use in Mylar bags?
Match absorber size to bag volume: 300cc for quart-sized bags, 500–800cc for one-gallon bags, and 2000cc+ for 5-gallon bags. This ensures proper oxygen removal.
What are the best Mylar bags for dehydrated food?
What are the best Mylar bags for dehydrated food?
The best Mylar bags for dehydrated foods are 5-mil or thicker, food-grade, heat-seal bags with oxygen absorbers included. Thicker bags (5–7 mil) resist punctures and light better than thinner 3.5 mil ones.
Choose flat gallon-size bags for long-term bulk storage or quart-size stand-up bags for smaller batches like fruit chips.
✅ Tip: Always pair each bag with the correct-size oxygen absorber (300cc for quart-sized Mylar bags) to ensure a full oxygen-free seal.
Can you store dehydrated fruit in Mylar bags?
Can you store dehydrated fruit in Mylar bags?
Yes - Mylar bags are excellent for storing dehydrated fruits, provided the fruit is completely dry (≤ 10% moisture).
Residual moisture can lead to mold, so test for crispness or use a desiccant packet if in doubt. Place the fruit in a clean Mylar bag, add an oxygen absorber, then heat-seal the top.
For best results, store the sealed bags inside a food-grade bucket or tote to protect from rodents and punctures. Properly dried fruit sealed this way can last up to 10 years in a cool, dark place.
How long does food last in Mylar bags?
How long does food last in Mylar bags?
Properly sealed Mylar bags can extend the shelf life of many dry or dehydrated foods for 10 to 30 years, depending on food type and storage conditions.
Low-fat, low-moisture foods like rice, beans, grains, and dehydrated vegetables last longest. Higher-fat items (nuts, granola) have a shorter life span of 3 to 5 years.
Can Mylar bags store non-food items?
Can Mylar bags store non-food items?
Absolutely. Mylar bags are ideal for storing seeds, medicine, and emergency supplies that need to stay dry and protected from light.
Thanks for stopping by to learn more about using Mylar bags for dehydrated food storage. With the right bags, oxygen absorbers, and sealing method, you’ll keep your meals safe for years - whether it’s soups, jerky, or snacks.
And before you go, don’t forget to grab your free 5 Dried Food Recipes You'll Actually Love PDF below. You’ll get carrot soup, minestrone soup, split pea soup, spicy beef jerky, and even banana cinnamon rolls to enjoy with your perfectly stored food!
Get 5 Dried Food Recipes You'll Actually Love

Here's where you can get your copy of our all new
5 Dried Food Recipes (That Actually Taste Great)
They're my all-time favorite easy dried food meals!
Get it here right now.
For Free!
You Might Like These
What Are Food Dehydrators? How They Work & Benefits
Learn what food dehydrators are, how they work, and preserve food naturally—no refrigeration or additives needed.
Food Vacuum Sealers – FoodSaver Models & Sealing Tips
FoodSaver food vacuum sealers, how they preserve food longer, and expert tips for safe, airtight storage.
Plastic Wrap Guide: Stop Vacuum-Bag Punctures
Prevent vacuum-bag punctures: cushion sharp edges on vacuum-sealed packets. Easy steps, quick tools, reuse tips.
How to Store Dehydrated Food for Long-Term Freshness
Keep dehydrated food fresh for years: Vacuum sealing, Mylar bags, oxygen absorbers, desiccant packets plus storage tips.
Why Oxygen Absorbers for Dehydrated Food are a Must
Keep dehydrated foods fresh longer with oxygen absorbers. Get sizes, tips, and FAQs for safe long-term pantry storage.
Keep Your Food Pantry Full: Why & Exactly How to Do It
Keep your pantry full with simple strategies. Get the free Six Simple Steps email mini-course to dehydrate safely.
Before You Go...
If you enjoyed this page, tap the ❤️ in the lower right-hand corner.
It saves this page to your Grow bookmarks so you can find it again later.
You’ll also see quick share buttons to copy the link, post to Facebook,
or save it straight to Pinterest.
What We Mean by “Dehydrate”
Here at Easy Food Dehydrating, “dehydrate” always means using an electric food dehydrator — the easy, reliable way to dry food at home.
Click the "Save" button (above) to pin
this page’s ideas to your Pinterest board!


LATEST READS on EFD
-
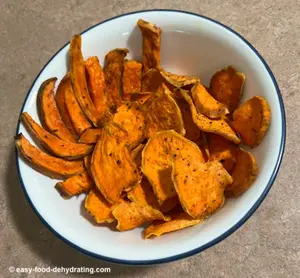
Dehydrated Sweet Potato Treats: Human and Dog Approved
May 12, 26 09:01 AM
 Make these dehydrated sweet potato treats for you AND your dog. Plus dog-safe tips for sharing the love of snacking!
 -
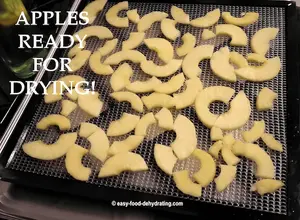
Dehydrate Apples for Snacks and Pantry Storage
May 11, 26 09:07 AM
 Dehydrate apples easily: slice, prevent browning, dry at 125–135°F, and store for snacks, pies, or pantry use.
 -
Green Split Pea Soup Made Easy in the Slow Cooker
Apr 30, 26 09:10 AM
 Easy slow cooker green split pea soup with ham, carrots, and celery—comforting, flavorful, and simple to make.

Unlock the Secrets of Food Dehydrating... from Fruit 'n' Veg to Doggie Dinners!


AFFILIATE DISCLOSURE: I am an Affiliate for Amazon, and other sellers of quality merchandise. Should you purchase an item through their links, I may receive compensation. The price you pay does not increase. THANKS for your support! Read full disclosure here.
easy FOOD DEHYDRATING: Making food preservation simple since 2010. I show you how to keep your food pantry full, whatever the reason or season!

HOME ARTICLES CONTACT DMCA DISCLAIMER FAQ PRIVACY SITEMAP TERMS TESTIMONIALS
ALL CONTENT COPYRIGHT © 2010-2025 • ALL RIGHTS RESERVED REGARDLESS OF LINKS OR ATTRIBUTIONS.
POWERED BY SBI! (SOLO BUILD IT!)
As an Amazon Associate, I earn from qualifying purchases.