whatever the reason or season!
- Home
- How To Dehydrate Vegetables
- How To Dehydrate Beans
How to Dehydrate Beans
Green Beans: Fresh, Frozen, or Canned
How to Dehydrate Beans
Green Beans:
Fresh, Frozen, or Canned

If how to dehydrate beans is top of your dehydrating to-do list, this post tells you what you need to know about dehydrated green beans. I'll fill you in about fresh sliced green beans, or frozen, or precooked canned beans.
I cover how long and at what temperature to use for electric dehydrators and regular ovens to make satisfying dehydrated green bean snacks, plus a green bean casserole recipe from Epicurious to use them in.
So get ready to prepare those green beans and let’s unlock the process for delicious results, whether from fresh, frozen, or canned!
Dehydrated Beans are Great in Soups
Dehydrated beans are fantastic in homemade soups... I love them year-round!
Nothing tastes better than home-grown green beans, though. For ease right now of getting some put away quickly, I use frozen green beans, straight from the bag—no prep necessary!
NOTE: Check out our dehydrated green beans recipe ideas at the foot of the content, thanks!
TOP Frequently Asked Questions:
Can you dry canned green beans?
Can you dry canned green beans?
Yes, you can dry canned green beans - and frozen green beans too. Read further down the page to see how when using canned or FROZEN green beans, we can skip the blanching step because the manufacturers did that step for us! More deets too on dehydrating fresh green beans further down the page.
How long do dehydrated green beans last?
How long do dehydrated green beans last?
When stored properly, i.e. in a food vacuum-sealer bag with an oxygen absorber tucked in, they can last months - and years.
How to dry green beans for seeds?
How to dry green beans for seeds?
Here are the steps to properly dry green bean pods for saving seeds:
1. Allow green bean pods to fully ripen on the vine until they are brown, dry and crispy. Pods should be left on the plant as long as possible to allow bean seeds inside to fully mature.
2. Once bean pods are crisp and brown, pick them off the plant and spread them out on mesh screens or newspaper in a warm, dry indoor area with good air circulation.
3. Allow pods to dry for an additional 1-2 weeks, turning them over halfway through. Proper curing allows moisture levels in the seeds to lower further.
4. Once thoroughly dried, the pods will easily split open when gently flexed. Shake and remove the bean seeds. Discard leftover bean pods.
5. Spread bean seeds in a single layer on screens or baking sheets. Give them 2-3 more weeks of drying time, stirring periodically.
6. Beans meant for storage and replanting should have a maximum moisture content of around 10-15%. Test your batch with a moisture meter if available before storage.
7. Store thoroughly dried green bean seeds in air-tight containers in a cool, dark place. Add some rice grains to absorb excess moisture.
Following these steps captures green bean seeds at peak maturity and low enough moisture for long-term viability. Enjoy your homegrown seed stock!
Is it possible to use home-canned beans?
Is it possible to use home-canned beans?
Yes, just keep in mind that they're more likely to shatter if the beans are firm.
I'm learning how to dehydrate beans and they shattered - is that okay?
I'm learning how to dehydrate beans and they shattered - is that okay?
It's fine depending on how long they were dehydrated and the bean's skin thickness. If your dehydrated (and/or rehydrated) beans are going into soup, they'll be OK.
Can you damage your teeth while eating dried beans?
Can you damage your teeth while eating dried beans?
Admittedly, they are often hard to chew, and they can cause tooth
damage if you're not careful. It's important to soak the dried beans overnight
before cooking - and to cook them until they're soft.
If you have dental concerns, check with your dentist before eating dried beans.
Dehydrated green beans snack?
Dehydrated green beans snack?
Yes, and it's easy! See our How to Dehydrate Beans for Snacks here!
Green Bean Nutrition Info.
VITAMINS: Vitamin A, Choline, and Vitamin C, followed by Folate and Vitamin K. Green Beans rank high in these minerals: Potassium, Calcium, Phosphorus, Fluoride, and Magnesium.
MINERALS: Trace minerals are Iron, Selenium, Zinc, Manganese, and Copper.
There are also Omega-3 and Omega-6 fatty acids in green beans.
Don't forget to check out our Recipes page for an easy-to-make Vegetable Soup and just add chicken to make a tasty Chicken & Vegetable Soup!
Mother's Day Specials!


How About Dehydrating Fresh Green Beans?
Yes, for fresh beans follow our instructions here. The drying process takes between 6 to 8 hours at 125°F to 135°F in your dehydrator.
Canned Beans are the Easiest to Dehydrate When Learning How to Dehydrate Beans... But Why Is That?
Canned beans require no cooking and rehydrate better. Simply drain and dehydrate at 125°F for six to eight hours.
The beans will split open when dried. This helps when you rehydrate them in a meal - so it's not a bad thing IMHO!
Top Methods for Drying Beans:
- Oven drying
- Dehydrating with a dehydrator
Using an Oven to Dehydrate Beans
Oven drying is quicker than the dehydrating method, but it can be less consistent. To oven dry beans, preheat your oven to its lowest setting (dry at 125 °F if your oven lets you set it that low) and then spread the beans out on a baking sheet.
Place the baking sheet in the oven and leave the beans to dehydrate for 12-24 hours, depending on the size and type of bean.
Now you know why I prefer using an electric dehydrator - I can set the exact temperature and be sure it meets and maintains 125°F.
How to Dehydrate Beans in a Dehydrator - Fresh
If using FRESH green beans:
- Gently wash fresh beans. Trim off the ends.
- Blanch in a small amount of boiling water for about 3 to 5 minutes.
- Arrange the green beans on your dehydrator trays, making sure the beans don't overlap.
- Turn on your food dehydrator and set the temperature between 125°F and 135°F (or per your food dehydrator's instructions).
- Drying time: between 6-8 hours.
Blanching helps the beans retain their lovely green color PLUS it helps crack their skins which, in turn, helps the beans to dehydrate more evenly. Otherwise, you risk getting 'case-hardening.'
This occurs when the outside dries too fast, leaving the insides damp. Avoid that at all costs. You don't want to be eating bad beans!
- Green beans will feel tough and brittle when dried.
- Please remember to rotate your dehydrator trays for even drying.
If using canned beans, simply drain and rinse. Place directly on your trays; no need for a solid or non-stick sheet.
Dehydrating Frozen Green Beans

If using FROZEN green beans:
- Arrange the green beans on your dehydrator trays, making sure the beans don't overlap.
- Turn on your food dehydrator and set the temperature between 125°F and 135°F (or per your food dehydrator's instructions). Drying time: between 6-8 hours.
Break Up Clumps of Frozen Green Beans
If your frozen beans are clumping, let them sit in the kitchen sink, unopened, for about an hour. Or you can simply drop the unopened bag on the kitchen countertop a few times to break them apart.
Dehydrating Canned Green Beans
Don't forget you can use canned green beans in a pinch!
Just drain them and dry them on the dehydrator. Check out the canned beans info. below.


Dried Beans vs. Canned Beans

Dried beans that have been prepared at home will not rehydrate as quickly as canned beans. When drying, canned beans split open, but uncooked dry beans rehydrate better.
The most significant reason to dehydrate cooked beans rather than using raw dry beans is the cooking time. This would save time and energy in an off-grid scenario.
Beans frequently break apart when they are dried, but they still taste delicious and offer high amounts of protein and other nutrients to backpacking meals.
Dehydrated Beans - Before and After Dehydrating

Shown above are some fresh string beans and dehydrated string beans.
When dehydrating your own fresh beans, it is important to start with clean, dry beans. Rinse the beans thoroughly and then spread them out on a clean surface to air dry. Once they are dry, you can begin the process of dehydration.
Storing Your Dehydrated Beans
If you're dehydrating beans for shorter-term storage and intend to consume them in a week or two, they may be kept on the counter or in your pantry in sealed containers or zip-top bags.
For mid-range storage (a month or two), simply allow them to cool after dehydrating (this is called conditioning) before sealing them inside an airtight container.
I like using Ziploc bags or Mason jars because they are reusable.
Mason jars are great for three reasons:
- Airtight - remember to add a 100cc oxygen absorber
- Clear glass, so you can see what's inside
- And they look great on your pantry shelves!
Shown below are green beans being vacuum sealed in vacuum sealer bags for long-term storage.
These vacuum-sealed packages will be placed inside mylar bags, and then in airtight bins, or feed-grade buckets.


Vacuum-Seal and Store your Dehydrated Beans
After you've dehydrated your beans, it's time to store them. Whether for long- or short-term storage, you need to use a food vacuum sealer so you can remove the air. I personally love the Foodsaver brand.
A Foodsaver food vacuum-sealing machine draws the air out of the vacuum-sealer bags. Remember to add a 100cc oxygen absorber inside the vacuum-sealer bag, before drawing the air out!
How to Rehydrate Your Beans
Rehydrate your dehydrated beans with clean cold water. Granted, beans can remain a little tough, even after dehydrating them.
Soak the beans in clean cold water for at least four hours, or overnight.
They do make delicious snacks: see Farmgal Val's contribution a little farther down.

Other Dried Beans are Great for Backpacking Meals, Too!
Beans, when dried, such as Great Northern Beans, Red Beans, and Lima Beans are an excellent source of protein and other nutrients, making them a great addition to any backpacking meal.
However, they can be tricky to cook, and they often crack up when dried, as mentioned above.
Despite these challenges, they are a delicious and nutritious option for backpacking meals.
How to Dehydrate Beans for Snacks
Here's how to make a dehydrated green bean snack.
Prepare your beans by following the 'fresh beans' instructions mentioned further up the page. Lightly toss your beans in salt.
OVEN: Place the beans on cookie sheets that are lined with parchment paper and dry in a regular oven on the lowest heat possible... or use a dehydrator! This is another reason why I prefer to use a dehydrator... you know exactly what temperature to use, namely 125°F to 135°F for 6 to 8 hours.
DEHYDRATOR: Place your salted beans on dehydrator trays on top of solid sheets. This will keep the salt from falling down into the lower trays.
Your beans will feel nice and crispy when fully dehydrated. Don't over-dry them for snacking; and watch your teeth.
Dehydrated Green Beans Recipe: Super-Tasty Green Bean Casserole!

OK, when I lived in the UK originally, we didn't eat green bean
casserole. I've no idea if folks over there have caught on to this
delicious dish or not!
After listening to hours and hours of begging and pleading from my hubby to make green bean casserole, I finally gave in. Glad I did!
It's worth learning how to dehydrate beans so you can make this easy green bean casserole recipe from Epicurious ANY time of the year.
Remember to rehydrate your dehydrated beans before adding to the recipe.
NOTE: When using French's fried onions, they have a recipe for green bean casserole on their label.
Arlene Sent this all the Way from Alaska:
Arlene had noticed that a few posters wanted to know how to make the green bean snacks—and some had already tried dehydrating beans to that end without success. So, here's what Arlene told me:
"I have not gotten to the end of the FAQ pages yet, so you may have already covered this. Several posts asked about the green bean snacks that you can buy in the store. I'm pretty sure these are freeze-dried, not dehydrated. That's why they maintain the shape and crispness."
Arlene, I'm so glad you told us this—and "keep warm up there!"
More tips on how to dehydrate beans:
Karen posted this:
Bake the Beans!
"Bake them at 425° for 10-15 mins. Put seasoning on them before you start to bake them. The same as your dehydrator instructions: make sure you do not overlap the beans. I hope this helps."
Thanks, Karen!
And this just in from Farmgal Val:
Crispy Green Beans
"I read where to make the crispy kind of green bean snacks that are so popular, you have to coat them lightly with oil (coconut or olive) toss on your spices, and dehydrate them. Haven't tried it yet."
Thanks, Val!
A Note About Black Beans
I tried to cook black beans once. Never again. Took far too long. I even tried pressure cooking but was too concerned about 'froth' blocking up the pressure cooker valve... so I didn't try it!
Now I use canned black beans all the time and love them in this Black Bean Soup recipe.
Thanks for reading. Share this page with your buddies.
What the flipping 'eck?
Check me out on Flipboard!
RECENT POSTS
-
Beef Stew Made Easy with Dehydrated Vegetables
 Beef Stew Made Easy in your slow cooker while you're away at work! Use dehydrated vegetables to make a delicious evening meal!
 -
Rehydrating Pasta: An Effort To Conserve Water
 Rehydrating Pasta: Let Lori show you how you can conserve water via her thorough "testing."
 -
How To Dehydrate Potatoes: With A How To Slice Them Tip
 How To Dehydrate Potatoes: See our Slicing Tip! After dehydrating, potatoes take up FAR LESS room in the pantry or cellar!


BEST Dehydrators Out There!
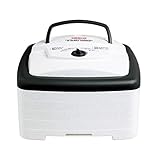
Nesco FD-80A Food + Jerky Dehydrator
Square shaped, perfect for fruit, snacks, and beef jerky making.
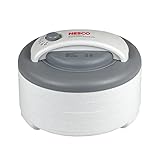
Nesco FD-60 Snackmaster Express Food Dehydrator
Comes with a fruit roll sheet and 2 original-flavor Jerky Spice & Cure packets.
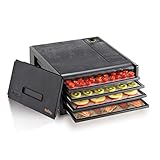
Excalibur 2400 Food Dehydrator, 4-Tray Starter
Square shaped, 4 removable trays, 220 watts drying power.
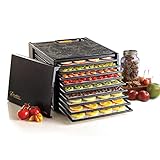
Excalibur 3900B 9-Tray Electric Food Dehydrator
9 removable trays, 600 watts drying power with on/off power switch.
On Sale TODAY! Get your EFD on...


For Mom's Special Day:
 Woman - Gel Mouse Pad")


Hi, I'm Susan Gast, founder of Easy Food Dehydrating. My passion for dehydrating food began in 2010 while seeking crafty uses for an abundance of tomatoes!
I've since devoted myself to elevating the art of removing moisture from fruits, vegetables, meats, and so much more!
JOIN ME as we unlock the magic of food preservation through dehydration together!
Read About Me and see how it all began.
SEARCH this SITE...
To search this site, use the handy dandy search bar at the top of just about every page below the dancing fruit! Happy searching... and finding!
SHARING, Caring, + More!

Share the love from your phone or computer by hitting the "share" icon (see big black arrow above) The share icon is below the "red heart bookmark/save" icon. All are found at the bottom RH corner of the page.
See MORE POSTS!
Need to see MORE POSTS on PCs? Scan the
carousel bar at the tippy top of my pages. Scrolling a little makes it appear by magic!
Want to see suggested posts on your phone? In the lower RH corner you'll see a rounded rectangle recommendation below the SHARE icon (beneath the black arrow in the image above).
Note: The Share feature also has another way to find what you're looking for here on Easy Food Dehydrating. Don't be shy: Share away!

ALL CONTENT COPYRIGHT © 2010-2024
ALL RIGHTS RESERVED REGARDLESS OF
LINKS OR ATTRIBUTIONS.
POWERED BY SBI! (SOLO BUILD IT!)
AFFILIATE DISCLAIMER:
I am an Affiliate for Buzzsprout, Amazon, and other great sellers of merchandise. Should you purchase through their links, I may receive compensation. The price you pay does not increase. THANKS for your support! Read full disclaimer here.


CLICK A BOOK IMAGE TO LEARN MORE
CLICK A BOOK IMAGE BELOW
TO LEARN MORE
|
|
|
|
|
|