- Home
- Easy No-Bake Dried Fruit and Nut Bars Recipe
- Easy No-Bake Dried Fruit and Nut Bars Recipe Video
Easy No-Bake Dried Fruit and Nut Bars
Recipe Video
Howdy folks. Today, I'm making another batch of dried fruit bars, and I purchased these off Amazon silicone molds. And today, I'm gonna not put them in the oven. So here we have twenty-five dates and twenty, sorry, fifteen apricots dehydrated whole - chopped up uniform pieces. So that's twenty-five dates and fifteen apricots.
Howdy folks. Today, I'm making another batch of dried fruit bars, and I purchased these off Amazon silicone molds. And today, I'm gonna not put them in the oven. So here we have twenty-five dates and twenty, sorry, fifteen apricots dehydrated whole - chopped up uniform pieces. So that's twenty-five dates and fifteen apricots.
And here I've got four ounces of assorted nuts... rather than get the chopper out...
Take out some of your frustrations, and do this with a rolling pin.
Whoops. And now I've made a hole in the bag so that goes in my mouth
CLICK to READ the remaining TRANSCRIPT
CLICK to READ the remaining TRANSCRIPT
Then we're gonna mix it with honey.
Let's get that in here.
Throw that away. Mix it all up.
So what I'm gonna do is put them in these silicone molds and just freeze them because last time I showed you that I baked them first to dry them out a bit, I guess, but there's nothing in here that's raw that needs baking.
So that's why I am just thinking I'll put them in the silicone molds and freeze them.
So I'm gonna take this lid off because it took forever squeezing the honey out. Another tip is to heat it up in the microwave, but I don't want to bore you to death waiting for that.
I know that looks like a generous amount of honey - probably is - and like I said in another video, I wish that they had markings down the side showing you how much you've actually used, you know. Maybe I should write to the the Busy Bee Honey Company and suggest it!
It's a twelve ounce bottle. So, you know, you know, half of it's gonna be six. So I've probably used two fluid ounces in this mix so far. That's quite sticky to be quite honest looking at that.
These are ooey ooey gooey gooey good!
Tell you what I'm gonna do, I'm gonna add some dried cranberries. Just a handful... That will add a bit tartness to it. Well, okay. Two handfuls in.
When I cheated, I've got some Great Value cranberries.
There we go. Let's fold these in.
Adds a bit more color to it.
I'm gonna squeeze in just a tad more honey - just a tad - squeeze it
in that, let's get rid of that.
Can't stand sticky bottles, don't know about you. I just cannot stand sticky bottles.
Don't wanna draw in any sugar ants. Oh, those little tiny microscopic ants, you know. If you do ever get 'em, I'll tell you what's good. It's "Terro" ant killer, T E R R O. Works like a charm. Put a blob of the liquid on a piece of paper.
It'll draw the ants to it and then they just disappear.
I kid you not.
Right.
Let's get that out of the way.
Now it's time for me to put this in here.
I think I'll get a spoon - a good old teaspoon - and let's see how I shape doing this, put that in the sink.
... so you can see - oh, yeah.
We'd say "piece of cake," but this is a piece of fruit bar.
Right? The trick is to push it down as well.
My original bars... they're a lot smaller than this, so my serving is gonna be half a bar.
When I've eaten one - when I'm ready to eat them, right?
So I've no idea how much this recipe was gonna fill - don't know how many cavities.
Do you wanna guess with me? I think six.
Looks like we're gonna get eight folks, so I'm not going to complain about that.
So my serving size will be sixteen. Like I said, half one of these will be ample.
I use a an an app called cron-ometer or crono-meter. I don't know how you pronounce it. What I do is put the whole recipe amounts in, then tell it how many servings, and then I know what to add to my count.
Okay. My daily count.
Yeah. I'm really pleased with that.
That has managed to fill
All eight cavities.
Reminds me of teeth!
Not those kinds of cavities right?
So again, I'm really - you can't tell - but I'm really pushing down hard here.
So I'll get them in the corners and it helps them stick together.
Right?
Yum yum yummy. So I'm gonna now put these in the freezer.
I'm not gonna cover it with any cling film or anything, you know, Saran wrap.
I put it on a plate.
That'll help me transport it to the freezer, and I'll come back and do a secondary video showing you how they came out of the mold.
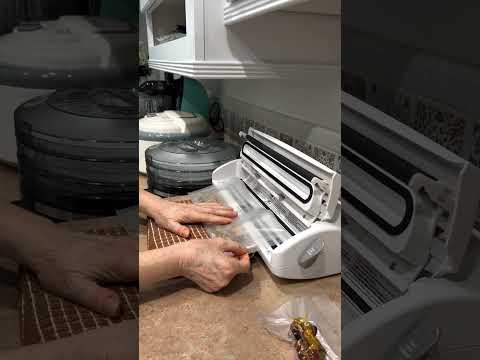
And we're gonna get ready to take the fruit bars out, but before I do that, I want to create bags for them. There were eight bars. Correct? So I'm gonna split them into two because it's just too much for me to eat one full one. So what we're gonna do is get a pint-size bag. I think it's ten by six.
And we're going to cut it in half.
Use the FoodSaver.
Put that on the strip. Okay? ... which is this first sealing strip. Keep your fingers out the way.
The way to do that is to keep your finger close to, so you can hold it, you know.
It's not rocket science, really. Lock it. We're just doing the seal only. Alright. You can see the red button's on and it will go off when it's ready. So what I'm gonna do is make - there you go -
Bags. So that's two bags out of one and you gotta wait twenty seconds between the sealing roughly so's that strip can cool down. Otherwise, it will not allow you to make another one.
So these are ready to go. Let's see if we can do another new one. Put it there and seal.
And, I will do this for the whole bag pile here and I'll come back. Okay?
Okay. These fruit bars have been in the fridge two hours. I'm gonna very carefully push them out.
Wanna get them all out at once because we all know - not exactly things thaw - but they'll warm up too fast.
Oh gosh they look brilliant, don't they?
I will have to remember to take a picture of those.
So this is the no-bake deal, little bit sticky there.
There you go, get your fingers underneath.
Oh, they look good enough to eat, don't they?
So they're still a little bit bendy, but it's okay. They're workable and remember I'm gonna cut them in half anyway.
Very impressed with this silicone mold.
It's a sticky job and don't worry, I always wash my hands. Everything's clean, let's get that in the sink.
So what I've got here are the bags for the FoodSaver, right?
This time I'm gonna be putting the bars in.
I need to cut them in half... Wow. You probably can't see I'm trying to cut it in half here.
I'm showing it here.
I'm gonna put that with it. So now we're gonna vacuum seal this. I am not using an oxygen absorber with them. No need these are gonna be eaten up before we know it. Remember that the edge of the bag goes in the center the vacuum chamber, because now we're not using the seal, we're using the vacuum and seal function. Alright?
There you are, it's doing the seal.
It's set done. Ready to go in the fridge.
Let's put in number two. Now bear in mind, if you want to vacuum seal full bars, go ahead. It's just I'm on a diet and I'm trying to watch the calories and sugar intake, you know, so I don't want to get too much sugars.
But I also enjoy a little bit of dried fruits. So remember we're doing the vacuum AND seal. Let's hope I'm not too - too soon.
It's a sticky job! That's that. Let's get the next one in.
And so on and so forth. Okay.
So these are delicious. On the site, I will use my cronometer to tell you how many calories each bar has for your own reference. So chat later!
Unlock the Secrets of Food Dehydrating... from Fruit 'n' Veg to Doggie Dinners!


AFFILIATE DISCLOSURE: I am an Affiliate for Amazon, and other sellers of quality merchandise. Should you purchase an item through their links, I may receive compensation. The price you pay does not increase. THANKS for your support! Read full disclosure here.
easy FOOD DEHYDRATING: Making food preservation simple since 2010. I show you how to keep your food pantry full, whatever the reason or season!

HOME ARTICLES CONTACT DMCA DISCLAIMER FAQ PRIVACY SITEMAP TERMS TESTIMONIALS
ALL CONTENT COPYRIGHT © 2010-2025 • ALL RIGHTS RESERVED REGARDLESS OF LINKS OR ATTRIBUTIONS.
POWERED BY SBI! (SOLO BUILD IT!)
As an Amazon Associate, I earn from qualifying purchases.